
Trying to install that extension on Visual Studio Code that’s all the rage, but you find that you can’t install the extension or it’s stuck while downloading or installing?
Visual Studio Code is a powerful code editor developed by Microsoft that is widely used by developers worldwide. It’s fast, lightweight, and packed with features that make coding easier and more efficient. Visual Studio Code has everything you need to build, test, and deploy your apps. It supports a wide range of programming languages, has built-in debugging tools, and has a large library of extensions. It becomes pretty obvious why it’s one of the most popular code editors on the market right now.
If you’re a developer, you know how important it is to have the right tools at your disposal. So, as we’ve said, VS Code lets you add extra features to your development environment by letting you install extensions. That’s great and all, but seeing as you’re reading this article, sometimes you may encounter issues when trying to install these extensions.
If you’re having trouble installing Visual Studio Code extensions, don’t worry – you’re not alone. In this how-to guide, we’ll walk you through the 10 fixes to troubleshoot and fix this issue. We’ll cover common causes of installation problems and provide solutions that you can try to get your extensions up and running again. Whether you’re a seasoned developer or just starting, this guide will help you get your extensions working smoothly so you can get back to coding.
To ensure that you are able to install Visual Studio Code extensions as quickly and efficiently as possible, the solutions provided are organized from the most effective and easiest to implement to the more complex. This way, you can be confident that you are starting with the best options for resolving installation issues.
For more help and guidance for troubleshooting Visual Studio Code issues, you can check out our other guides:
- Can’t Open Visual Studio Code? Here Are 9 Fixes!
- How to Fix Visual Studio Code Live Server Not Working, Showing, or Updating?
- How to Fix Visual Studio Code Not Updating or “Update Failed” Error?
- How to Uninstall and Reinstall Visual Studio Code? (Windows, macOS, Linux)
Table of Contents
- Why Can’t I Download or Install An Extension on Visual Studio Code?
- How to Install Extensions in Visual Studio Code?
- 10 Fixes for When You Can’t Download or Install a Visual Studio Code Extension
- 1. Force Close and Restart Visual Studio Code
- 2. Restart Your PC/Device
- 3. Install Extensions on Visual Studio Code Manually
- 4. Configure DNS
- 5. Setup Visual Studio Code for Proxies
- 6. Turn Off VPN
- 7. Reinstall Visual Studio Code
- 8. Check Your Internet Connection
- 9. Check Visual Studio Code’s Server Status
- 10. Report the Problem to the Visual Studio Code Team
Why Can’t I Download or Install An Extension on Visual Studio Code?
After conducting our extensive research on the matter, we’ve identified the main culprits that could be preventing VS Code extensions from installing:
- Your DNS prevents VS Code from connecting to servers
- Your proxy/VPN is misconfigured
- The VS Code installation doesn’t have access to the user’s filesystem
- VS Code Extension servers may be down
How to Install Extensions in Visual Studio Code?
Before we get into the fixes on how to install your desired extensions in VS Code, it’s a good idea to get acquainted with how a successful install is supposed to play out. Installing extensions are typically done with the GUI method, so here’s a quick and easy guide on how to do just that:
Note: on macOS, Windows and Linux, since this is the GUI method, all of them are done identically.
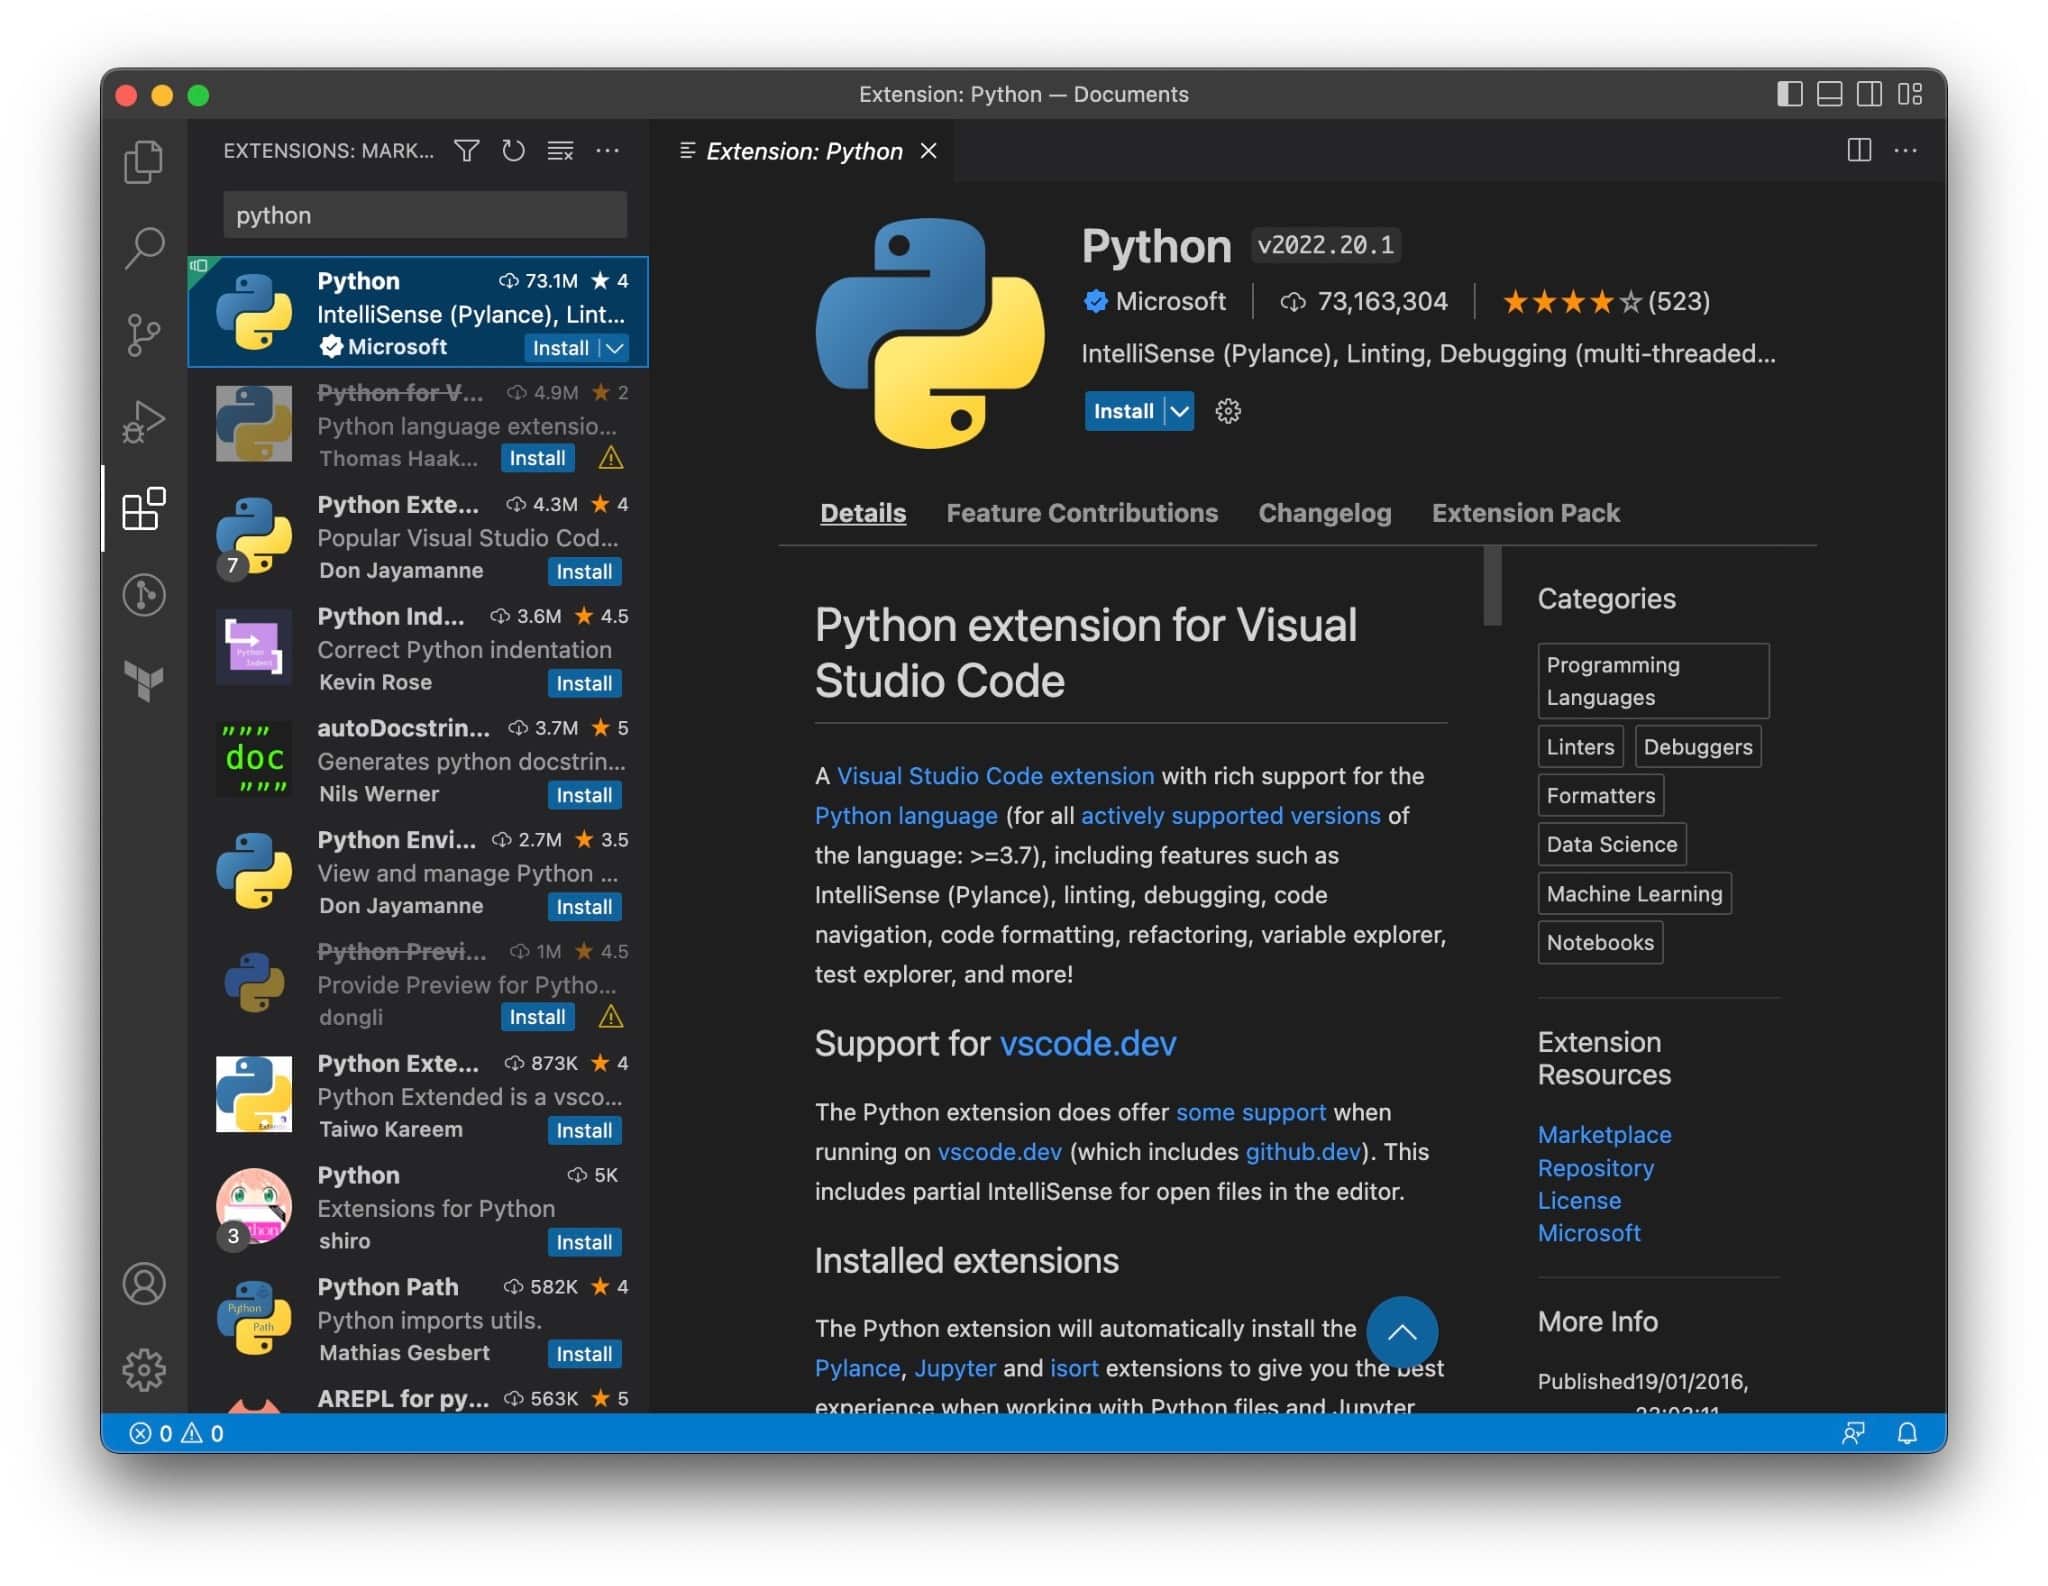
- First, open up the Visual Studio Code application.
- Then, click on the Extensions icon in the Activity Bar on the left. You can also open this by pressing CMD + Shift + X or Ctrl + Shift + X on macOS or Windows/Linux.
- After that, you can search for the extension you want using the search bar at the top.
- The menu will then populate with relevant extensions.
- Next, you can click on your desired extension, and a new tab will open.
- Finally, you can click on the Install button in the extension tab. Alternatively, you can also click the Install button in the extension menu.
With that settled, let’s finally get into the fixes themselves!
10 Fixes for When You Can’t Download or Install a Visual Studio Code Extension
1. Force Close and Restart Visual Studio Code
One potential fix for various problems with apps is to restart the app. This solution is often the first step in troubleshooting guides because it can quickly and easily resolve issues. When you restart the app, all its processes and data are reset. This can help fix problems caused by corrupted RAM data. It also connects the app to the Visual Studio Code servers, which can help make sure the connection stays stable during the download. Restarting the app can be a simple but effective way to resolve many issues.
It’s worth mentioning that it’s important to shut down the app completely for a restart to be effective. Simply closing the app by clicking the X in the window’s top corner may not fully shut it down. This ensures that all of the app’s processes and data are properly closed so that it can start from scratch when you open the app again.
Here’s how to do it on both Windows and macOS:
Windows
- To start, open the Task Manager by pressing Ctrl + Shift + Esc on your keyboard.
- Select the Visual Studio Code app, then click on End task in the bottom-right corner of the Task Manager window.
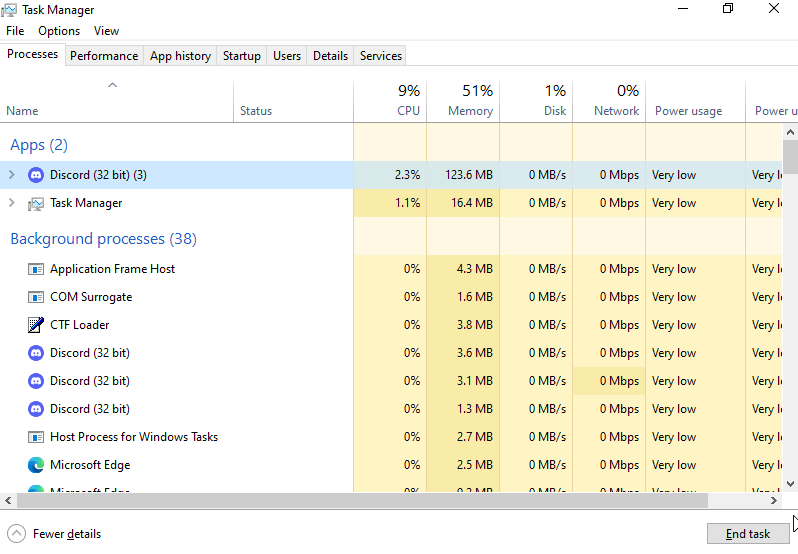
- After that, you can launch Visual Studio Code like you normally would.
macOS
- Start by opening the Force Quit Application menu and holding Command + Option + Esc.
- In the menu, select Code, then click Force Quit.
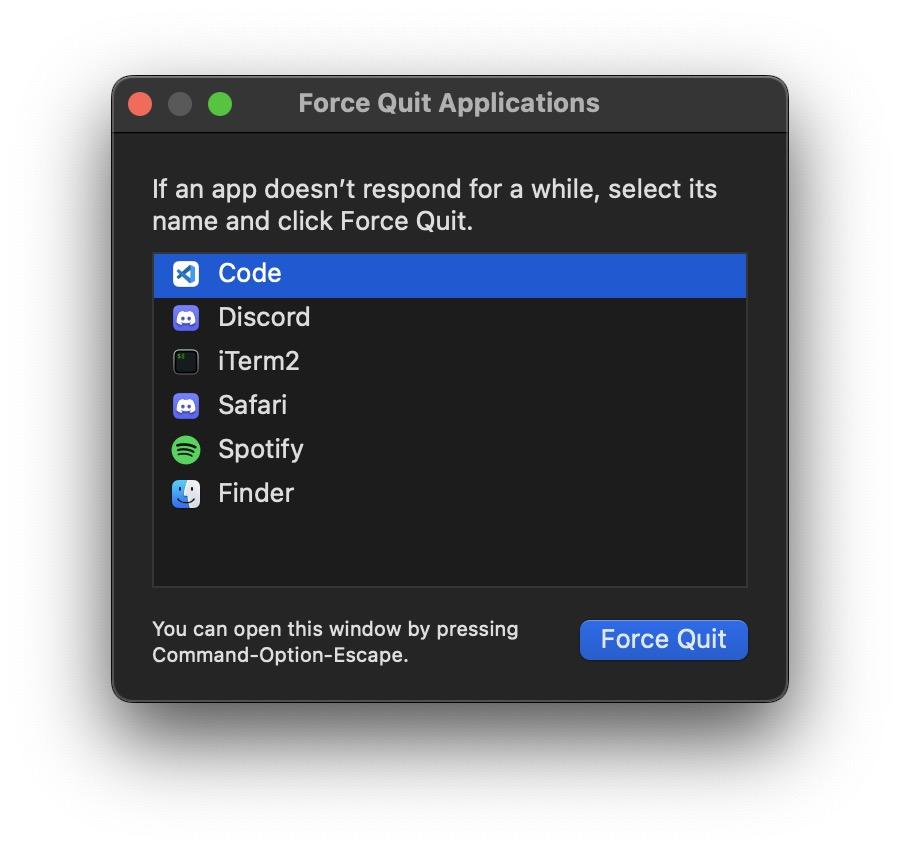
- Finally, open Visual Studio Code back up like you normally would.
Of course, now you would try to install the desired extension through the GUI, like we showed earlier.
2. Restart Your PC/Device
If the previous fix didn’t solve the problem, you may want to try restarting your device. If you restart the device instead of just the app, the whole operating system, all running processes, and the RAM will be reset. This can help resolve problems caused by anomalies that occur when a device is left on for a long time without restarting. Some of these problems may be caused by problems with the App Store, like not being able to install Xcode. If you restart the device, you can start over with a clean slate and fix these problems.
We highly recommend this fix, especially in conjunction with other fixes we’ve listed in this guide. It’s really simple and easy to do, and in our experience, solves the issue more often than not.
3. Install Extensions on Visual Studio Code Manually
So, restarting Visual Studio Code didn’t work? No worries, now we highly recommend you to install the extensions manually, rather than through the GUI like we demonstrated earlier. Doing it this way, of course, bypasses the GUI and as such may avoid any bugs that may have prevented you from successfully installing the extensions. By giving Visual Studio Code the right command to install your extension, you can make sure that the GUI doesn’t become a liability. Also, since the extension will be downloaded separately, we can avoid any network problems that Visual Studio Code might have if we install it manually.
With that being said, there are three ways that we’ll go over this:
- Using Visual Studio Code’s Quick Open prompt to install the extension.
- Issuing a terminal command that directly downloads installs the extension, bypassing the GUI.
- Downloading the extension file itself and issuing a terminal command to install it.
So, we’ve broken down each method into their own steps for your convenience.
3.1 Installation via Visual Code Studio Commands
The Visual Studio Code app will still download and install the extension for this approach. So, the only difference is that we’ll start the installation process through Visual Studio Code’s Quick Open prompt, so that the GUI doesn’t get in the way.
To do this, you’ll need to find out the extension’s and publisher’s names. The extension and publisher names should be specified in the format: `publisher.extension`. For example, if you want to install the Visual Studio IntelliCode extension, you would need to know that its publisher name is `VisualStudioExptTeam` and its extension name is `vscodeintellicode`.
With that being said, here’s how to do the installation via the Quick Open prompt:
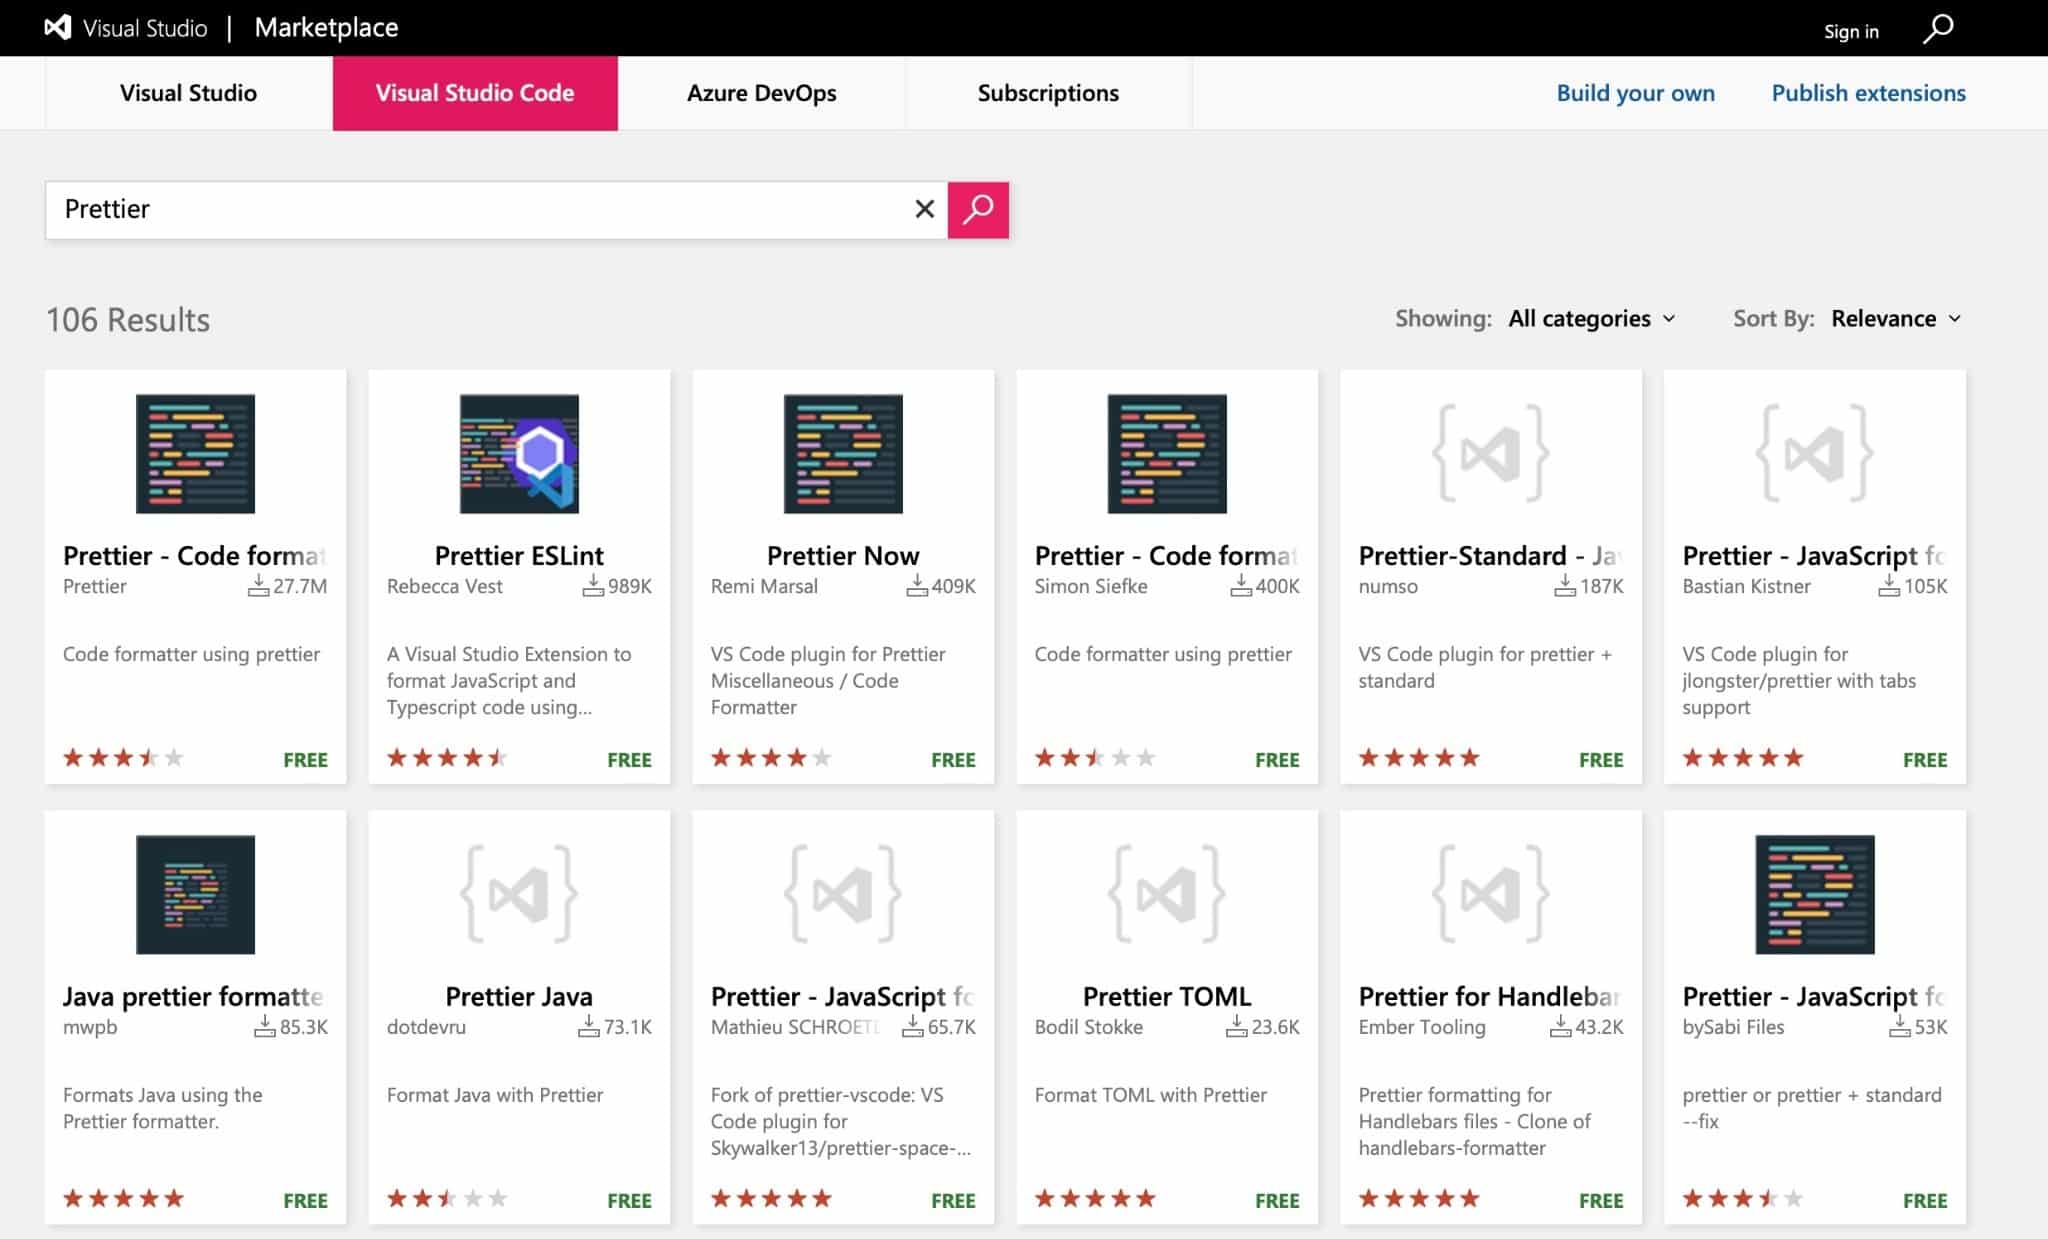
- To start, open up your browser of choice and navigate to the Visual Studio Code Marketplace
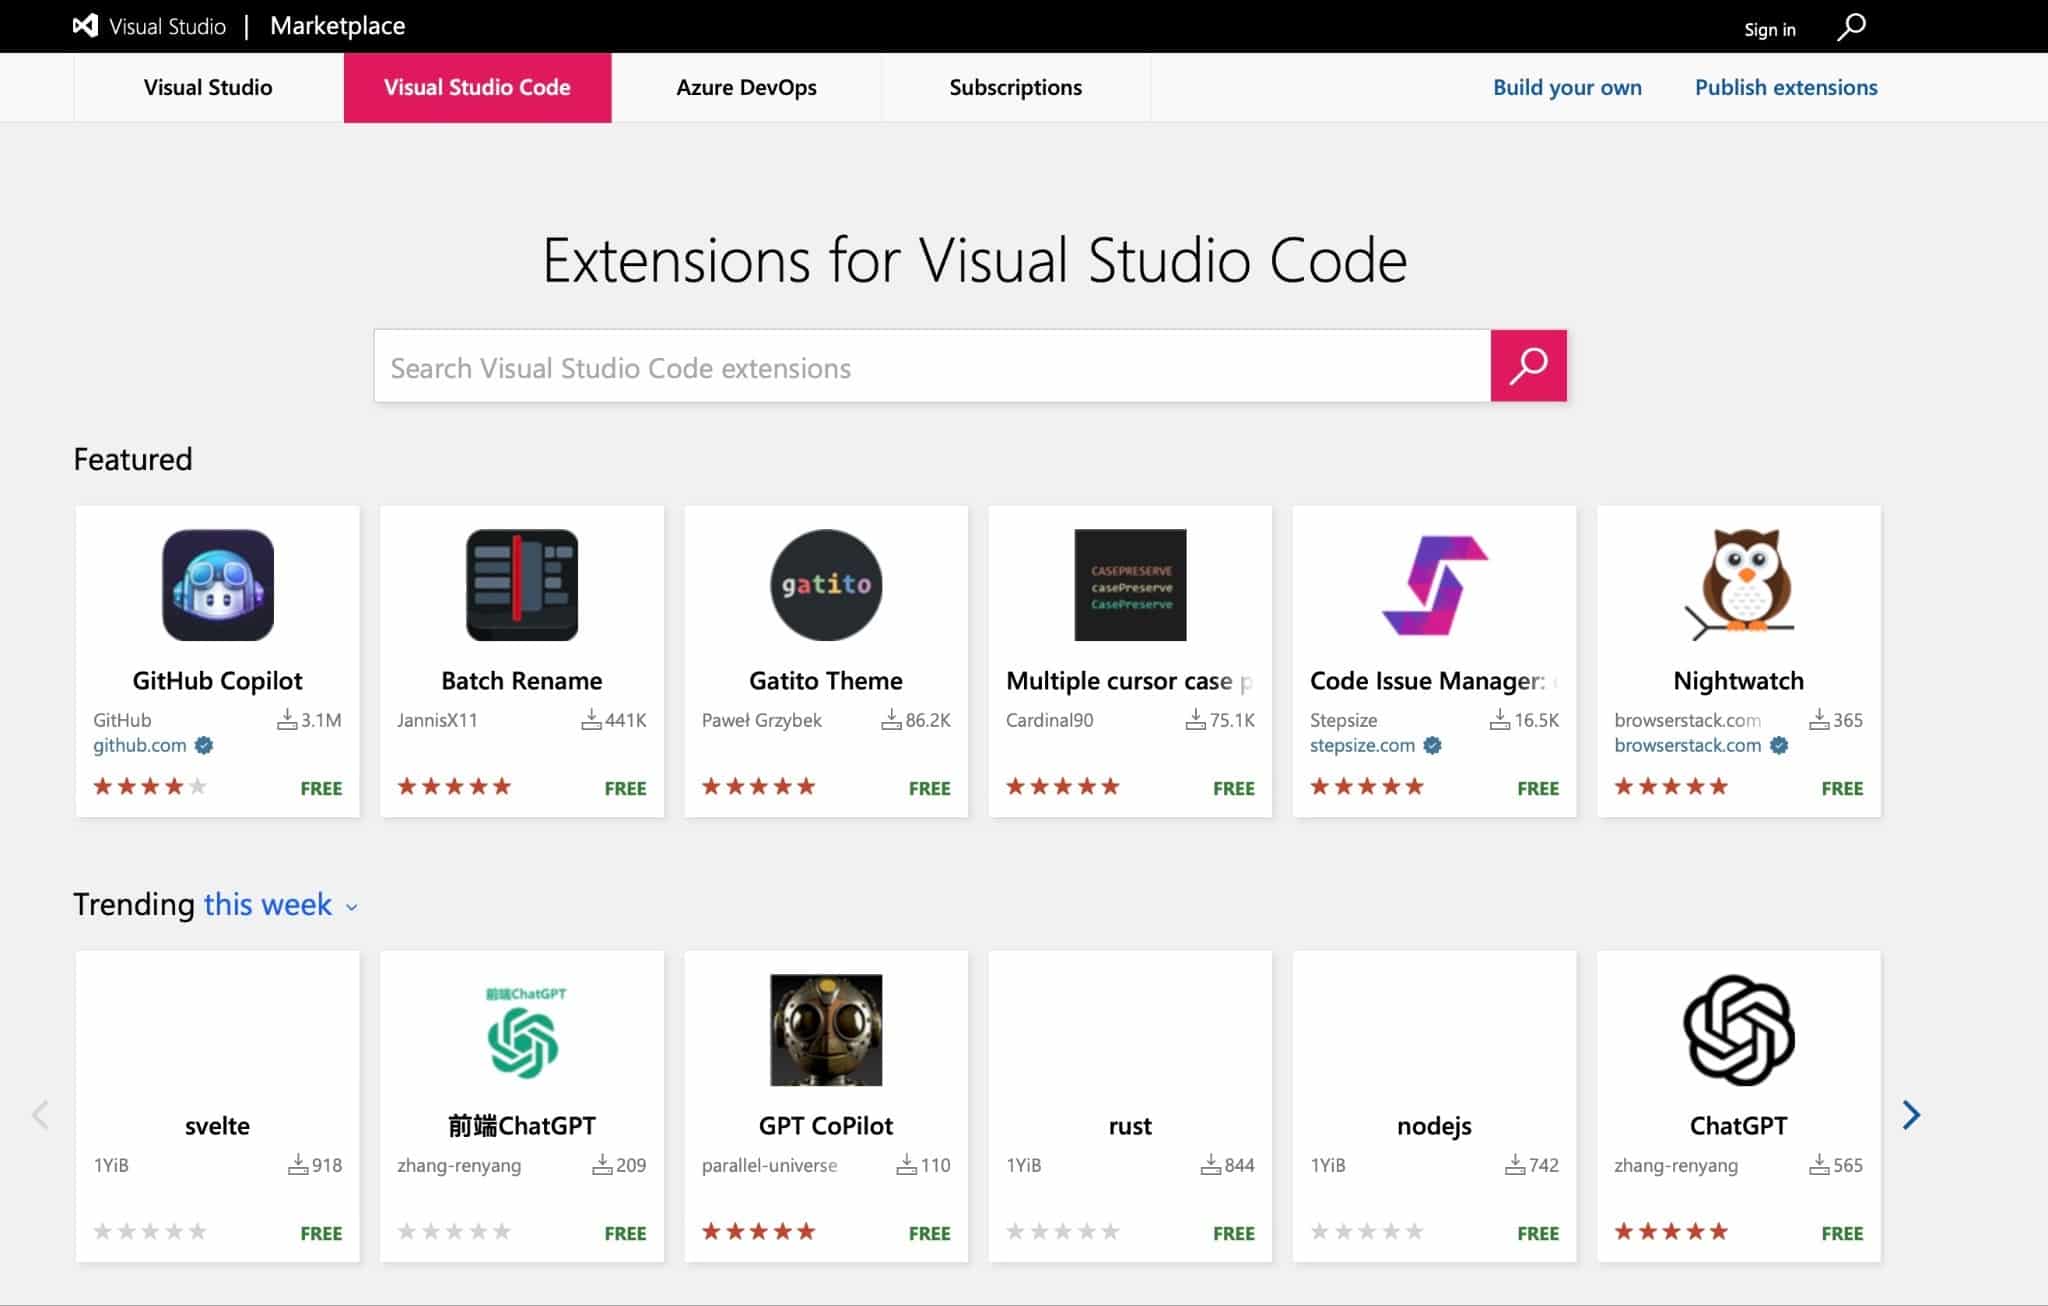
- Then, search for your desired extension with the search bar at the top. We’ll use Prettier for this example.
- You’ll be presented with a list of extensions that match your search criteria. Simply click on the one that you want to install.
- Next, the extension’s page will open up. Here, you’ll need to focus on the information on the right side of the page and look for the More info section. This is where the extension’s unique identifier resides. Copy this information to your clipboard

- Then, open up Visual Studio Code.
- Open up the Quick Command prompt by either pressing CMD + P or Ctrl + P on your keyboard, whether you’re using macOS or Windows, respectively.
- In the prompt, issue the following command and hit enter:
ext install <uniqueIdentifier here>
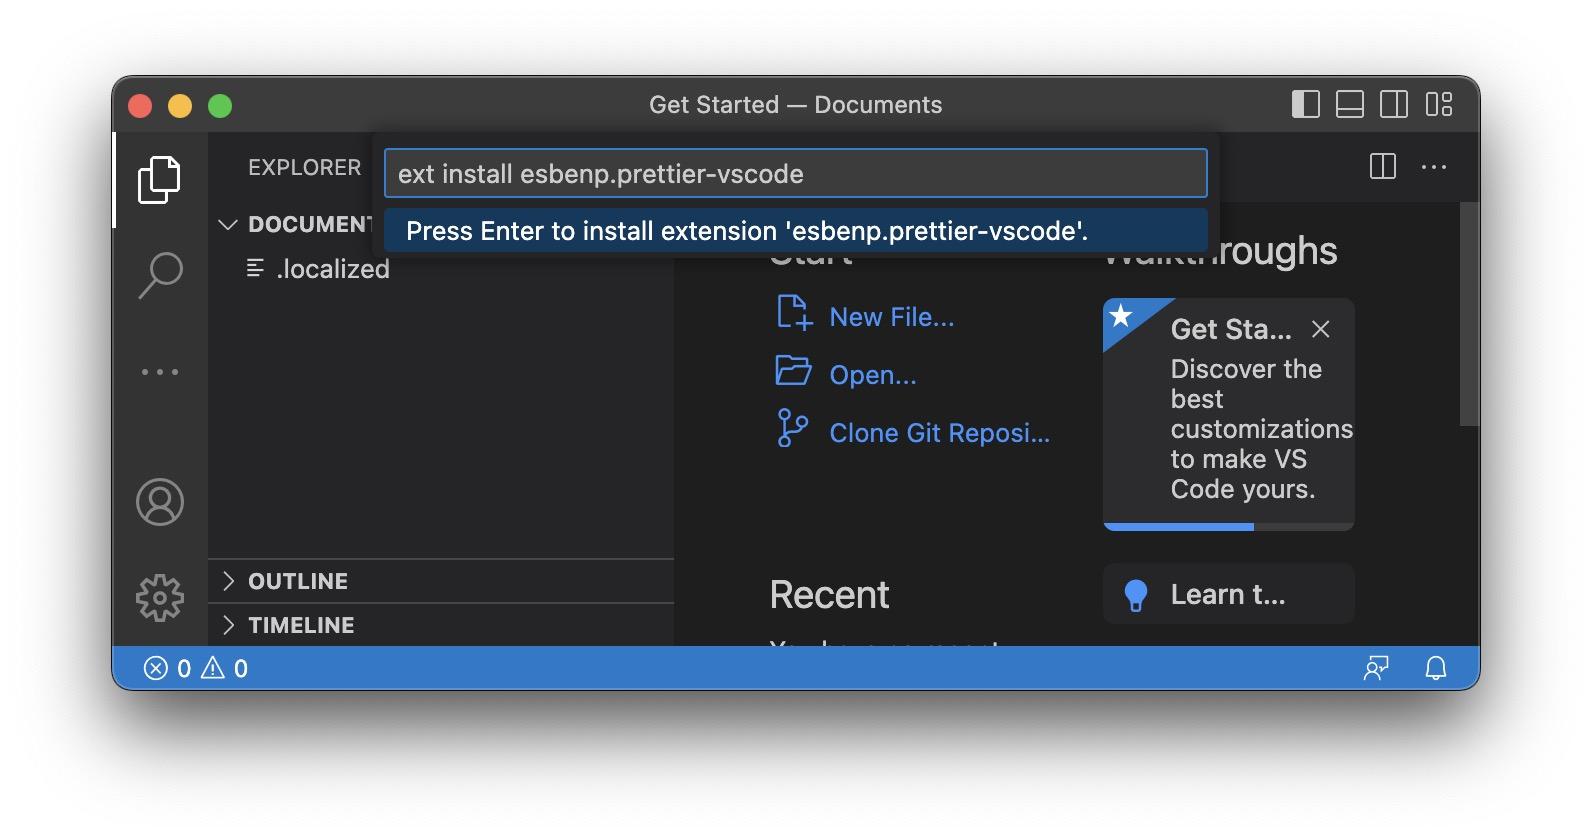
- Once it’s done installing, you should see the extension in your Extensions tab.
2.2 Installation via Terminal
For this approach, the Visual Studio Code app itself will still download and install the extension. So, the only difference is that we’ll start the installation process through Visual Studio Code’s Quick Open prompt, so that the GUI doesn’t get in the way.
To do this, you’ll need to find out the extension’s and publisher’s names. The extension and publisher names should be specified in the format: `publisher.extension`. For example, if you want to install the Visual Studio IntelliCode extension, you would need to know that its publisher name is `VisualStudioExptTeam` and its extension name is `vscodeintellicode`.
With that being said, here’s how to do the installation via the Terminal:
- First, follow the steps from 1 to 4 in 2.1
- Then, open up your Terminal or Command Prompt whether you’re on macOS or Windows respectively.
- After that, issue the following command to your terminal:
code --install-extension <uniqueIdentifier here>
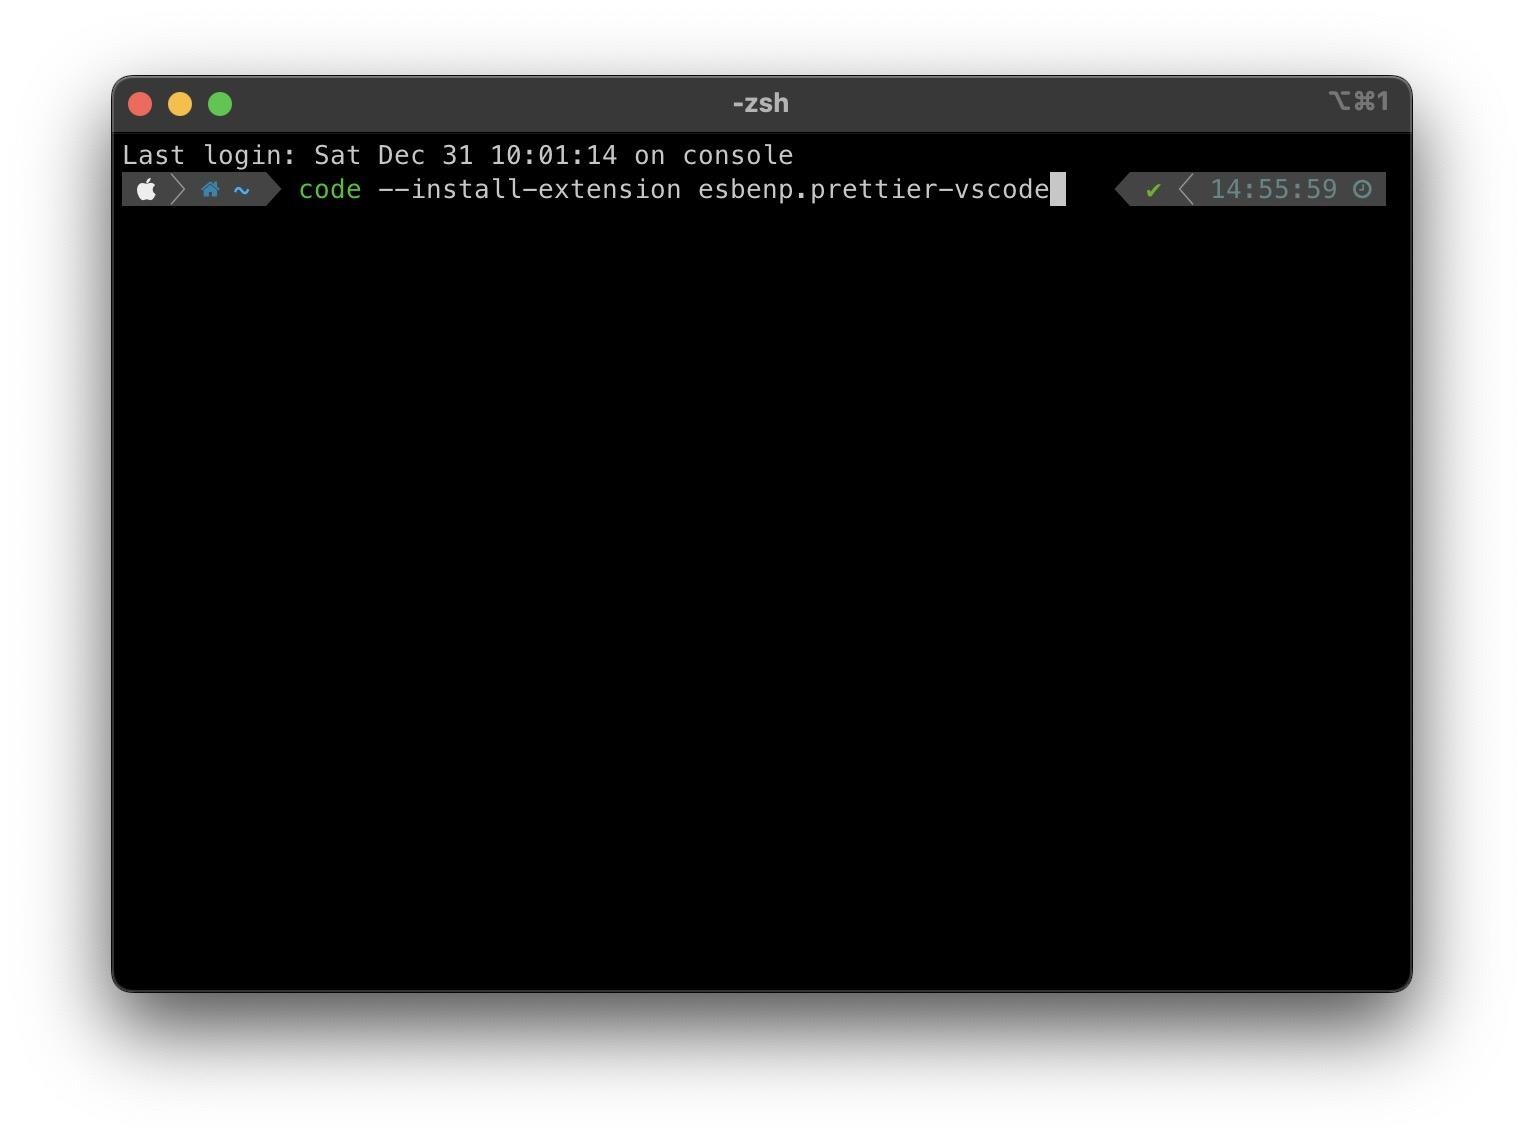
- Finally, we advise you to restart your Visual Studio Code app. You can follow the fix in Step 1.
2.3 Extension Download
So for this method, we’ll download the extension file through your browser, separate from the Visual Studio Code app. Then, we can tell Visual Studio Code to install said extension file.
Here’s how:
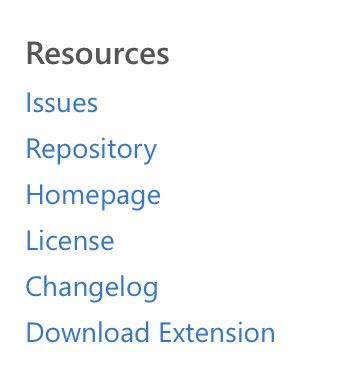
- First, follow steps 1 to 3 for method 2.1 to go to your desired extension page.
- Then, in the extension’s page, you’ll need to focus on the information on the right side and look for the Resources section. This is where you can click download the extension file itself, instead of installing it. Click on the Download Extension link.
- Next, open up the Visual Studio Code app.
- Then, go to the Extensions tab.
- Click on the Kebab icon at the top of the extensions list.
- After that, in the drop-down menu, select the Install from VSIX… option.
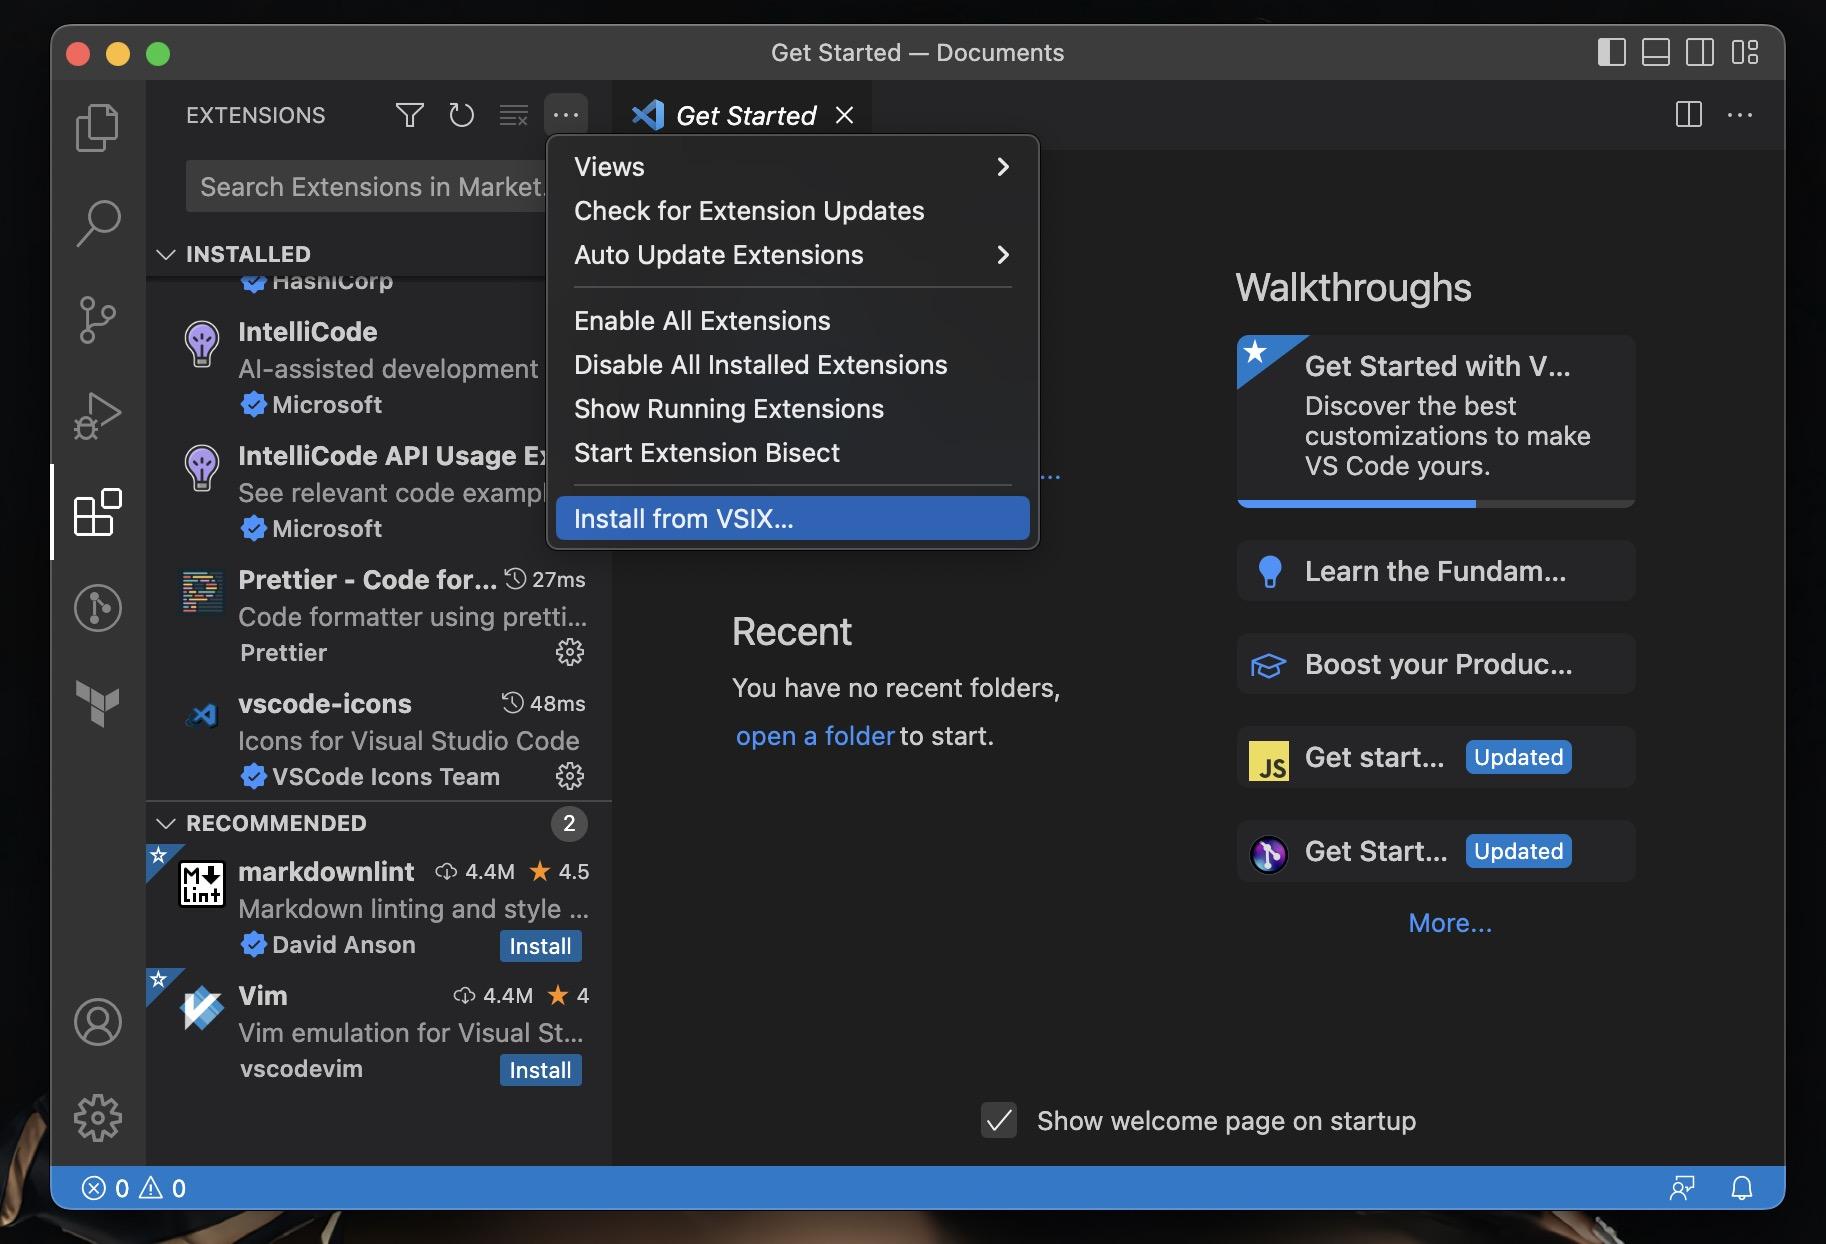
- Finally, your OS’s native file explorer will open. In here, simply select and install the downloaded .vsix file to install the extension.
- Alternatively, if you’d like to use the Terminal to install the .vsix file, you can run the following command:
`code path/to/<filename>.vsix`
4. Configure DNS
Another possible reason Visual Studio Code can’t install your extension successfully is because of your computer’s Domain Name Server (DNS) setting. As you might already know, this is because the DNS acts as a sort of dictionary that tells your device what the Marketplace’s IP address is through a human-readable domain name. If there are issues with your DNS settings, it can cause problems when you try to access online resources, including the VS Code Marketplace, where you can download and install extensions. If you change your DNS settings, your computer will be able to connect more reliably to the Marketplace and other online resources.
We highly recommend setting your DNS to either Google’s or Cloudflare’s, so here are their primary and alternate addresses:
Cloudflare | ||
|---|---|---|
Primary Address | 8.8.8.8 | 1.1.1.1 |
Alternate Address | 8.8.4.4 | 1.0.0.1 |
With that being said, here’s how to change the DNS on Windows and macOS:
Windows
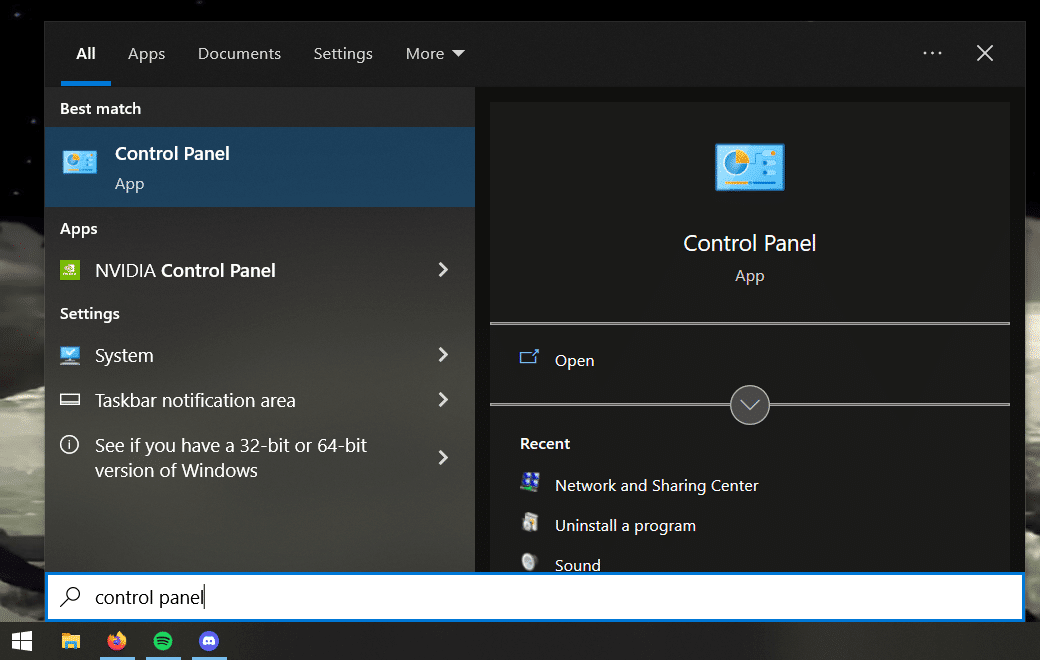
- First, open the Windows Search menu. You can do this by pressing Win + S on your keyboard.
- Then, search for Control Panel and click on the option shown in the screenshot.
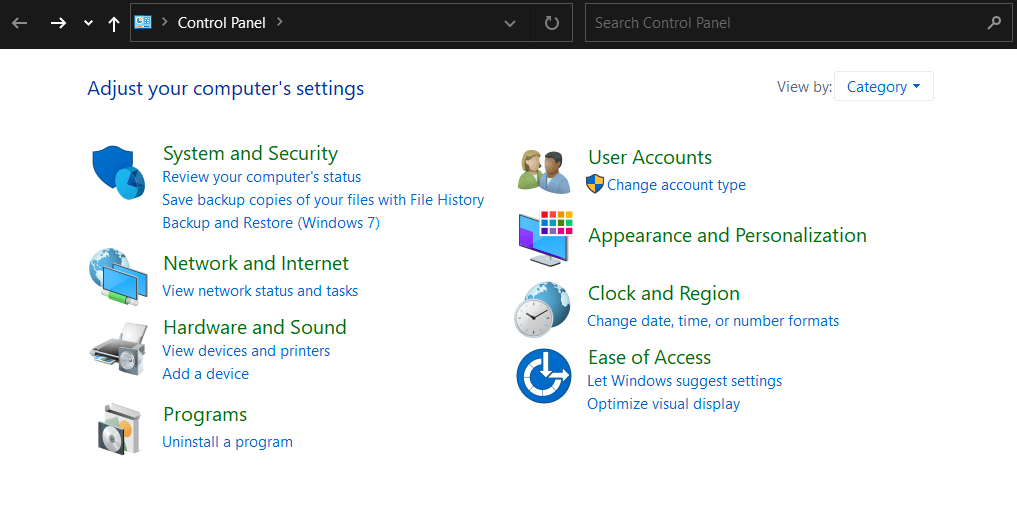
- In the newly opened Control Panel window, click on Network and Internet.
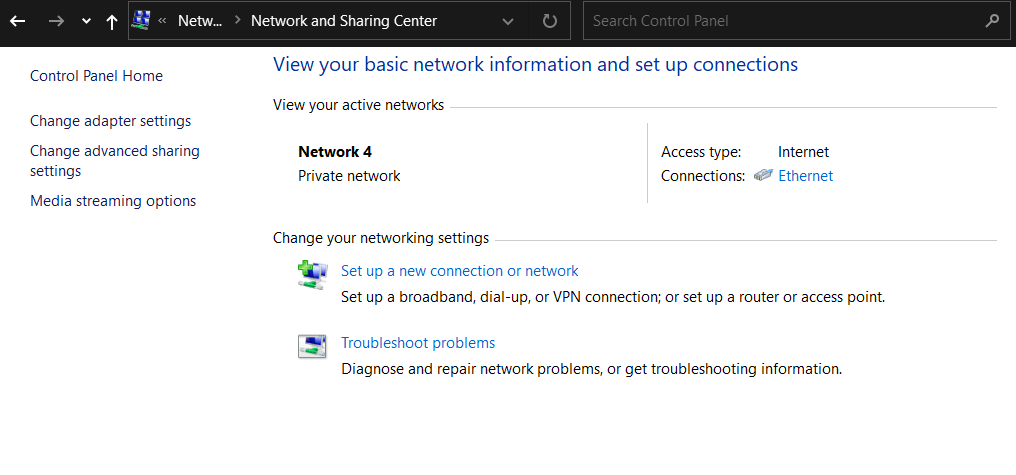
- After that, select Network and Sharing Center
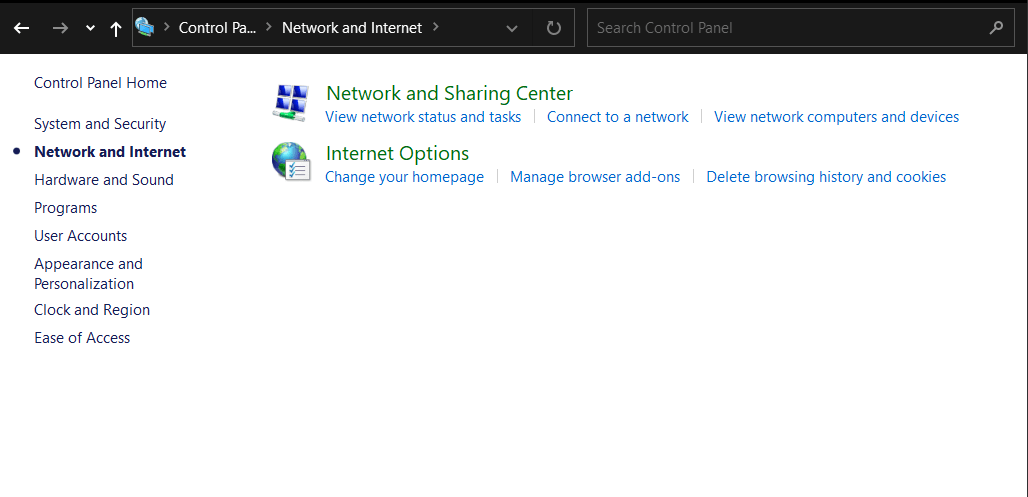
- Then, in the left side pane, select Change adapter settings
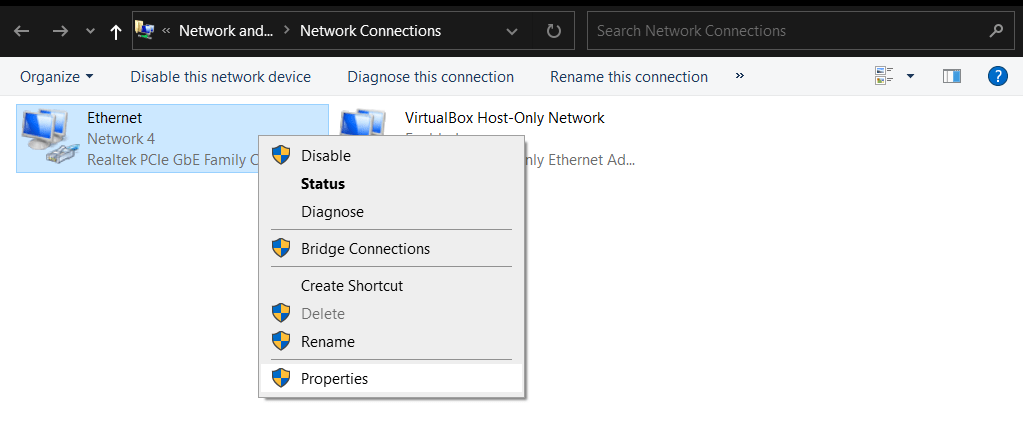
- In the newly opened window, right-click on the network adapter you use and then select the Properties option in the menu.
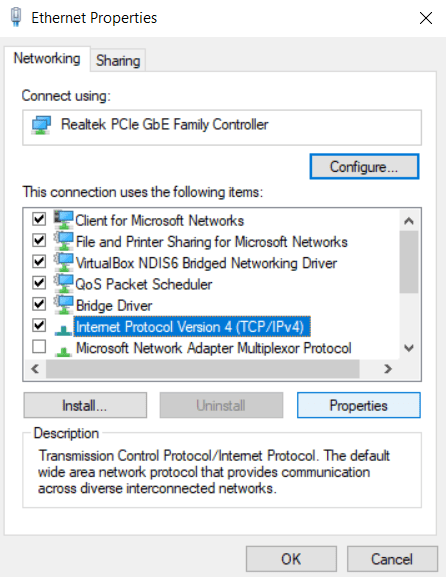
- Yet another window will open where you must select the Internet Protocol Version 4 (TCP/IPv4) option and then click on the Properties button.
- Then, in the next window, select the Use the following DNS server addresses: radio button.
- Now you can fill out the DNS servers of your choice using the table we provided earlier.
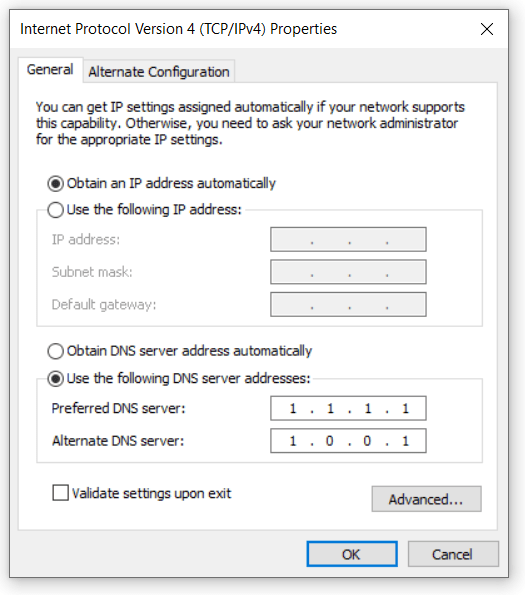
- Finally, click on the OK button when done.
macOS
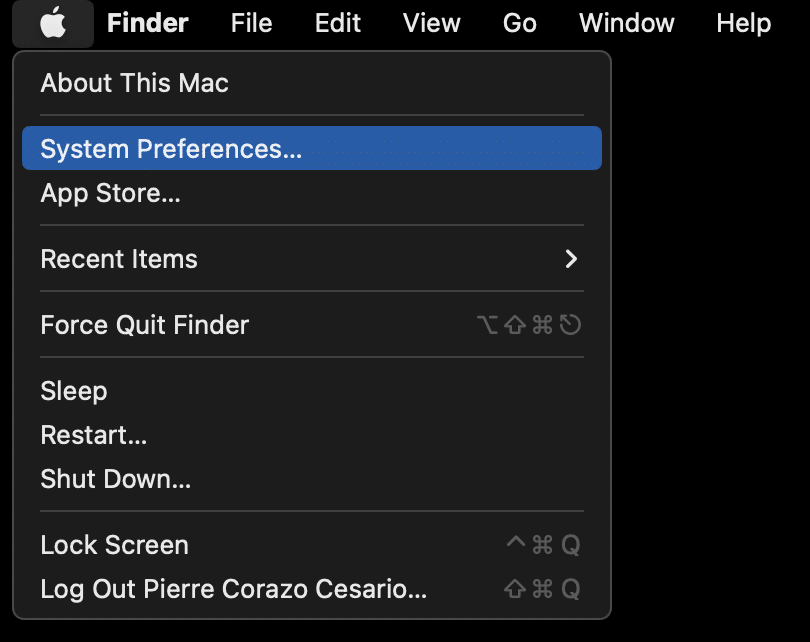
- Start by going to the top bar and clicking on the Apple icon.
- Then, in the drop-down menu, select System Preferences.
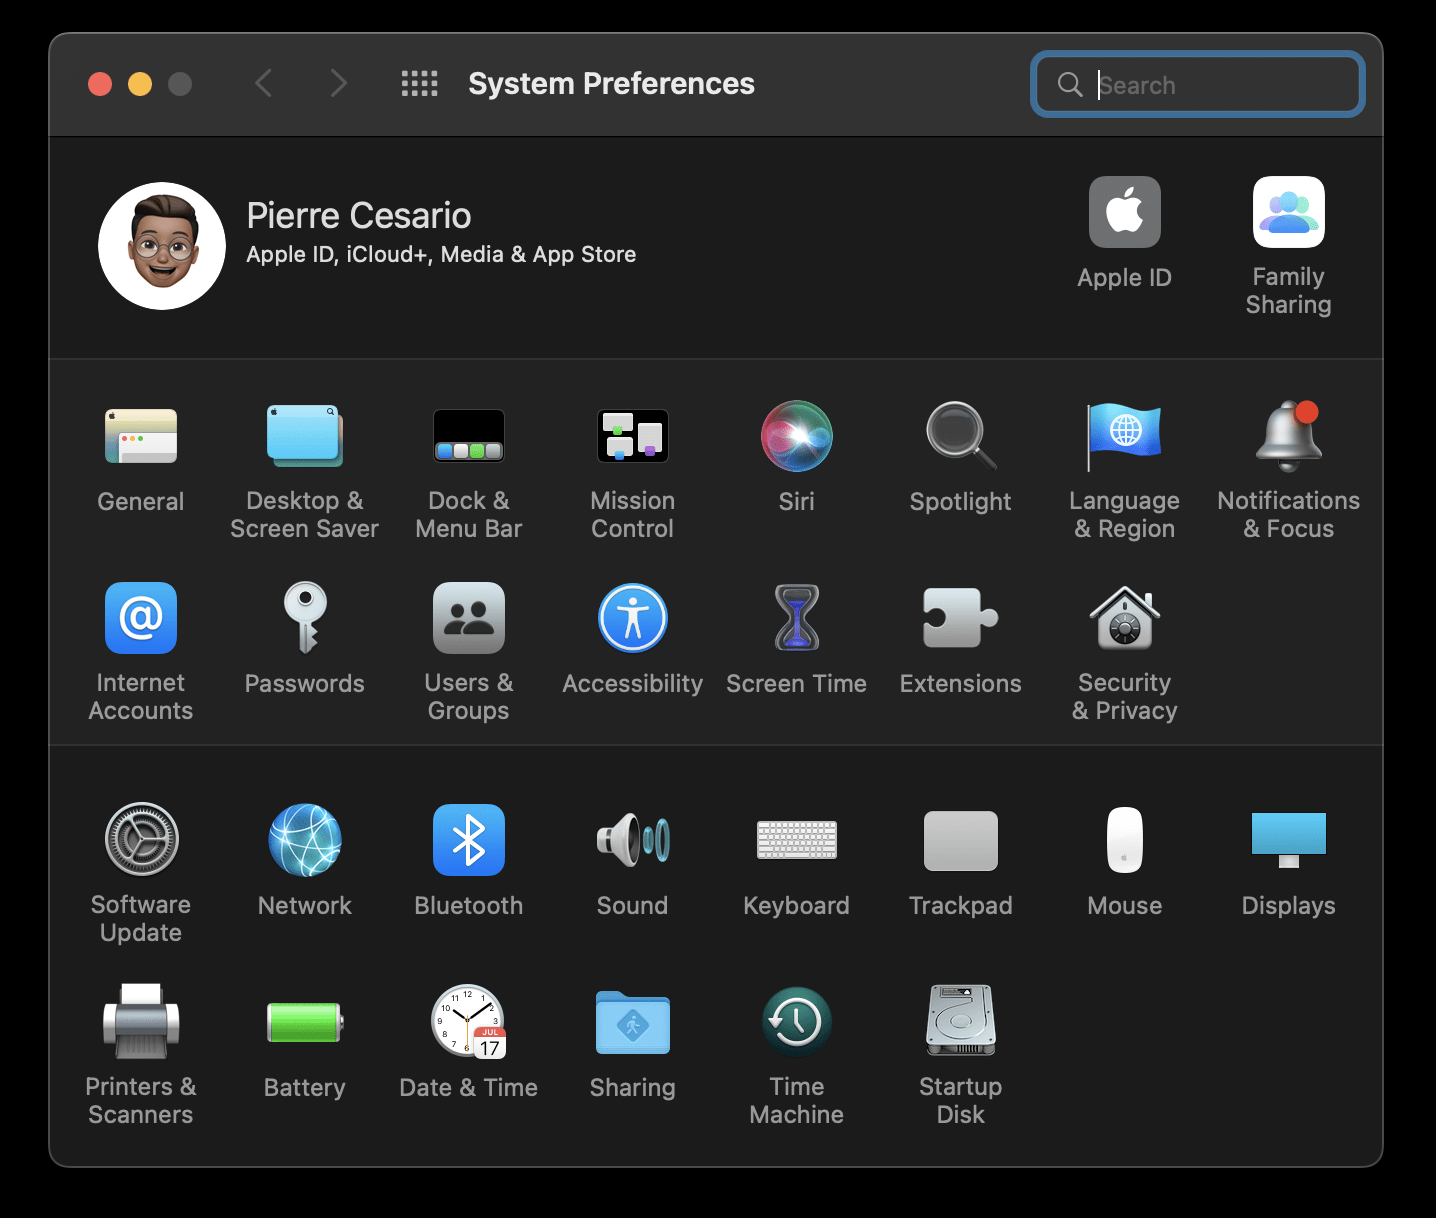
- Click on Network in the bottom half of the window in the newly opened window.
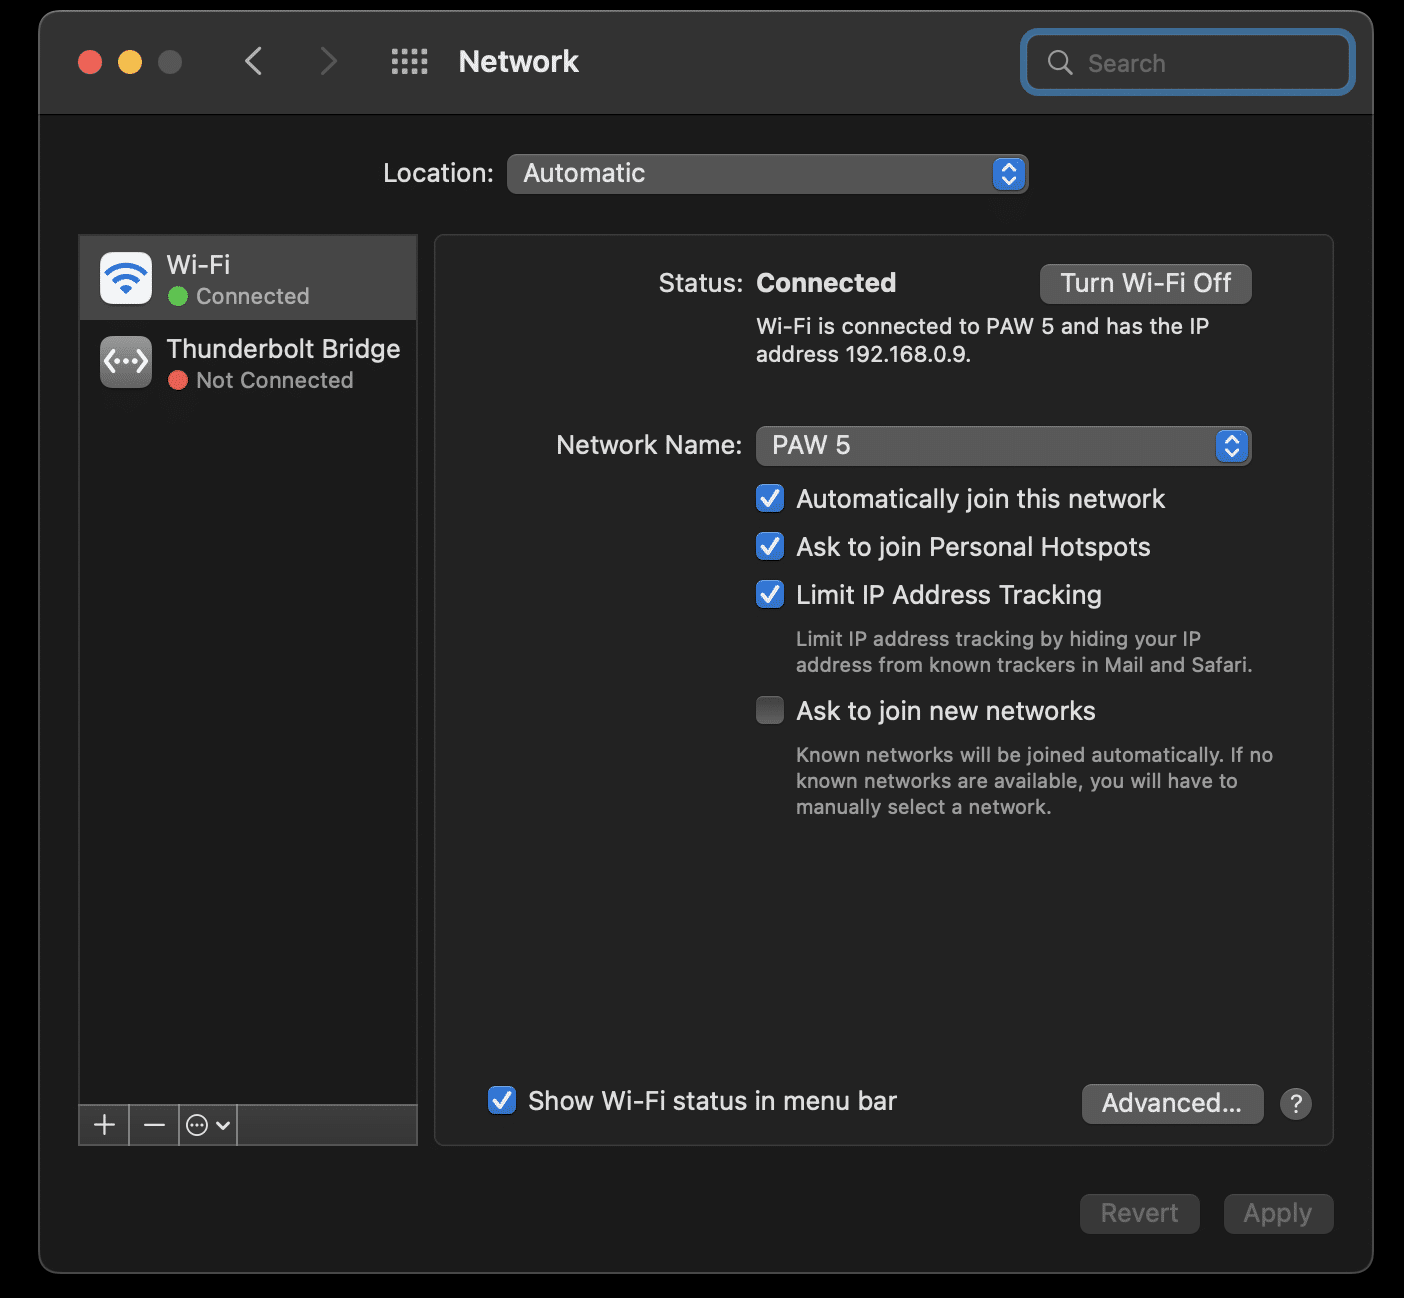
- Next, ensure your currently connected network adapter is selected in the left sidebar.
- Then, on the right hand side, click on the Advanced button.
- After that, select the DNS tab in the newly opened window.
- Under the DNS Servers: section, click on the + icon to start adding new DNS servers – both the primary and alternate addresses.
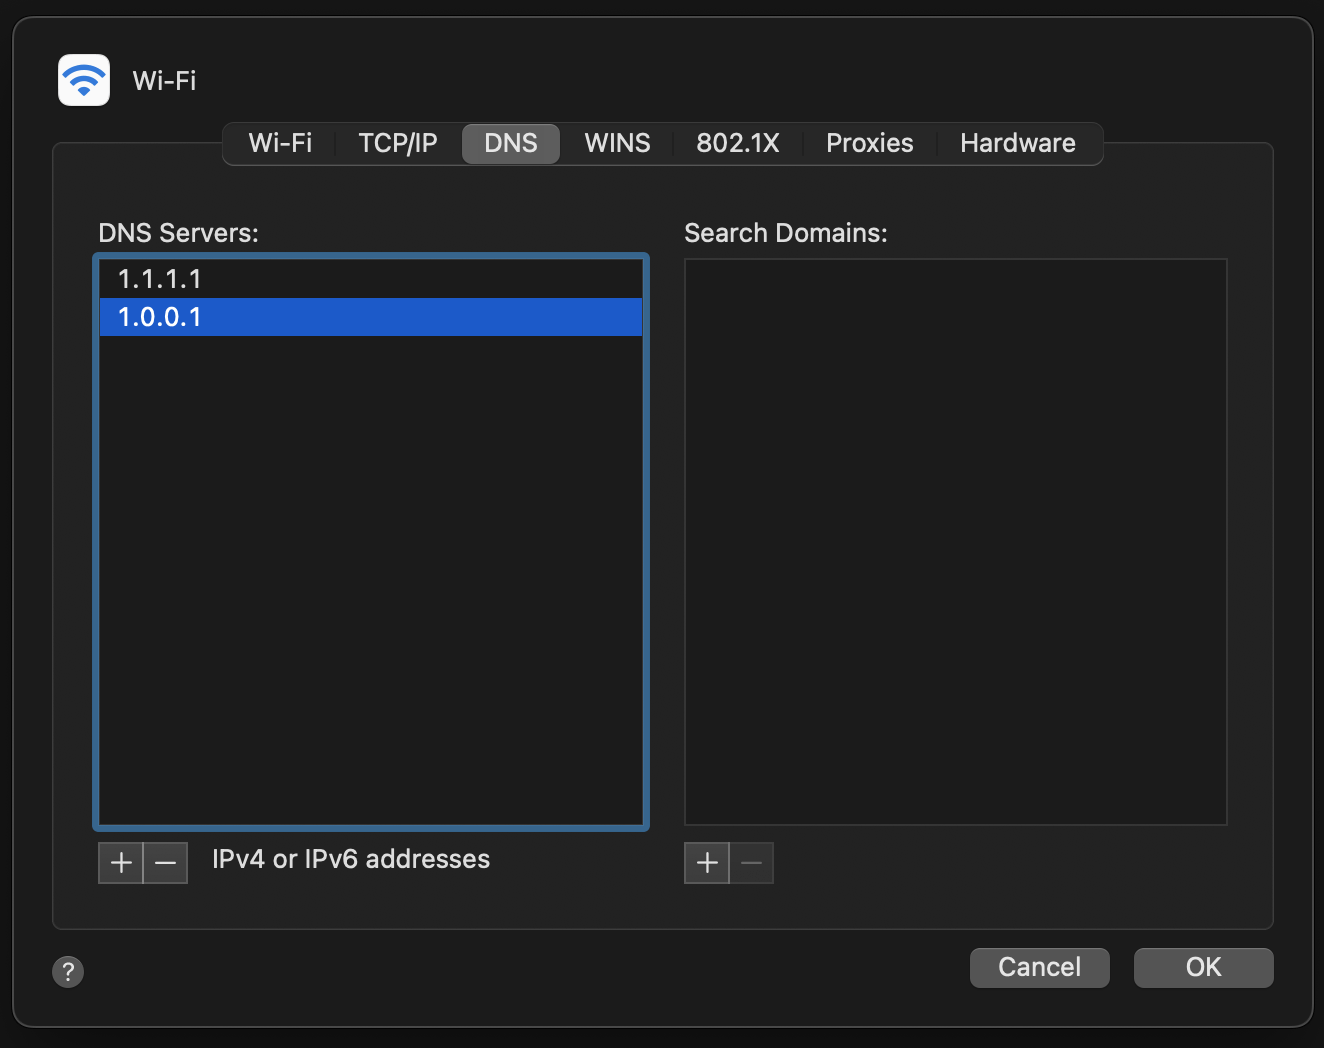
- Finally, once done, click on the OK button in the bottom right hand corner of the window.
5. Setup Visual Studio Code for Proxies
If you use a proxy for your Internet activities or just want to use a proxy with Visual Studio Code, you have to ensure that it’s set up and configured correctly in the settings. Of course, this is because proxies can interfere with how Visual Studio Code communicates with the Marketplace servers, preventing proper installation of your extensions. Hence, we’ll be guiding you on how to setup Visual Studio Code with your proxy:
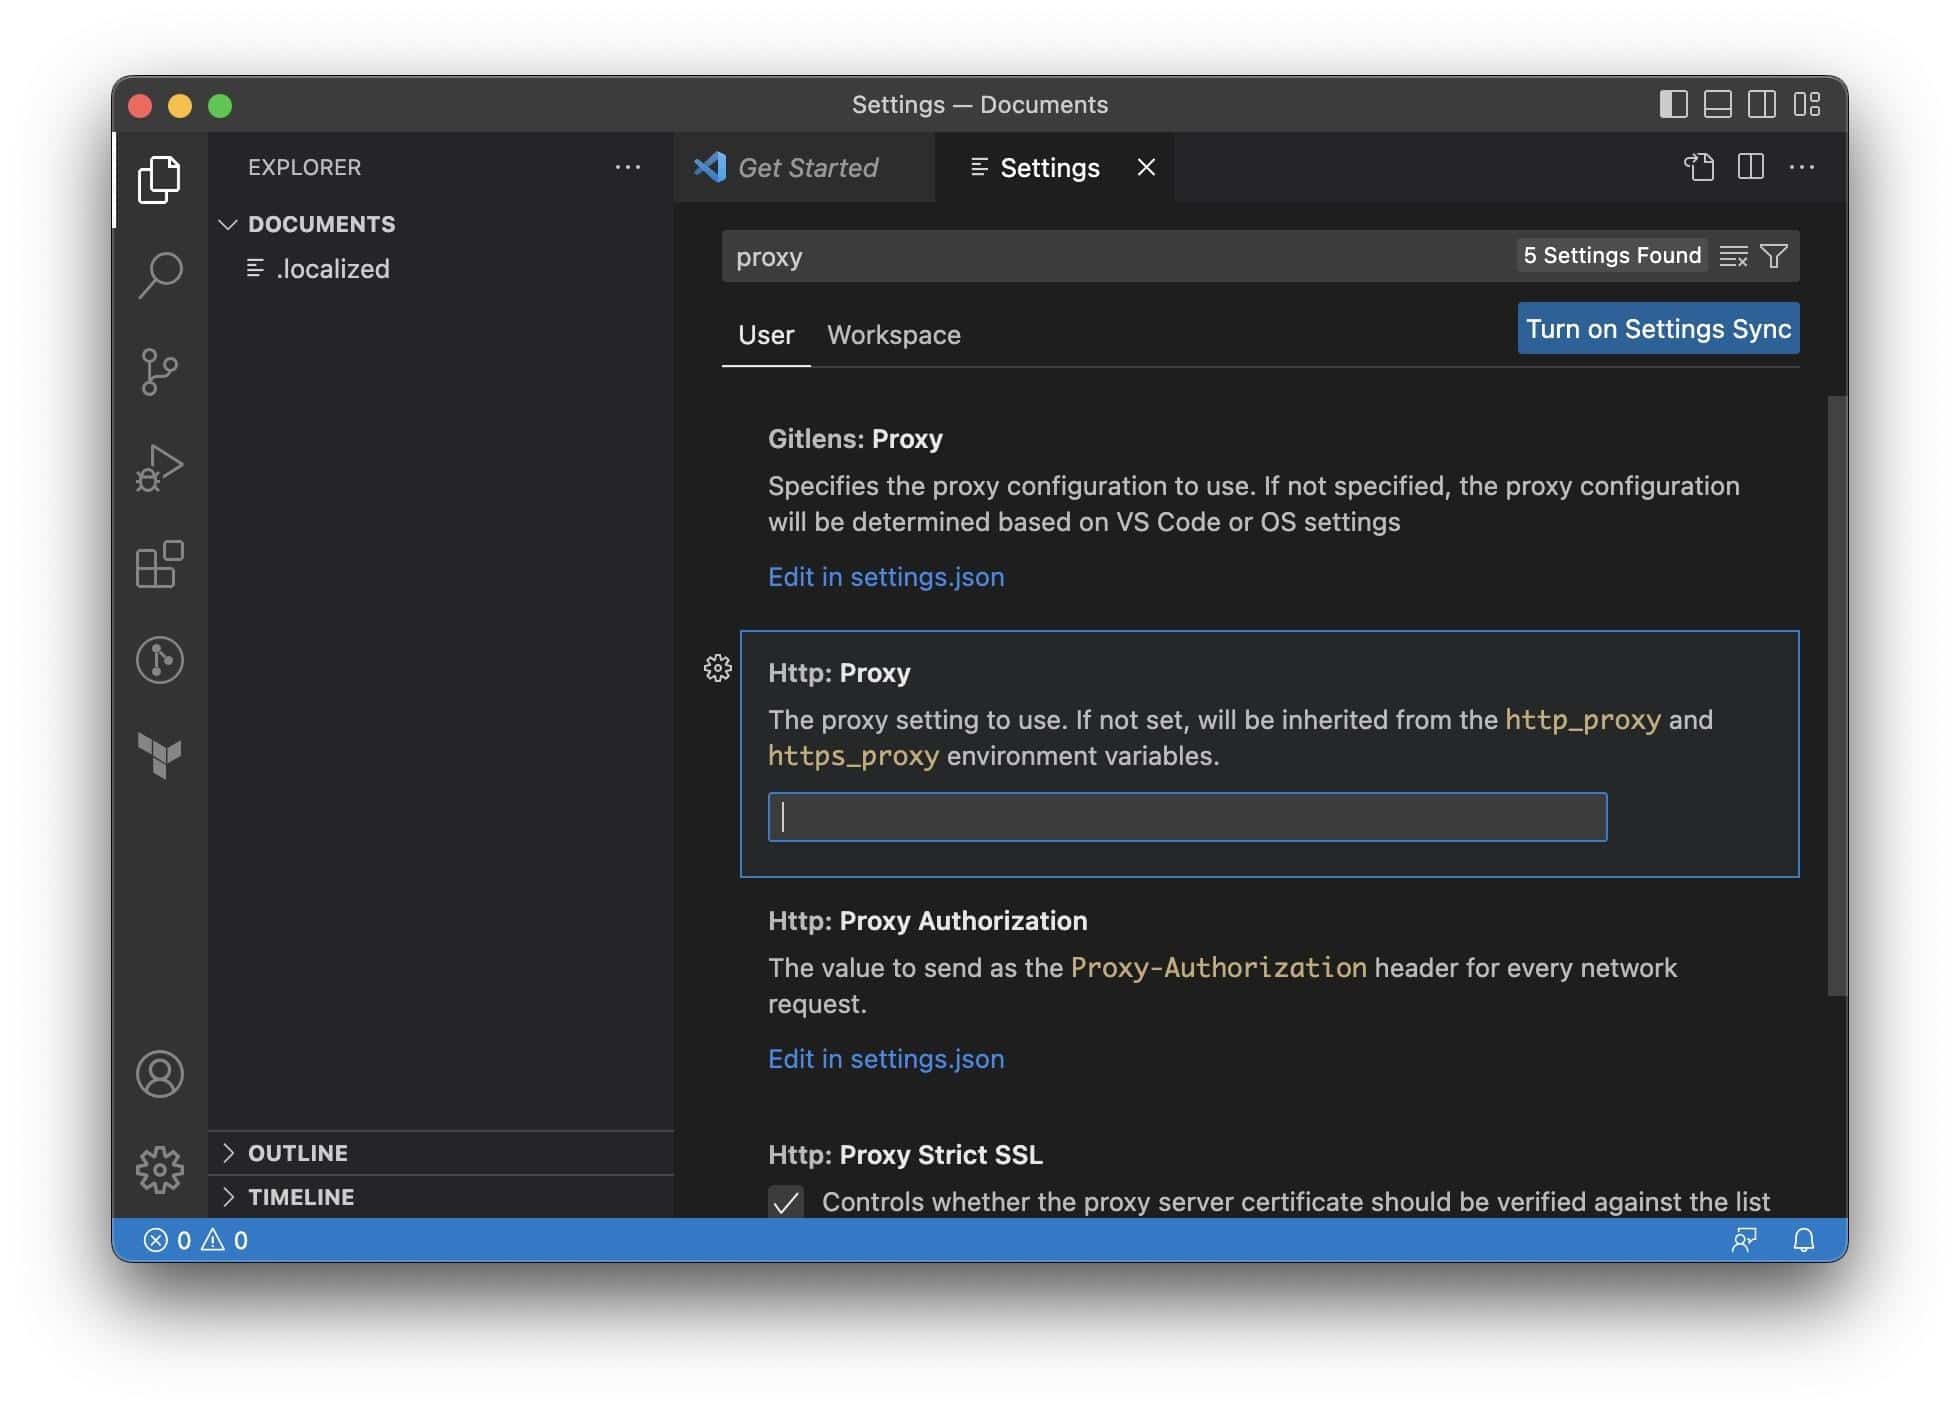
- First, open up Visual Studio Code.
- Then, open the Settings tab by either pressing the CMD + , or Ctrl + , keys on your keyboard depending on whether you’re on macOS or Windows respectively.
- Next, search for proxy.
- Finally, paste your proxy’s address into the Http: Proxy box.
If the proxy server you want to use requires authentication, the format of the address should be like this:
http://username:password@proxyserver:port
Note: You should ASCII encode your password if it contains special characters.
Else, it should be written like this:
http://proxyserver:port
With that being said, if this still doesn’t help solve your issue, it’s worth checking the proxy itself to see if it has any issues. So, an easy way to do that is to not use a proxy and then try to install your desired extensions, whether through the GUI or manually like we detailed in Fix 3.
6. Turn Off VPN
If you’re using a VPN on your computer, it’s a possible reason why Visual Studio Code isn’t able to successfully install your extensions. This is because of the inherent nature of how VPNs work, rerouting all traffic through an intermediary server for any requests through the Internet. With another layer in front of you and the Visual Studio Code Marketplace, networking becomes a bit more complex. As such, this may adversely affect the way in which Visual Studio Code contacts the Visual Studio Code Marketplace servers and cause a failed installation.
So, we highly recommend you to disable your VPN and see if it helps with your installation in any way.
7. Reinstall Visual Studio Code
Still no luck? Next, we highly recommend you to reinstall Visual Studio Code. One potential solution to problems with installing extensions in Visual Studio Code is to reinstall the app. Reinstalling the app can help resolve issues caused by corrupt files or botched installations on your computer.
A full clean reinstallation ensures that every part of the code is completely new and without corruption, which can help improve the stability and reliability of the app. Additionally, by reinstalling the app, you will also be able to install the latest version, which may include bug fixes and new features that could help resolve the issue you are experiencing.
Keep in mind that reinstalling the app will require you to set it up again and may also result in the loss of any custom settings or configurations you have made.
For more detailed information and steps for completely uninstalling and reinstalling Visual Studio Code on Windows, macOS or Linux, you can check out our comprehensive guide for that here.
Here’s how to uninstall Visual Studio Code on Windows and macOS:
Windows
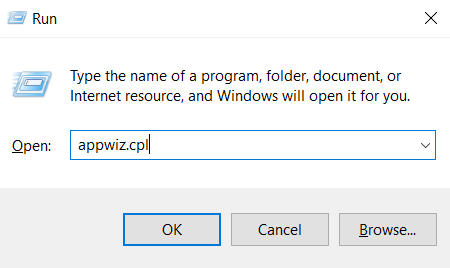
- Firstly, open the Run prompt by pressing the Windows and R key together, then type appwiz.cpl and press OK.
- After that, look for Visual Studio Code from the list of programs.
- Select it, then right-click it, and select Uninstall.
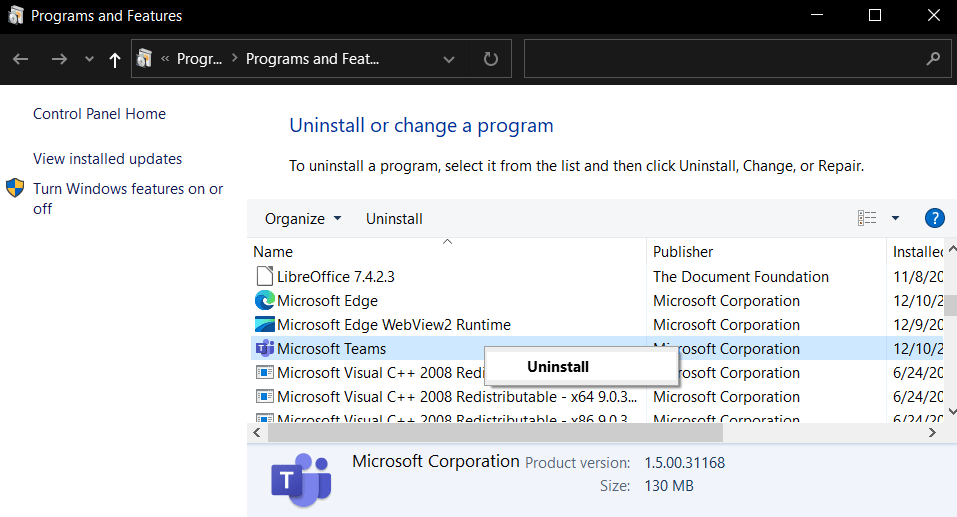
- Finally, follow the instructions in the uninstaller. It should tell you when it’s done uninstalling.
Specific to Windows installs, Visual Studio Code might have been installed with system installer mode, or an administrative mode, instead of user installer mode, or non administrative mode. Hence, the Visual Studio Code in the current user won’t have access to the Program files folder to install addons. As such, we recommend reinstalling Visual Studio Code with user installer mode or non administrative mode to address this issue.
So, to install it with said privileges, you can run this line of code in your Command Prompt:
`VSCodeSetup.exe /VERYSILENT /MERGETASKS=!runcode /NORESTART /CURRENTUSER`
macOS
Here is the main article from Apple themselves, should you refer to it.
Using Finder to Delete an App
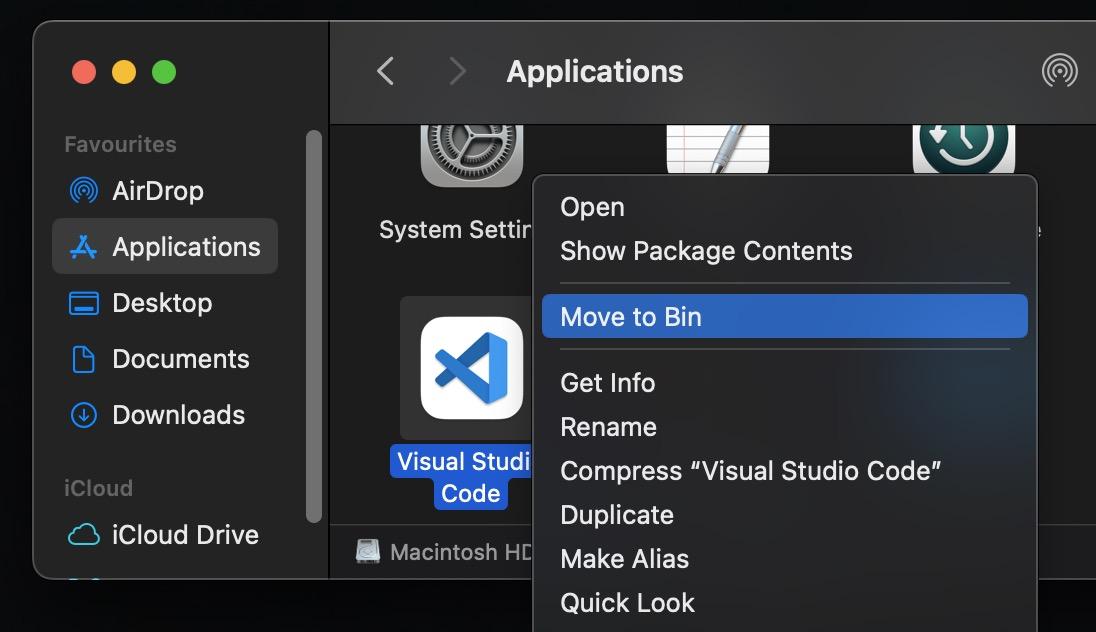
- Firstly, locate the Visual Studio Code app in Finder. Most apps are in your Applications folder, which you can open by clicking Applications in the sidebar of any Finder window. Or use Spotlight to find the app, then press and hold the Command (⌘) key while double-clicking the app in Spotlight.
- Then, drag the Visual Studio Code app to the Bin icon, or right-click the app and choose Move to Icon.
- After that, if you’re asked for a username and password, enter the name and password of an administrator account on your Mac. This is probably the name and password you use to log in to your Mac every time.
- Finally, to completely delete the app, open the Trash, right-click it, and select Empty Trash.

8. Check Your Internet Connection
It’s important to remember that your Internet connection can significantly impact the speed and stability of the extension download process, whether you are manually installing the extension or using the Visual Studio Code app. If you can’t get extensions to download, testing your internet connection to ensure it works well might help. This can help you determine if the problem is with your connection or if there is something else wrong with how you install the extension.
Many websites can help you test your internet connection and provide information about its performance. Many of these sites are easy to use and give you useful information about your connection, such as your download and upload speeds, latency, and other details.
To use these sites, you typically need to visit the website and click a button to start the test. The test may take a few seconds to complete, and it may strain your network. To get the most accurate results, it’s a good idea to turn off any downloads or streams that are running in the background before starting the test. This will help ensure that other network activity does not influence the test results.
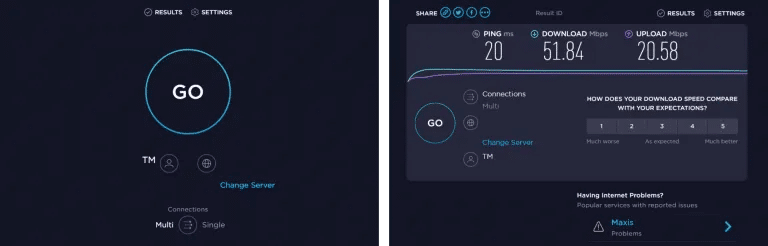
That said, Ookla’s Speedtest site is a popular and reliable option we can vouch for.
Once the site has loaded, click the big ‘GO’ button to begin your test. After the test, the site will display your download and upload speeds and your ping (latency). You’re aiming for a high download speed as well as low latency.
Suppose the results of an internet connection test using a website such as Ookla show that your speeds are lower than what you are paying for. In that case, you may need to troubleshoot your home’s network system to determine why the problem is happening.
Your internet speed could be affected by a number of things, such as the settings on your router, interference from other wireless devices, or problems with your internet service provider’s (ISP) system.
To fix the problem, you may need to try different things, such as checking your router’s settings, looking for sources of wireless interference, and calling your ISP to ask if there are any known problems or maintenance work that could be affecting your connection.
9. Check Visual Studio Code’s Server Status
Finally, the last thing in the pipeline to check is Visual Studio Code’s Marketplace server status. We obviously can’t download the extensions we want without a functioning server.
So, to determine server availability, Microsoft has their own site for monitoring the availability and status for all their Visual Studio services which you can view here.
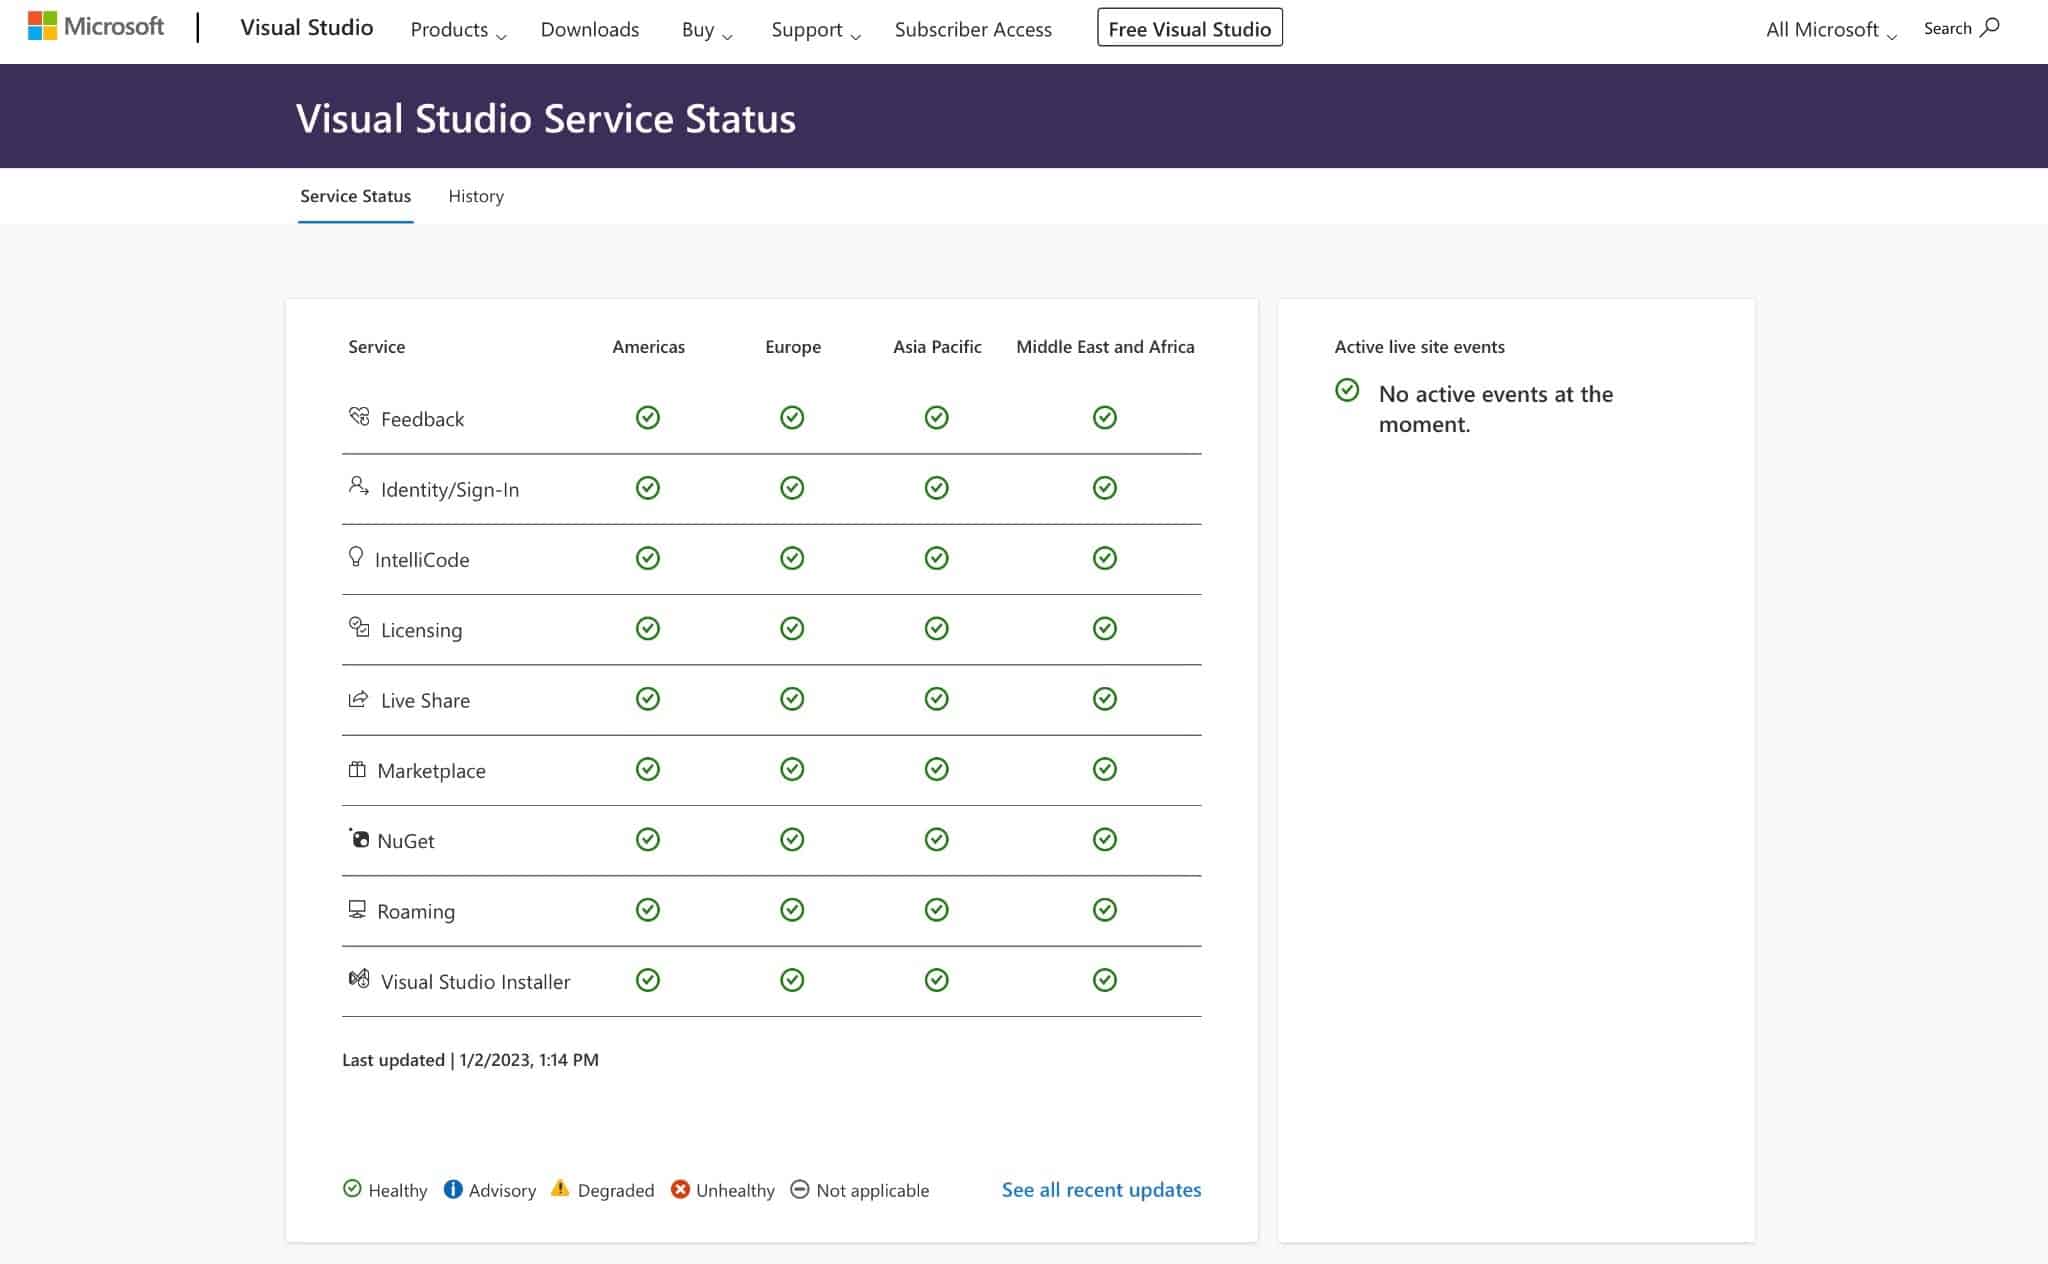
On this page, you’ll see a simple grid that lists all of the relevant Visual Studio services with per-region server status information. At the bottom, you can see the legend so that you know what each icon means. Of course, you’ll want to look at the Marketplace row and a green tick for your region.
10. Report the Problem to the Visual Studio Code Team
In the unfortunate event that none of the detailed fixes worked for you, you’ll probably have to report the issue to Microsoft’s team 👨💻 so that they can help you resolve it.
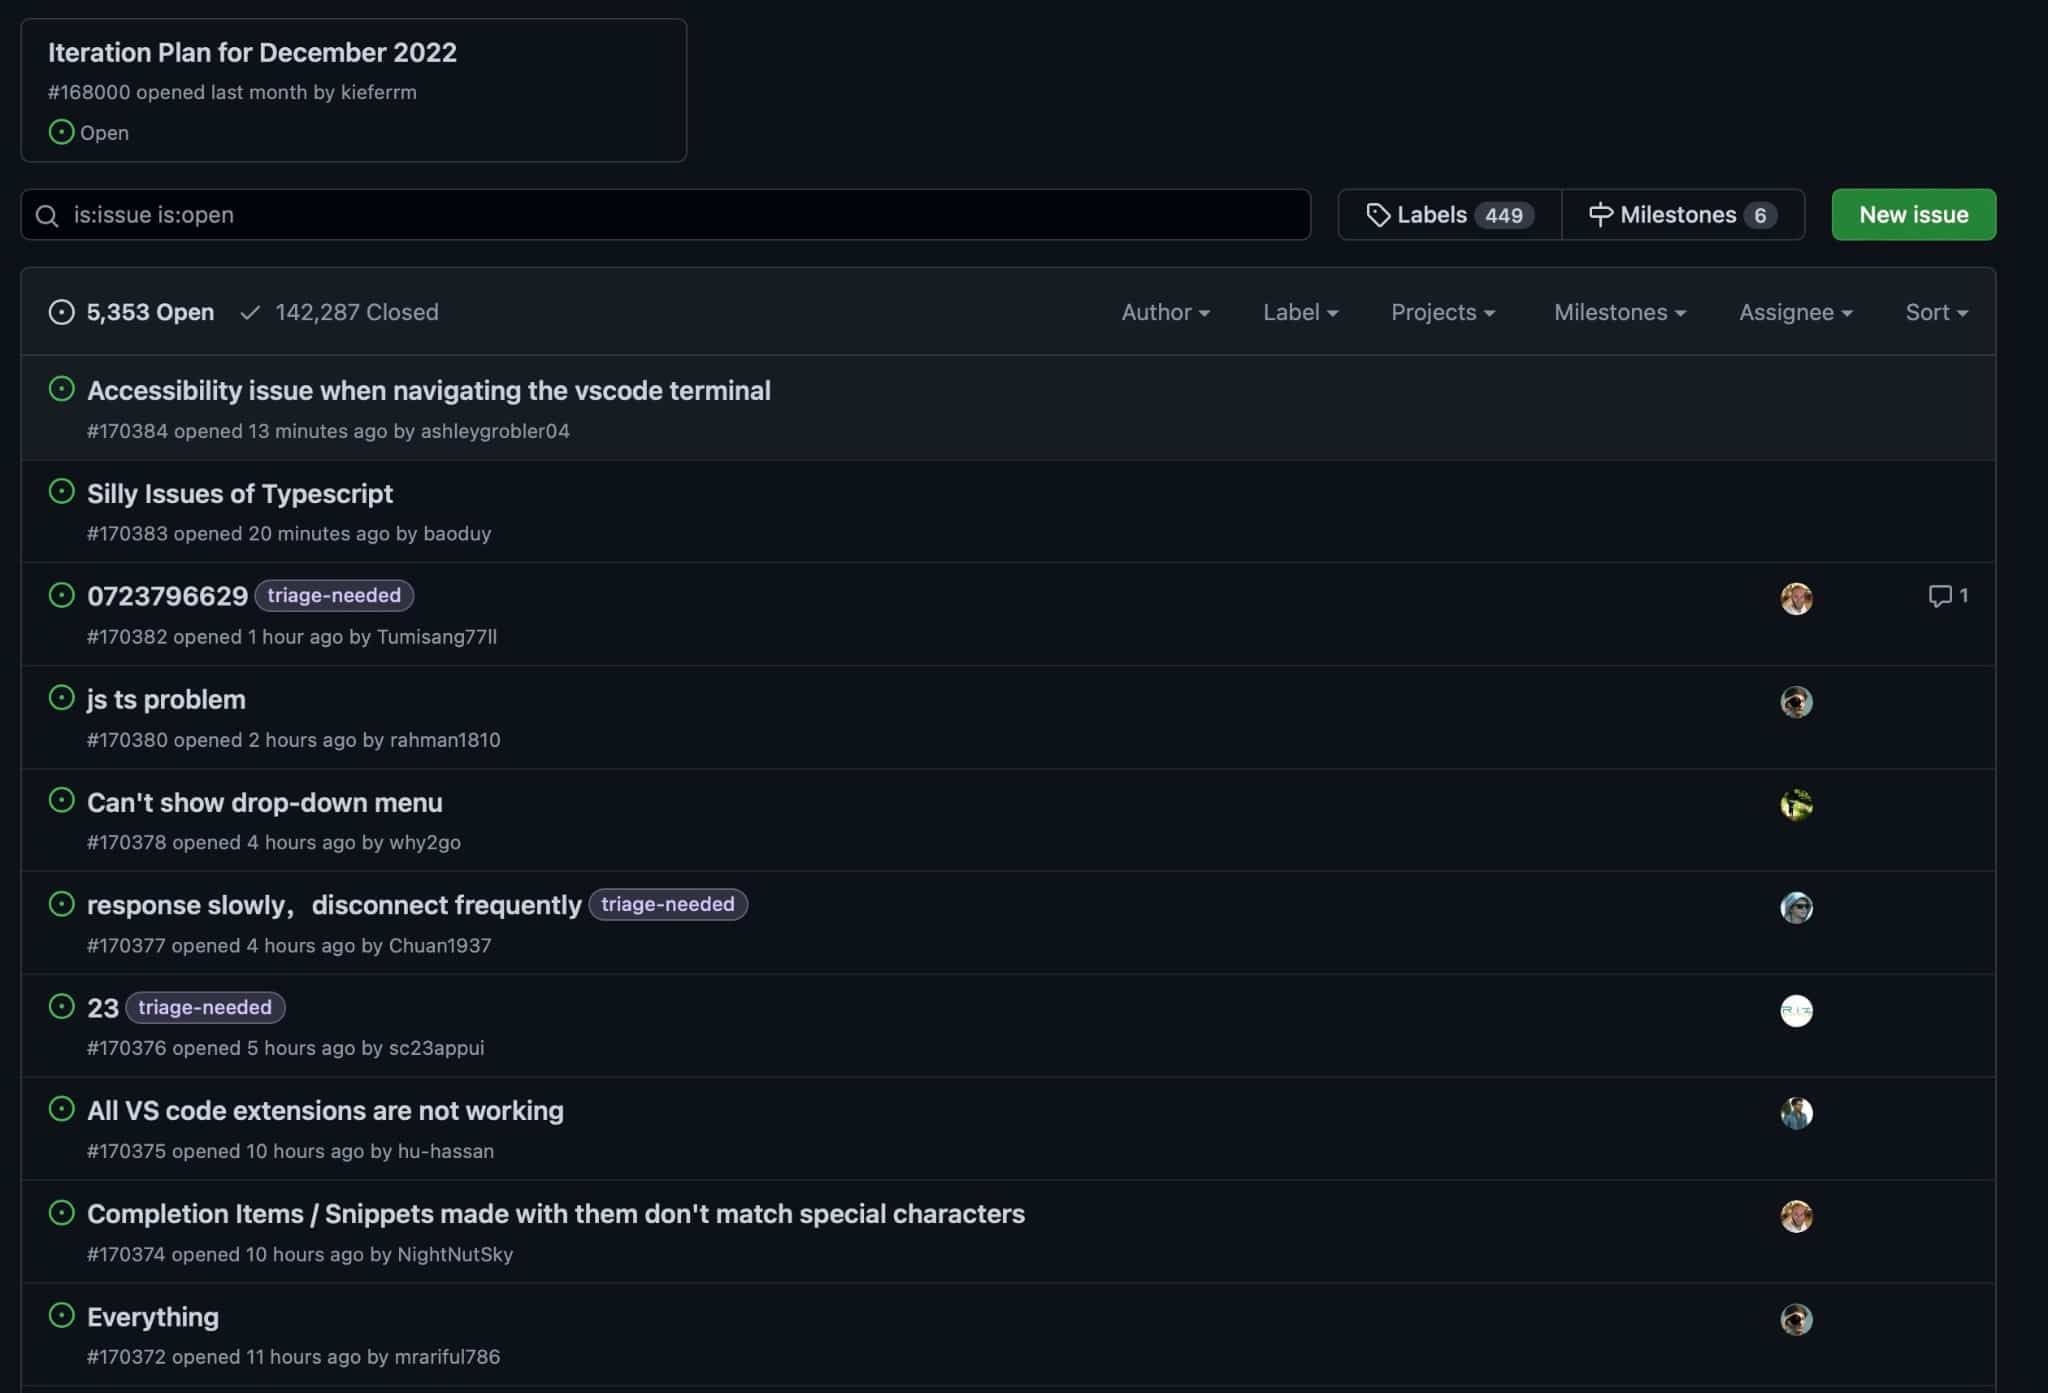
Suppose you have tried all of the suggested solutions for resolving issues with installing extensions in Visual Studio Code and are still experiencing problems. In that case, it may be necessary to report the issue to the Visual Studio Code team. You can do this through their official Issues page on GitHub and open a new issue like any other repository.
It’s important to be as detailed as possible in your description of the issue, including any troubleshooting steps you have already tried. This will help the team understand the specific issue you are experiencing and may allow them to replicate the problem more easily, which can help them identify and resolve the issue more quickly. While it’s unlikely that the team is unaware of the issue, reporting it through official channels can help ensure it is addressed.
Conclusion
That brings our guide to a close!
Visual Studio Code is undoubtedly one of the most popular code editors among developers, especially due to its vast library of extensions. Hence, we understand why you might become frustrated if you can’t install said extensions! So, with our guide, we’ve compiled 10 fixes detailing how to resolve this issue.
We went through all the fixes that directly address the main culprits that may prevent a successful installation of extensions, namely:
- DNS issues
- A misconfigured proxy/VPN
- The VS Code installation doesn’t have access to the user’s filesystem
- VS Code Extension servers may be down
Hopefully this guide managed to get your extension installed, whether in one way or another so that you can get back to coding!
Be sure to comment down below if you have:
- Any questions for us
- Any errors in the article
- Other suggestions to fix this issue
- Feedback on any of the fixes and if they worked