
Interested in getting into JavaScript development, but unfamiliar with Node.js and npm?
Installing Node.js and npm is the first and most essential step to being a JavaScript developer. There are other technologies such as webpack, React.js, Gulp, etc. but none of those technologies matter without both Node.js and npm, which serve as the core of every JavaScript project.
If this is your first time learning the ropes of JavaScript development, let alone learning programming in general, then this is the guide for you. We will briefly explain what both Node.js and NPM are as well as guide you step-by-step on how to install Node.js and NPM on your Windows or Mac computer.
Alright, let’s dive right into it.
What is Node.js?
JavaScript, since its creation, was primarily utilized as a client-side programming language alongside HTML and CSS. Client-side means creating interactive web pages where it is processed only in your search browser. In fact, JavaScript has been responsible for creating the pop-ups, animations, range picker modals, and just about almost any interactive element on a web page that you can play with.
However, with the increasing usage of JavaScript in the client-side, then brought about a different question, “What if we could use JavaScript to manage the backend too (server-side)?”
Note ⚠️
If you’re confused about what the ‘backend’ is, it simply refers to the part of the website, app, or software that we do not see. Whereas the client-side or frontend, in other words, means the user interface itself (the webpage you interact with). The backend is usually where the server, application logic and database lies.
That was the cue for Node.js’ entry into the world. Node.js, as well defined by their creators, is a JavaScript runtime (means where your Javascript code runs) and allows to run your code outside of the search browser (since remember as we talked about a few minutes ago that JavaScript was only able to run in the search browser before this). Node.js has been pivotal to allow developers to use JavaScript to manage their backend for their web applications.
Hence, if you’re looking to create a web app using JavaScript, Node.js will serve to help you establish your backend.
What is npm?
Now that you now what Node.js is, let’s talk about NPM. NPM is short for Node Package Manager (source), and it’s an online collection of open-source Node.js projects which you can call with a single line of code from your terminal of choice (Command Prompt, Git Bash, Zsh, etc.) to install any project you like at any time.
To give you a metaphor, think of it as a box of prebuilt Lego parts that others have built which you can always plug in play into your own project. This means you don’t have to reinvent the wheel for a lot of things as others have already done so for you and it allows you to just focus your efforts on developing the parts of your application that really do matter.
Now that we’ve covered what both Node.js and NPM are, let’s go ahead and begin installing it on our Windows or Mac computer.
How To Install Node.Js And NPM On Windows and Mac: Step-By-Step
If you’re on Windows 10 PC
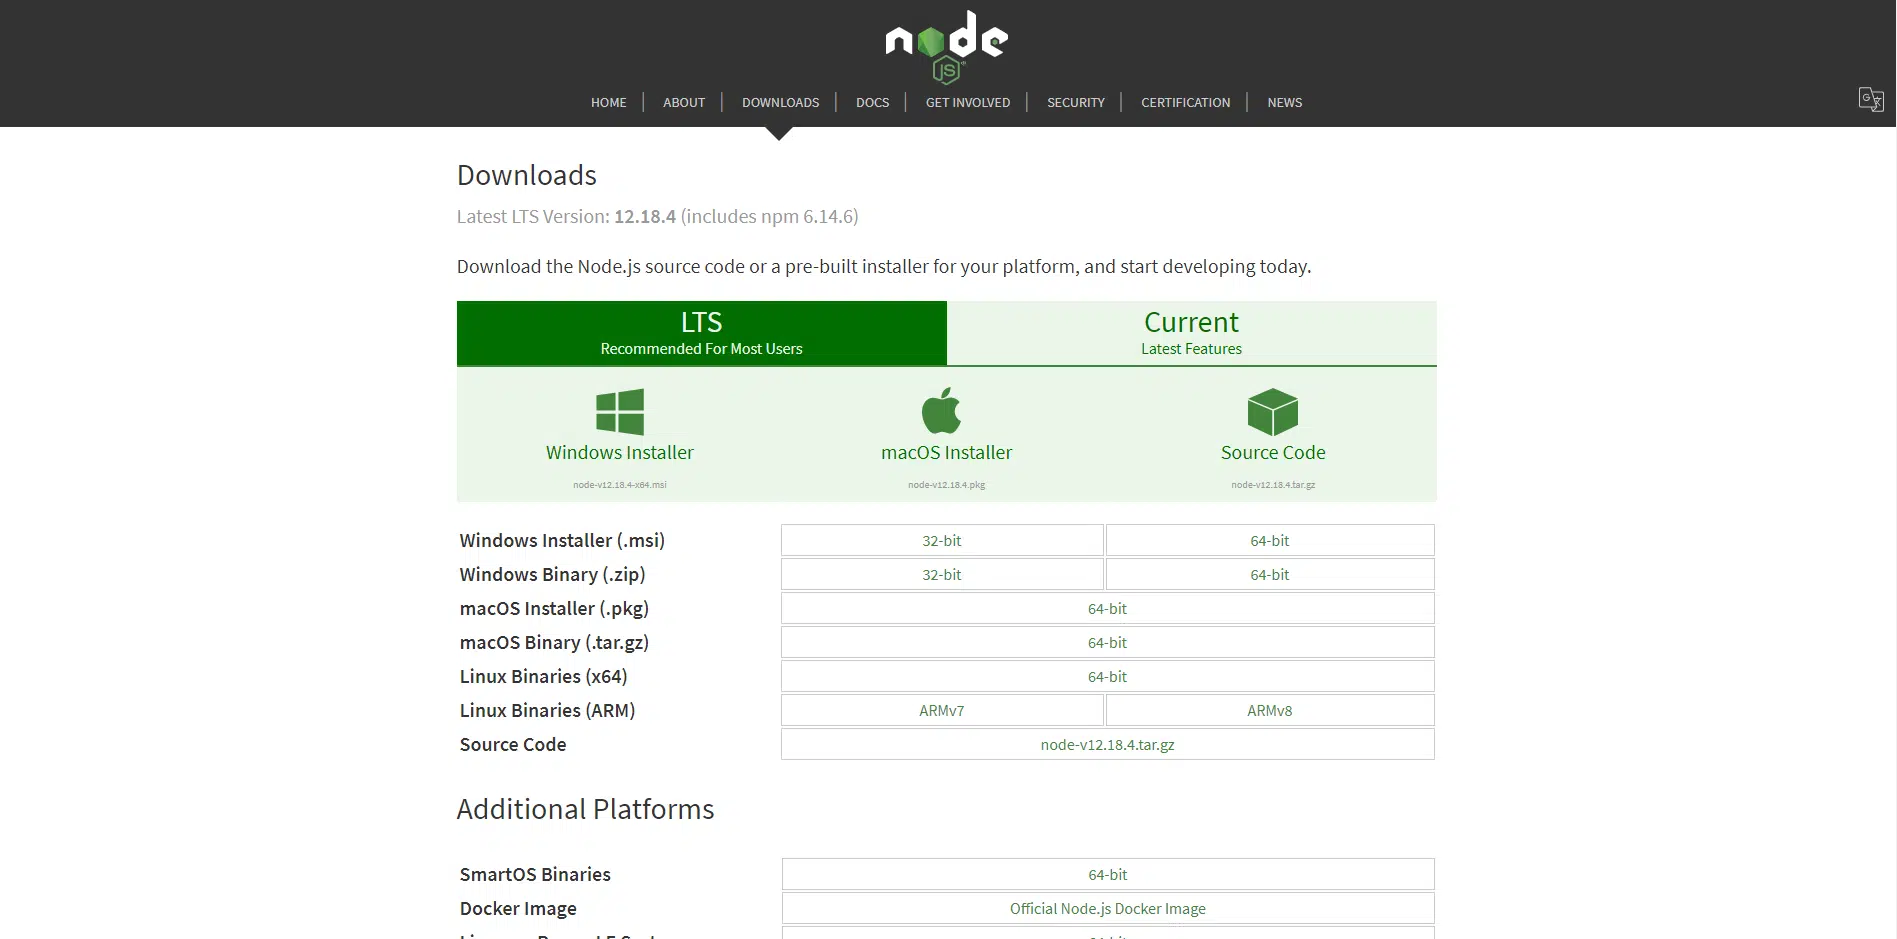
- Simply head over to the Node.js installation page and click on either the Windows Installer or macOS Installer (depending on which computer you’re using). For the purposes of this guide, I’ll be going with Windows.
Tip: NPM gets installed automatically when you install Node.js. You do not need to install NPM separately. The above step will suffice to install the latest versions of Node.js and NPM.
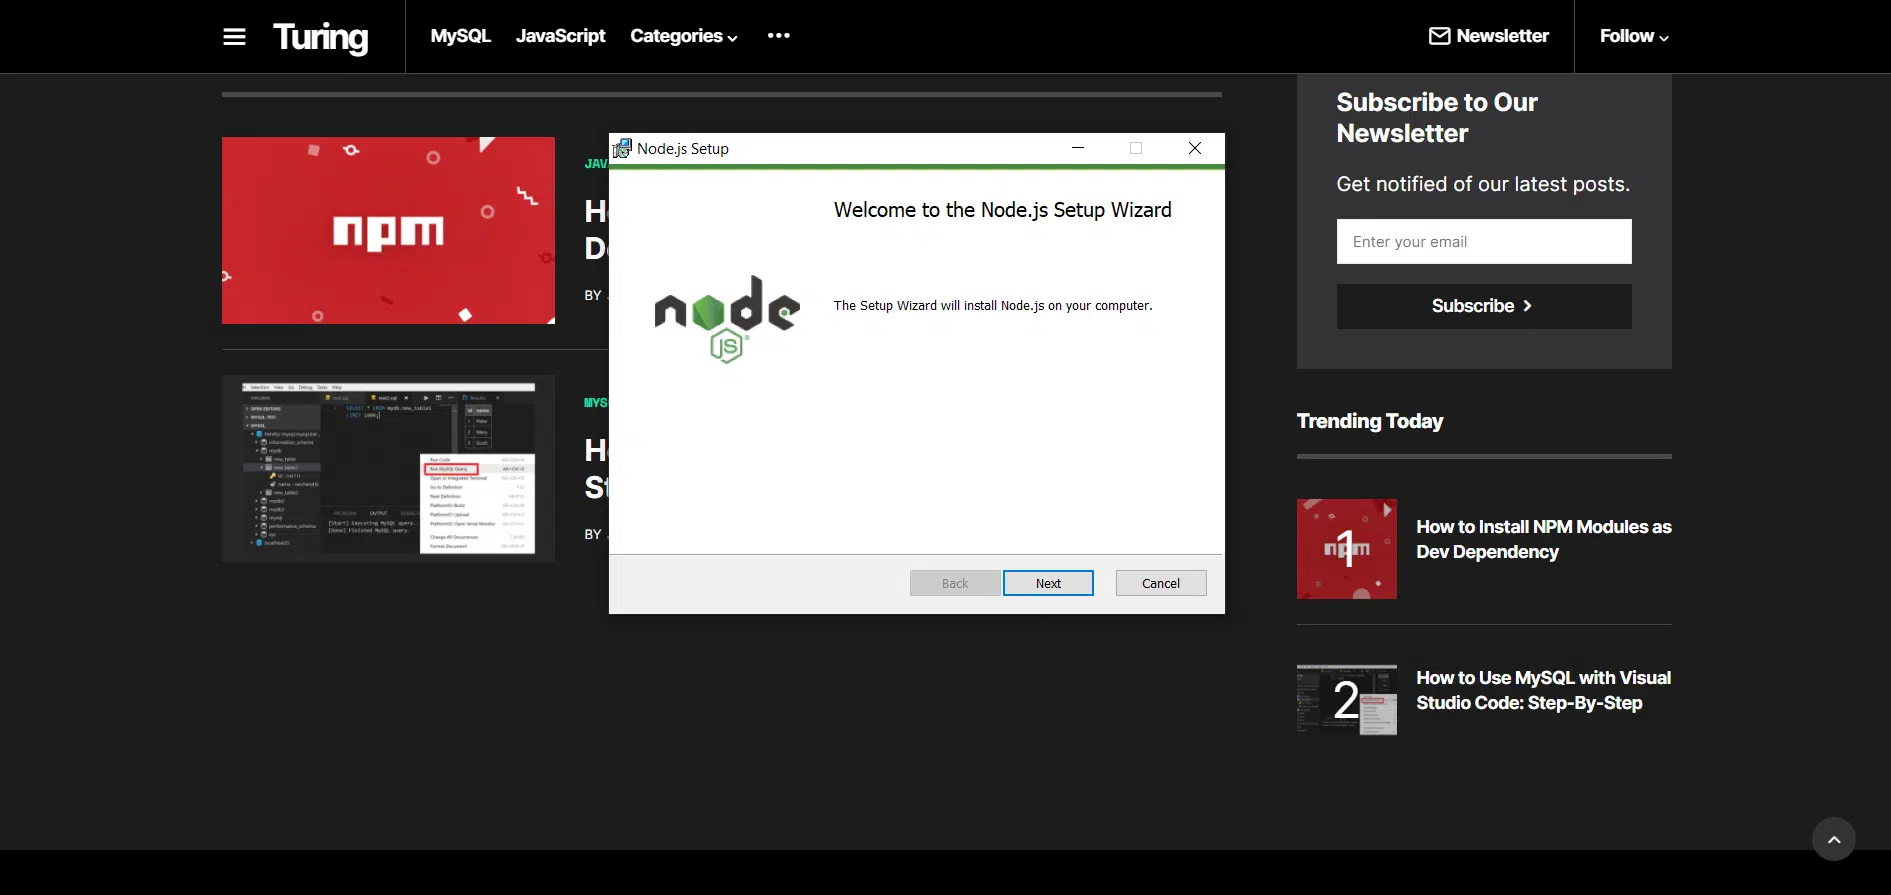
- When the installer opens, click Run.
- Once Node has inspected your computer to see if it meets the requirements, the setup wizard will begin. Click Next.
- Accept the End-User License Agreement and click Next.

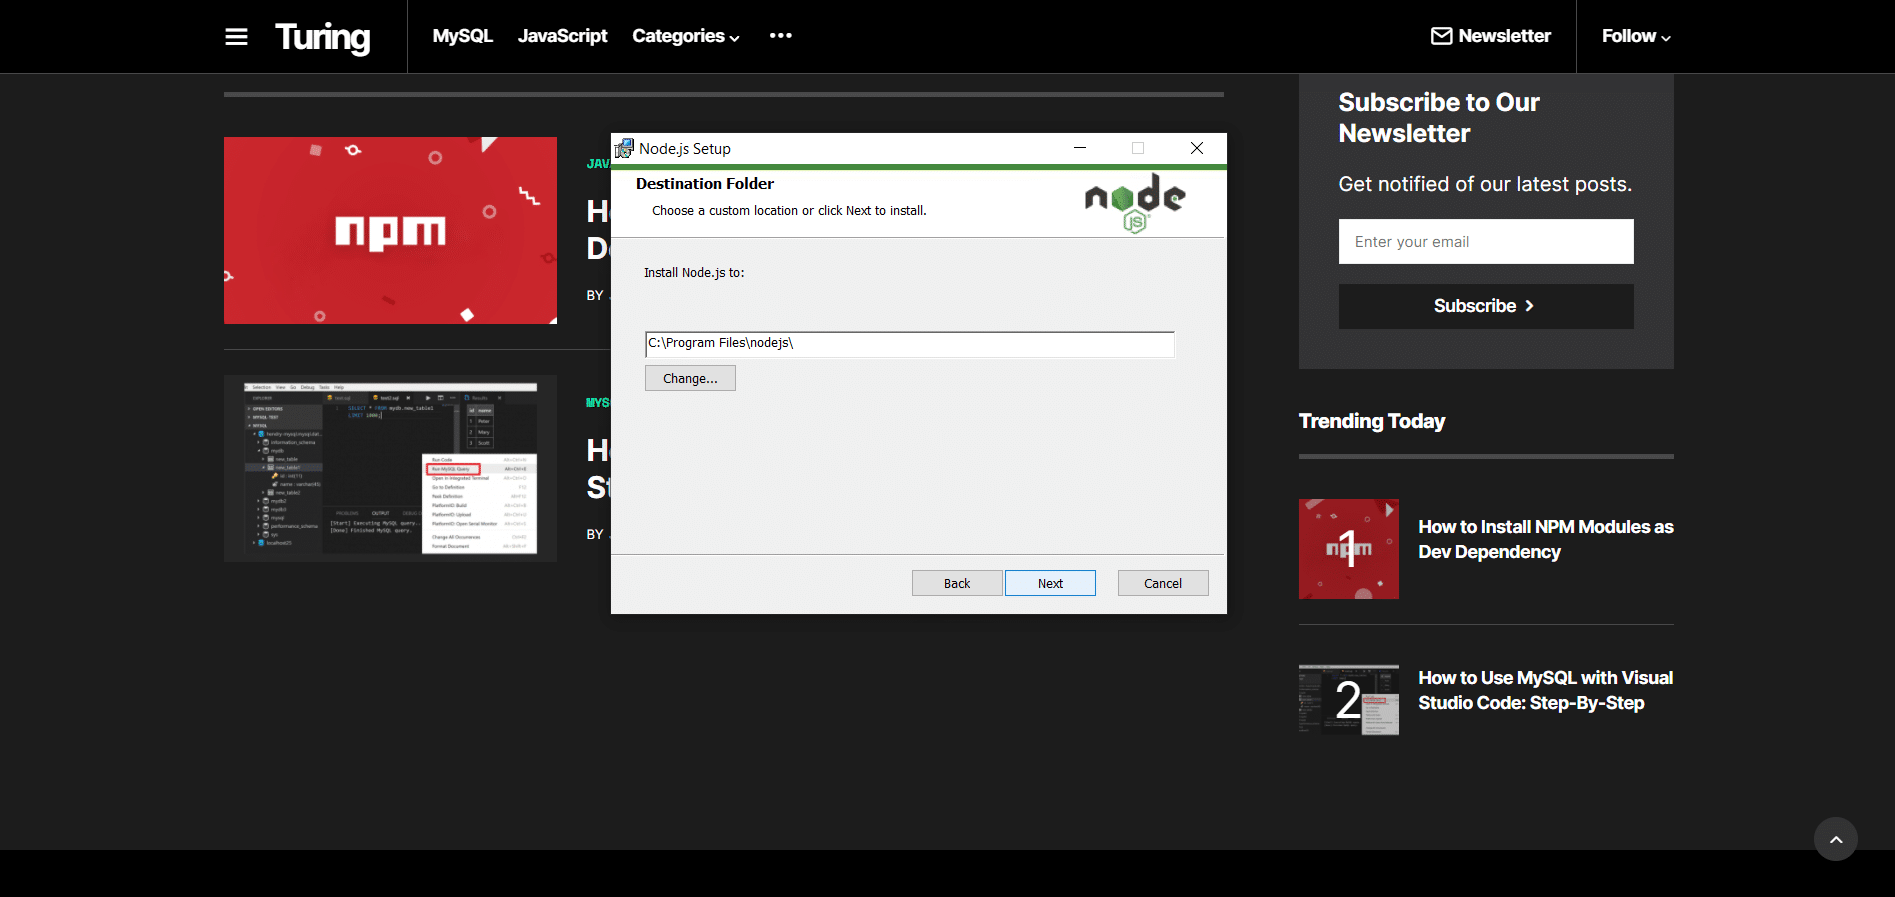
- Select your preferred Destination Folder. By default, Node.js will be installed into your Program Files directory which is fine. Click Next.
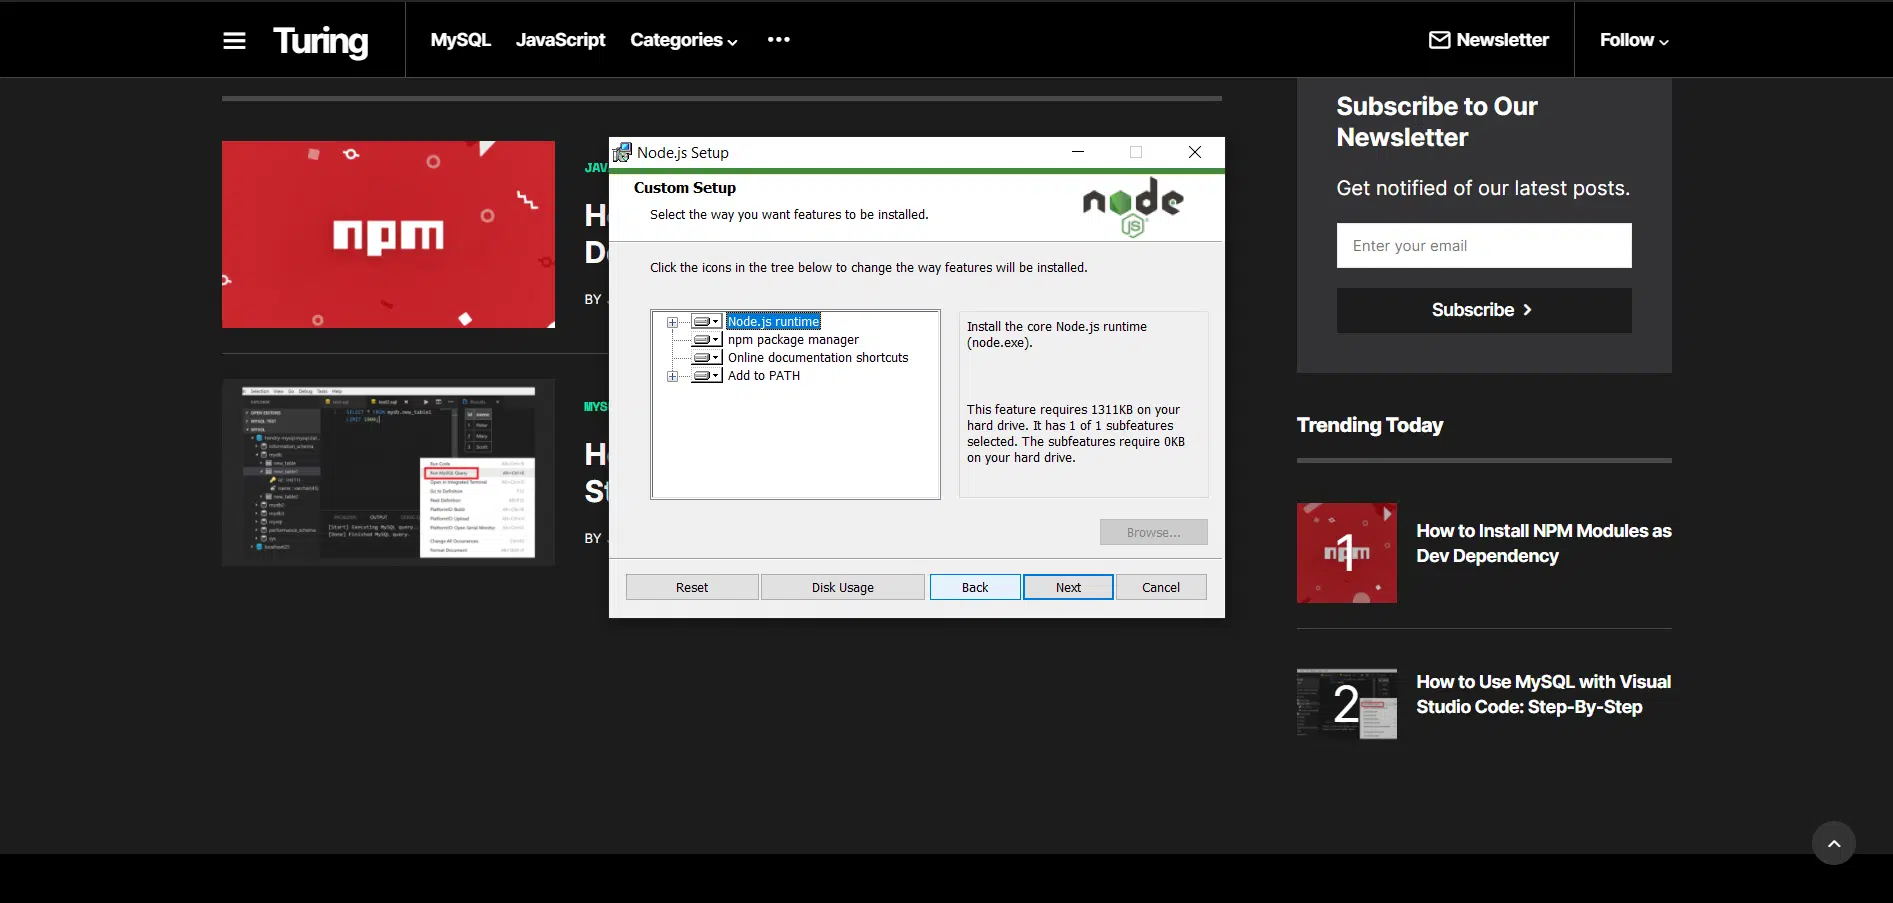
- If you would like to customize your setup, then you can do so in this step. As you can see here, that the ‘npm package manager’ will also be installed along with ‘Node.js runtime’ which is Node.js. If you want to make any adjustments, then you can do so here, but the default settings are acceptable for now.
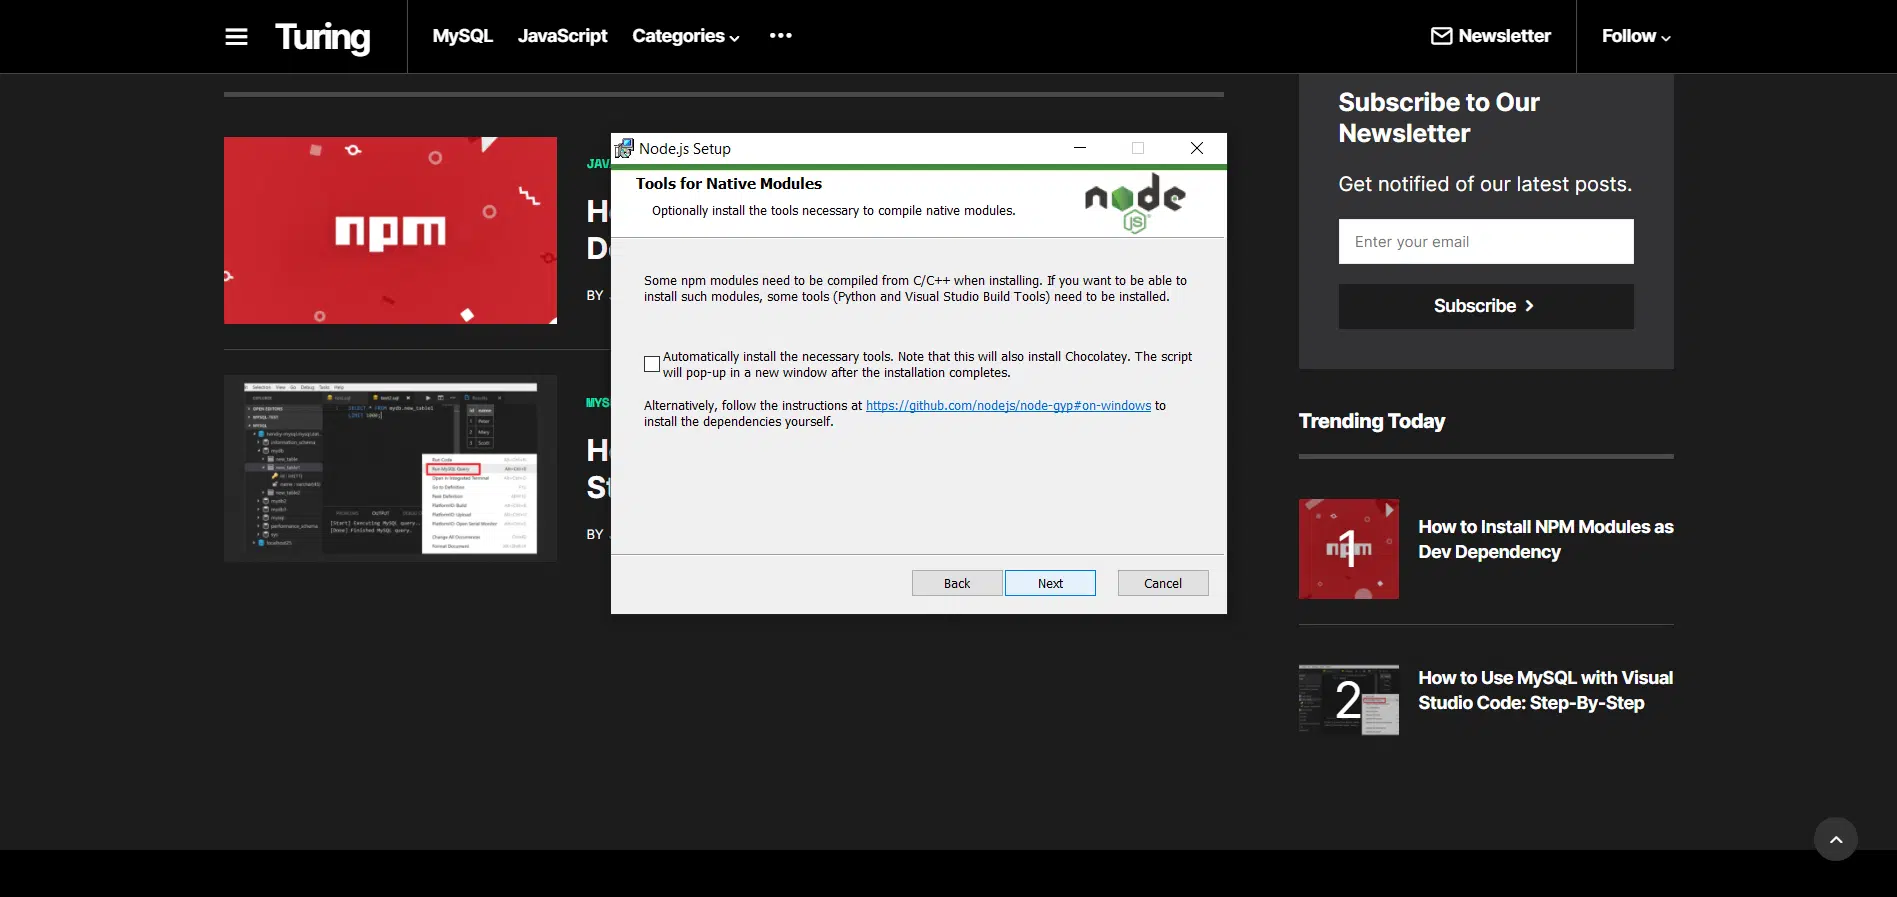
- Some tools will be suggested here to be added. You don’t have to install these tools for now as we only need Node.js. Just click Next.
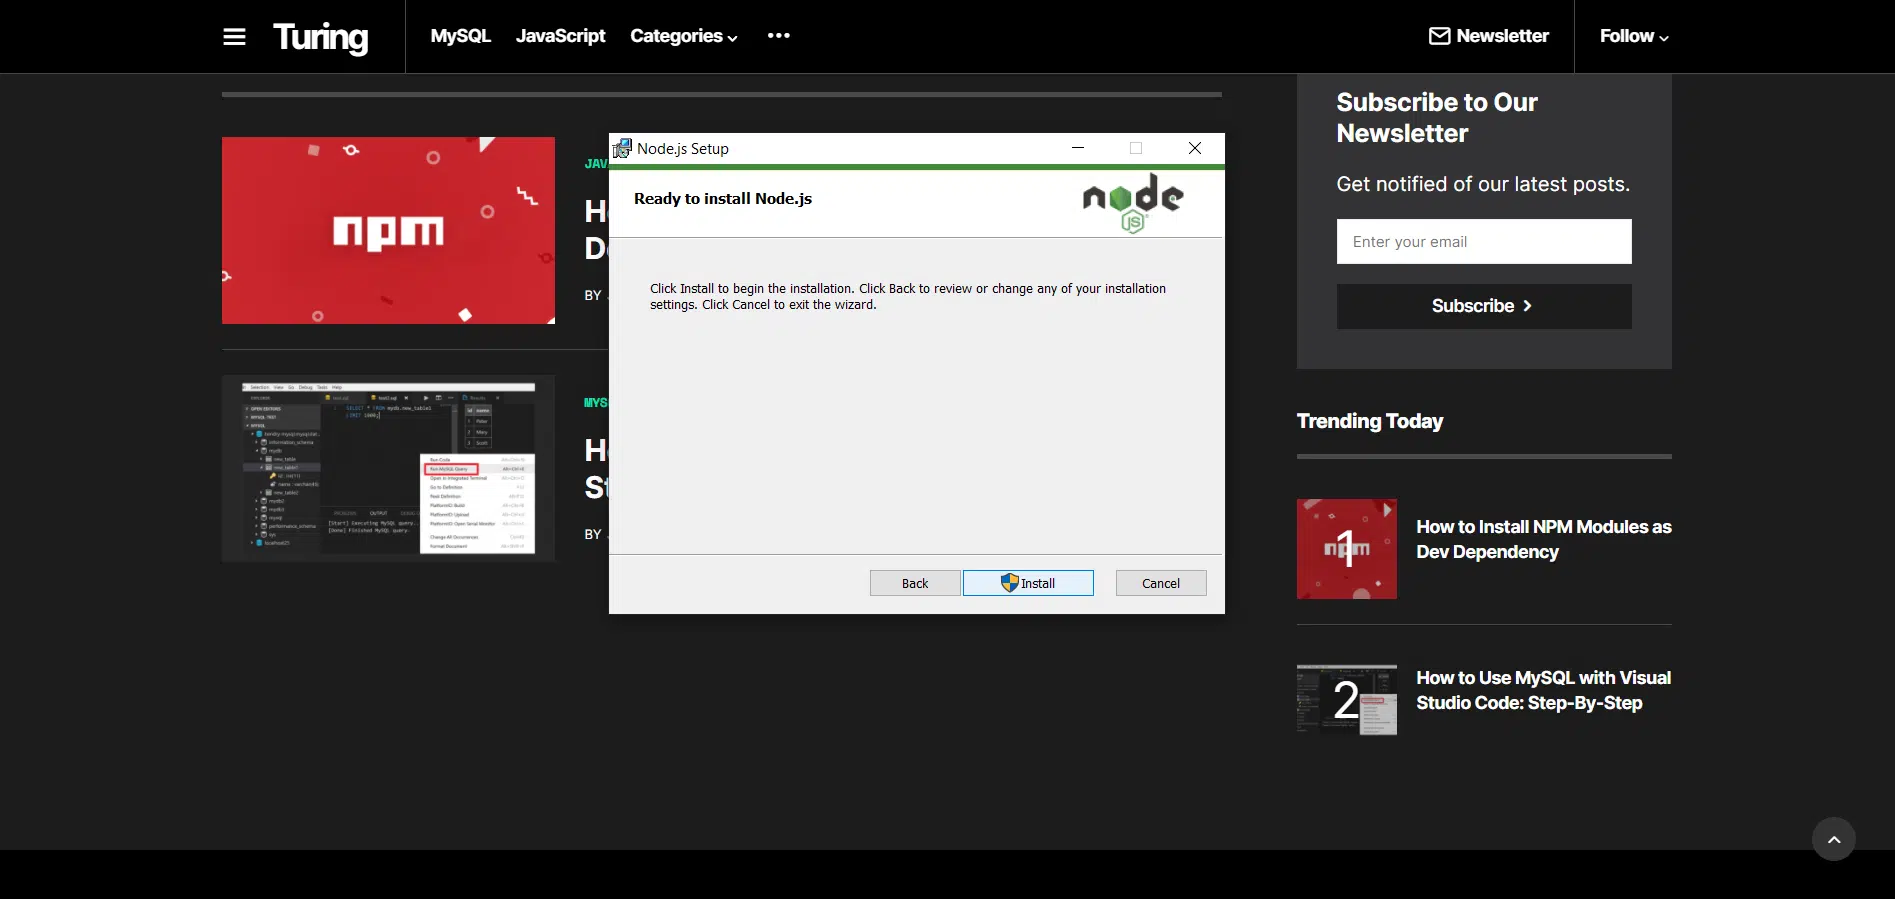
- Lastly, hit the Install button and Node.js and NPM will begin installing.
You will be shown the installation complete screen when you’re done. In the next step, we will just make sure to check our Node.js and NPM installation to see if it is indeed installed correctly.
To check if Node.js and NPM have been installed on your Windows PC, do the following:
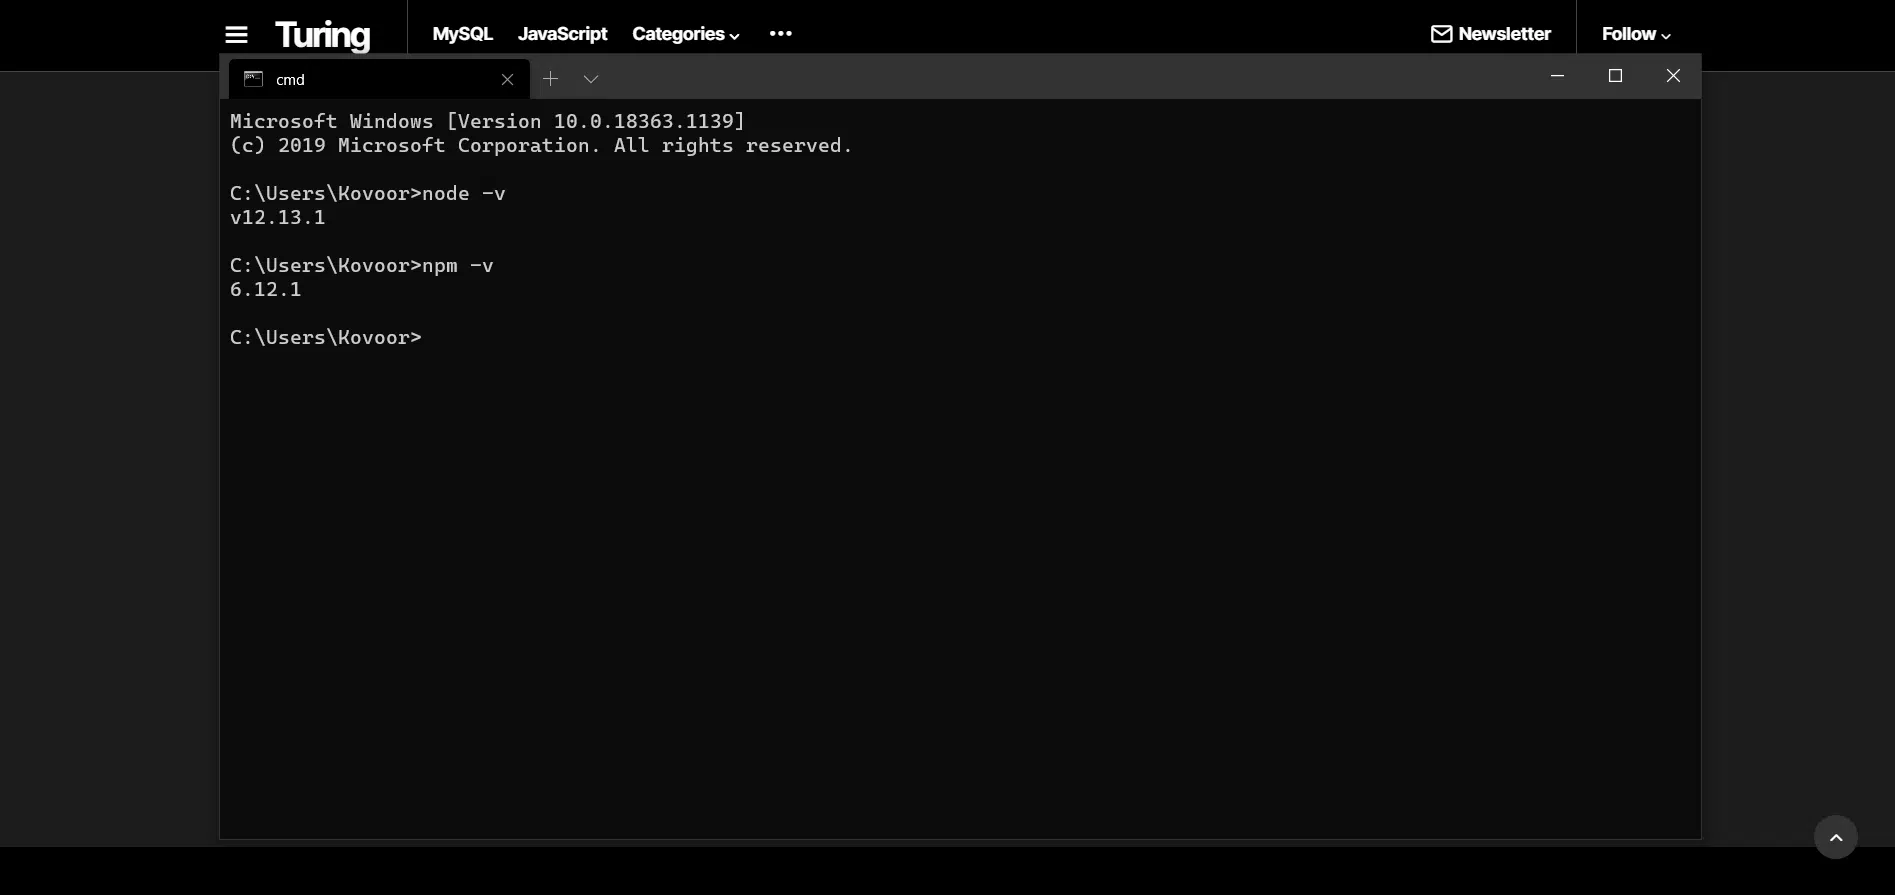
- Click on Start (bottom-left) and search for your Command Prompt.
- Next, type in
node -vinto the Command Prompt and hit Enter. This will show you the version of Node.js that is installed on your PC. If it does show you the version (as shown below), then Node.js is installed correctly. - To check NPM, simply type
npm -vinto the Command Prompt and hit Enter. This will show you the version of NPM that is installed on your PC. Again, if it does show, then that indicates that NPM is installed correctly.
Note
If you’re unable to see the version being outputted, then that means the installation had some issues. Please make sure to check that Node.js’ PATH variables on your Windows 10 PC were set up correctly. You may have to do this manually by going into your Windows settings. A user named wjohnsto has provided a great guide on how to do so. To quote:
You need to Add C:\Program Files\nodejs to your PATH environment variable. To do this follow these steps:
- Use the global Search Charm to search “Environment Variables”
- Click “Edit system environment variables”
- Click “Environment Variables” in the dialog.
- In the “System Variables” box, search for Path and edit it to include C:\Program Files\nodejs. Make sure it is separated from any other paths by a ;.
You will have to restart any currently-opened command prompts before it will take effect.
Once done, restart Command Prompt and try Steps 2-3 again. You can also try using the Windows Powershell (a similar tool just like Command Prompt) which is available on your Windows computer.
That’s it!
If you’re on Mac
There are a few ways to install Node.js and NPM on your Mac. In fact, you can just follow the steps as shown for Windows above if you prefer the more ‘manual’ way which is to install the installer and go through the setup wizard. However, we would like to provide you with a quicker shortcut which will install Node.JS and NPM in just the fraction of the time.
- We will be using the Node Version Manager (nvm) to install Node.js and NPM. Simply open your Terminal app and enter the following line of code (which will install NVM):
curl -o- https://raw.githubusercontent.com/creationix/nvm/v0.33.1/install.sh | bash
- Next, you will have to open the ~/.bash_profile and make sure that source ~/.bashrc is stated. This is just to confirm that NVM is installed. You don’t really have to check, but it’s just a practice. Restart your Terminal app.
- Now enter the following code to install Node.JS:
nvm install node
- Then to run Node.JS simply enter the following code:
nvm use node
- Voila! You’re done! Just three lines and no setup wizard needed. You should see the output as “Now using node v<your-latest-version> (npm v<your-latest-version>)”. Alternatively, you can also type, both
node -vandnpm -vto confirm your installation.
Now using node v8.2.0 (npm v5.3.0)
You’re done!
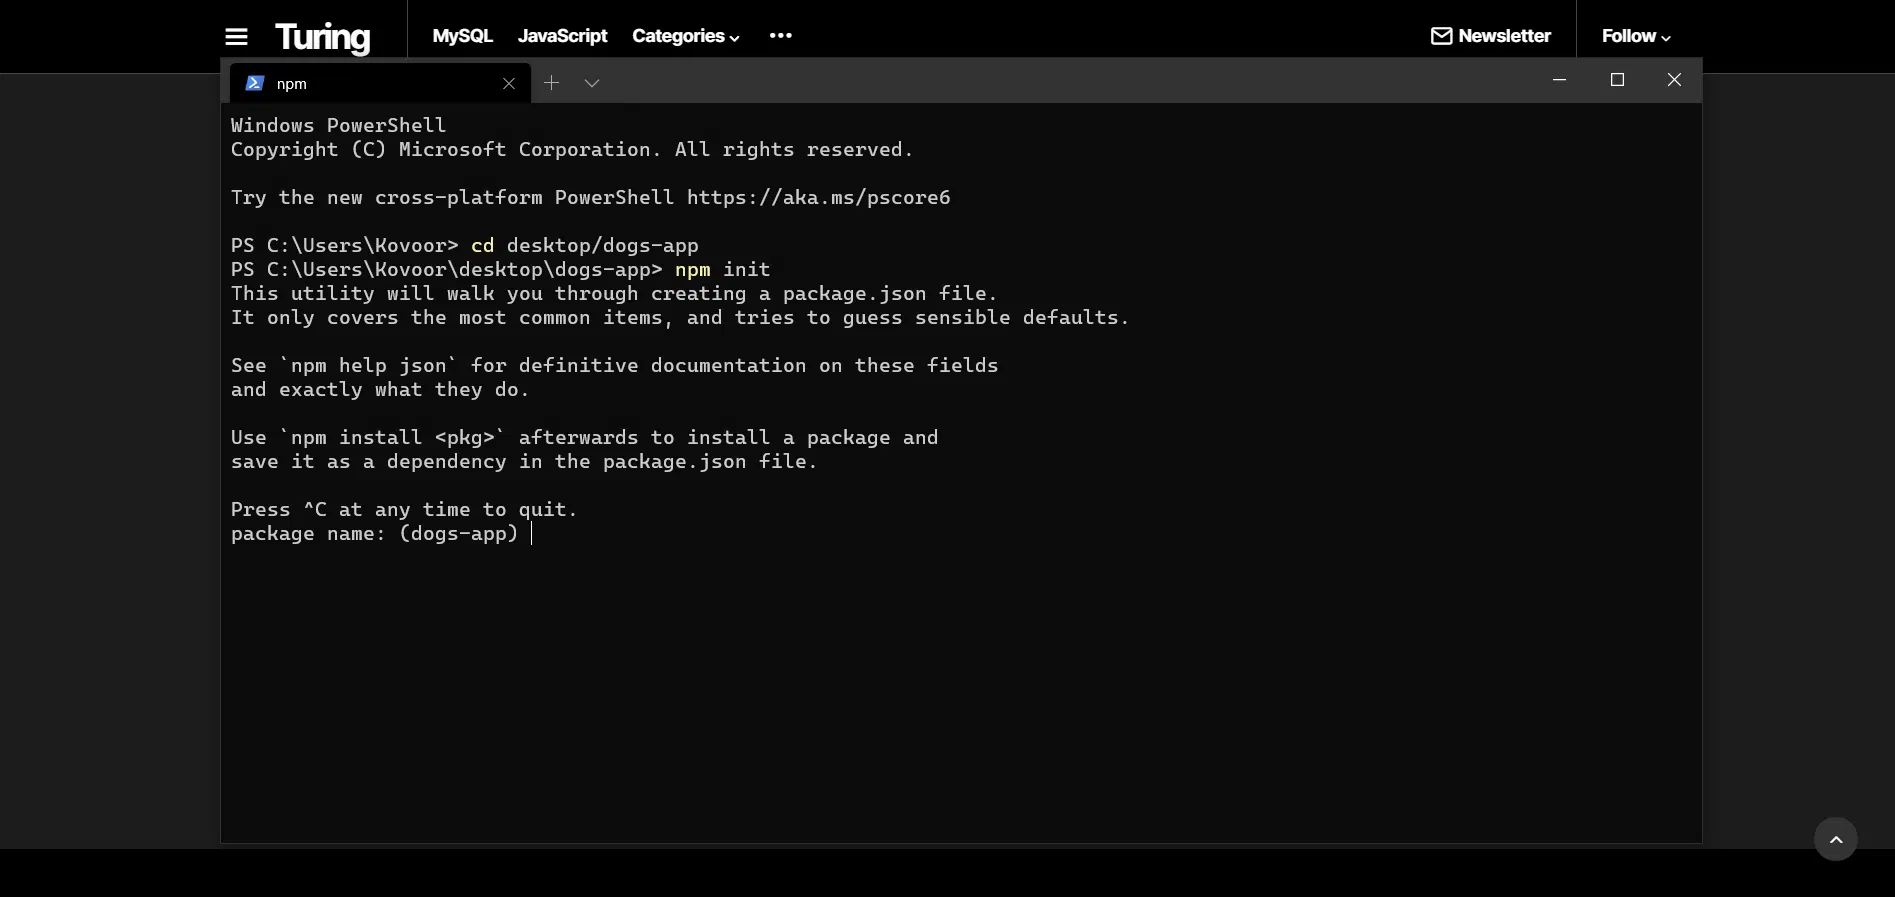
You can now use Node.JS and NPM for any web application projects that you want to create. Simply create a folder of your project, let’s just say I create a dogs-app in my desktop homepage. Open either the Command Prompt (Windows) or Terminal app (Mac), enter “cd desktop/dogs-app”.
Then all you have to do, and mind you this is done by everyone for all Node.JS projects using NPM everytime, is to initialize NPM as shown below. This only has to be done once when you create a project.
npm init
The initialization process will guide you through creating a package.json file which will create and manage all the NPM packages that you wish to install.
Every project using NPM has a package.json file, and it is meant to store metadata about the project as well as handle dependencies (refer to our previous post on explaining that).
Once you’re done with the initialization, you can open up the package.json file and see that is ready. You don’t have to code anything here, as this file is automatically updated when you install a new NPM module anytime (using npm install your-package-name, for examples refer to our guide here). You can, however, add shortcuts and much more, but we will leave that for another post 😉 (so be sure to be subscribed)
You’re done! That’s all there is to install Node.js and NPM on your Windows or Mac computer. You can now move on to install your NPM modules, manage their dependencies as well as do much more.
Happy coding!