

Installed the latest Node.js onto your Windows or Mac computer but finding it hard to update it to the latest version?
As we have shown you in our previous post, it’s pretty simple to install Node.js onto your Windows or Mac machine. However, especially if you’re just starting off with Node.js development, it can be a little confusing to wrap your head around on how to update Node.js to the latest version. The development team behind Node.js often releases updates every few weeks, which addresses security, stability and further improvements to make the Node.JS development experience better.
In this guide, we will show you the quickest and most reliable ways to update Node.js with step-by-step instructions. Whether you’re on a Windows PC or a macOS, the steps below will be applicable.
Let’s dive right in.
1. Update Node.js to Latest Version Using NVM (macOS/Linux)
The method which we use and recommend to is to use the Node Version Manager (NVM) to update Node.js to the latest version.
This is the most reliable method (as used by the folks over at NPM) to update Node.js since all you just need to do is fire off a single line of command and it will update your Node.js in seconds.
Here’s how you update Node.js to the latest version using NVM (step-by-step):
If you’re on macOS or Ubuntu Linux
- Firstly, let’s install nvm. I’ll be using a macOS in this case (with Git Bash). The commands should be applicable if you’re on a Linux OS too. To install nvm, simply enter the following command:
curl -o- https://raw.githubusercontent.com/creationix/nvm/v0.33.0/install.sh | bash
Note: You can check if NVM is installed by entering the following command:
nvm --version
- Finally, simply install the version of Node.js you want:
- To install the latest Node.js version, enter:
nvm install node - Use the latest version with
nvm use node - To install the latest LTS (Long-Term Support) version with
nvm install --lts - Use the latest LTS (Long-Term Support) version with
nvm use --lts
You’re done!
If you’re on Windows
- Since NVM is primarily for macOS and Linux only, we will be using Corey Butler’s NVM for Windows installer (Download the latest version) which is similar to the original nvm but made for Windows.
- Once you have download the nvm-setup.zip file, extract it and install.
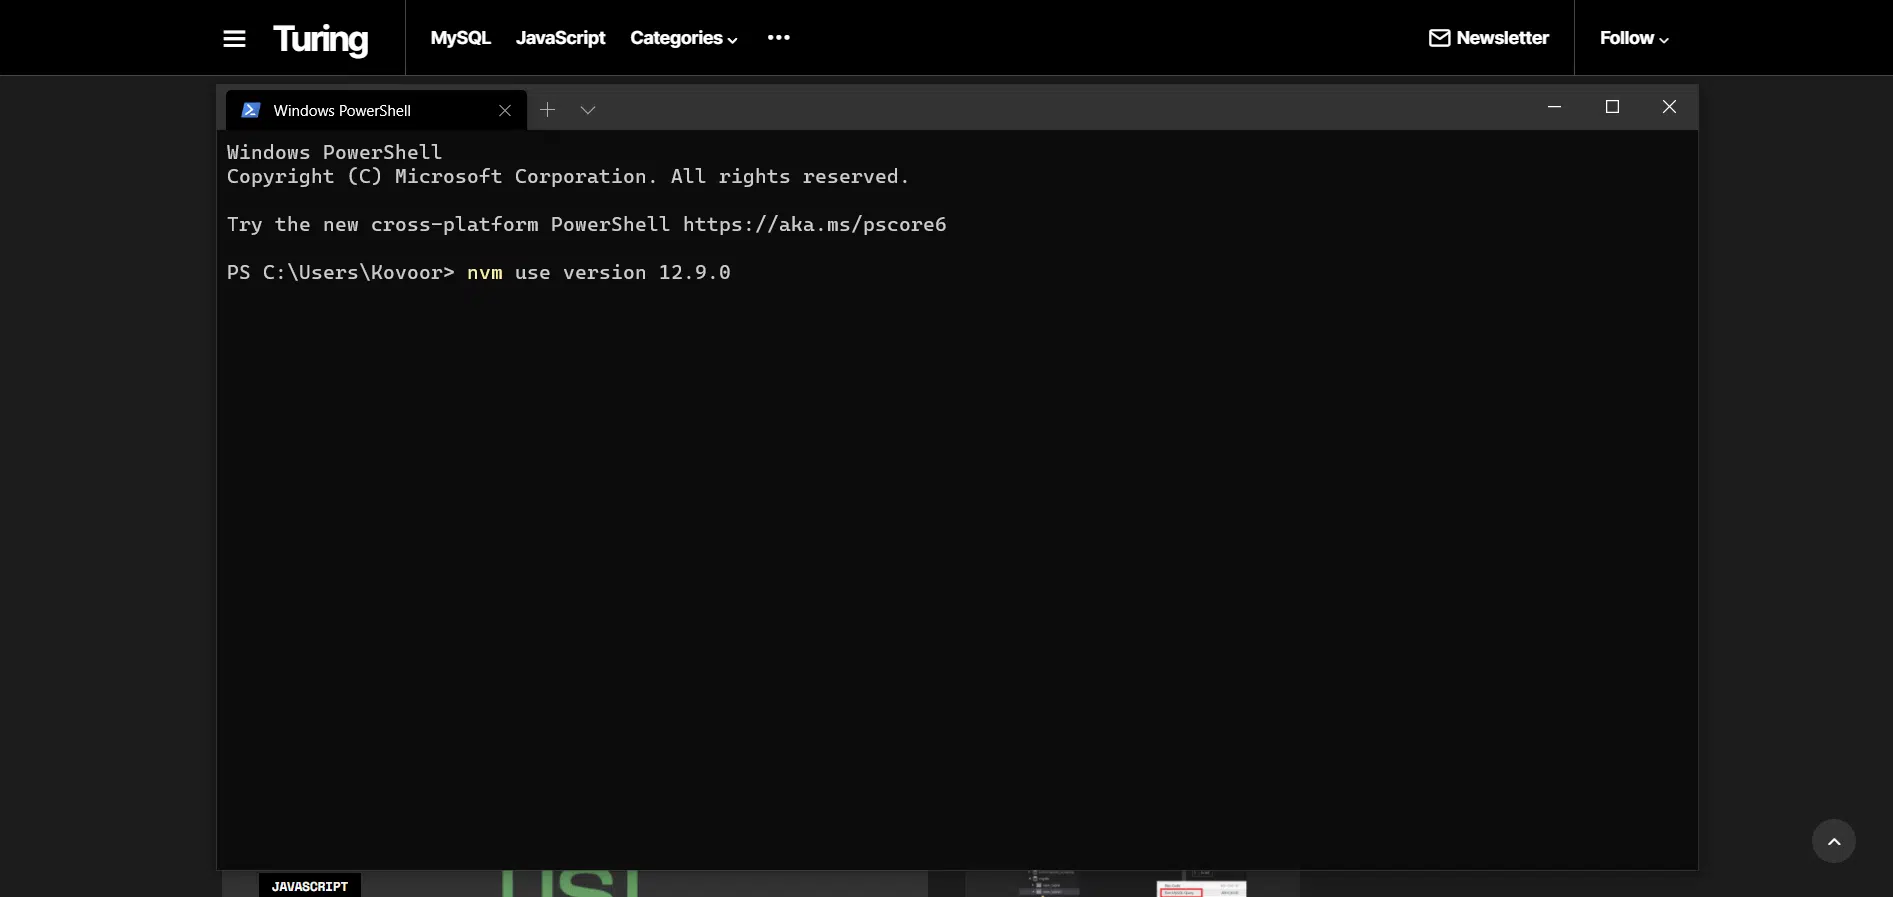
- Now everything can be handled via your Command Prompt (cmd), Git Bash or PowerShell or terminal of choice. Simply execute the below command
nvm list available. This will list all available version of Node for you (as shown below).
nvm list available
- To install the latest Node.js version, simply enter nvm install version (example: nvm install 12.9.0).
nvm install 12.9.0

- Lastly, enter the following command
nvm use version(example:nvm use version 12.9.0) to use the latest Node.js version you just installed.
nvm use version 12.9.0
There you go! In just a few seconds, you were able to update your Node.js. Now that you’ve installed NVM, you can simply update Node.js at any time via your terminal of choice with just two lines of commands (Steps 4 & 5 above) without needing to install anything else.
2. Using NPM to Update Node.js (Windows/macOS/Linux)
Alternatively, you can also use the Node Package Manager (NPM) to update Node.js to the latest version. Unlike NVM where you had to install it, NPM already comes preinstalled with your Node.js, so it is as easy as 1,2,3 when it comes to using it to update Node.js.
Here’s how you use NPM to update Node.js:
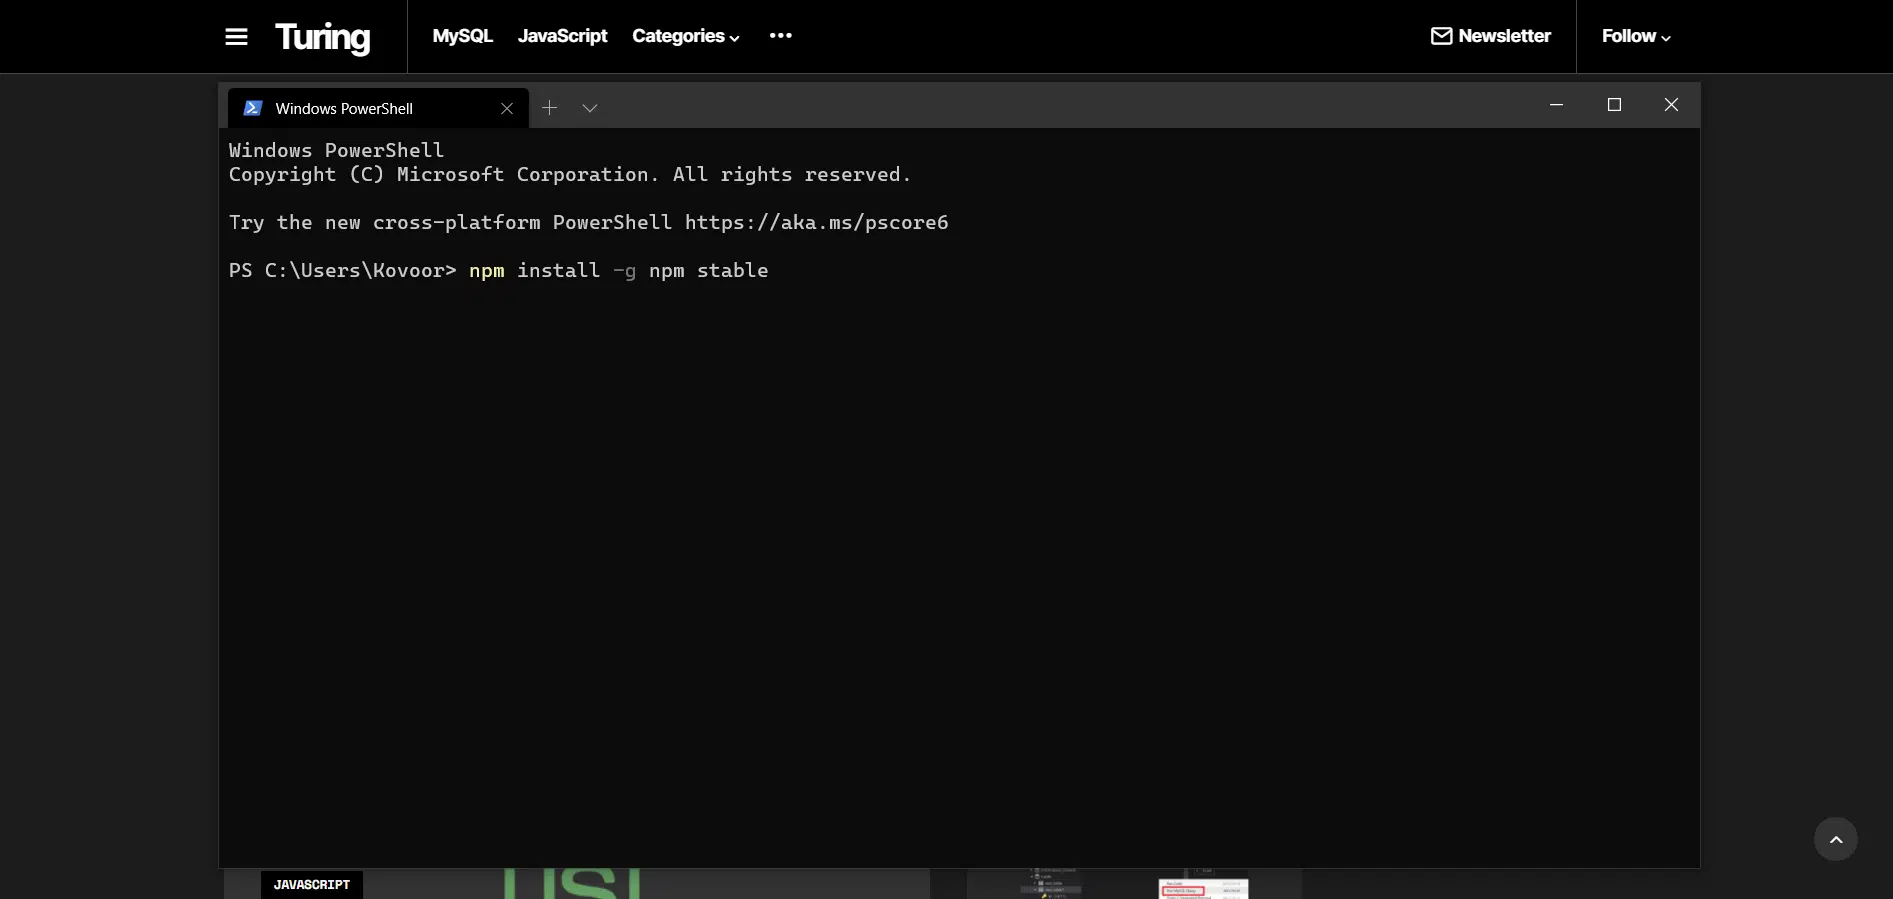
If you’re on Windows
- First, make sure to update the Node Package Manager (NPM) version you have to the latest version. You can do so by running the following command:
npm install -g npm stable
- Lastly, enter the following command to update Node.js to the latest version:
npm install -g node

Done. It’s as simple as that.
If you’re on macOS or Ubuntu Linux
For macOS and Ubuntu Linux users, we highly recommend that you use the n module, which does make version-management easy. This can be handy, especially if you want to update your Node.js again in the future. Unfortunately, this is not available for Windows users.
Here are the steps:
- To install the n module, simply enter the following command
sudo npm install n -g
- Next, once you’ve installed the n module, enter either one of the following commands to update the version of Node.js you would like:
For the latest stable version:
sudo n stable
For the latest version:
sudo n latest
Voila! That’s it.
3. Download Directly from Node.js (For All Platforms)
If you do not like having to enter commands into the Command Prompt (Windows) or Terminal (macOS/Linux) to update your Node.js, then you can always download the latest Node.js version directly from the Node JS official website.
This method is applicable for all platforms, and it is the most reliable way to begin, especially if you’re getting started as a beginner.
Here’s how you download and install the latest version of Node.js directly from the official Node.js website:
- Head over to the Node.js official website and just click on either the LTS (Long Term Support) download or the latest Current download. The site will automatically detect which operating system you’re on this way.
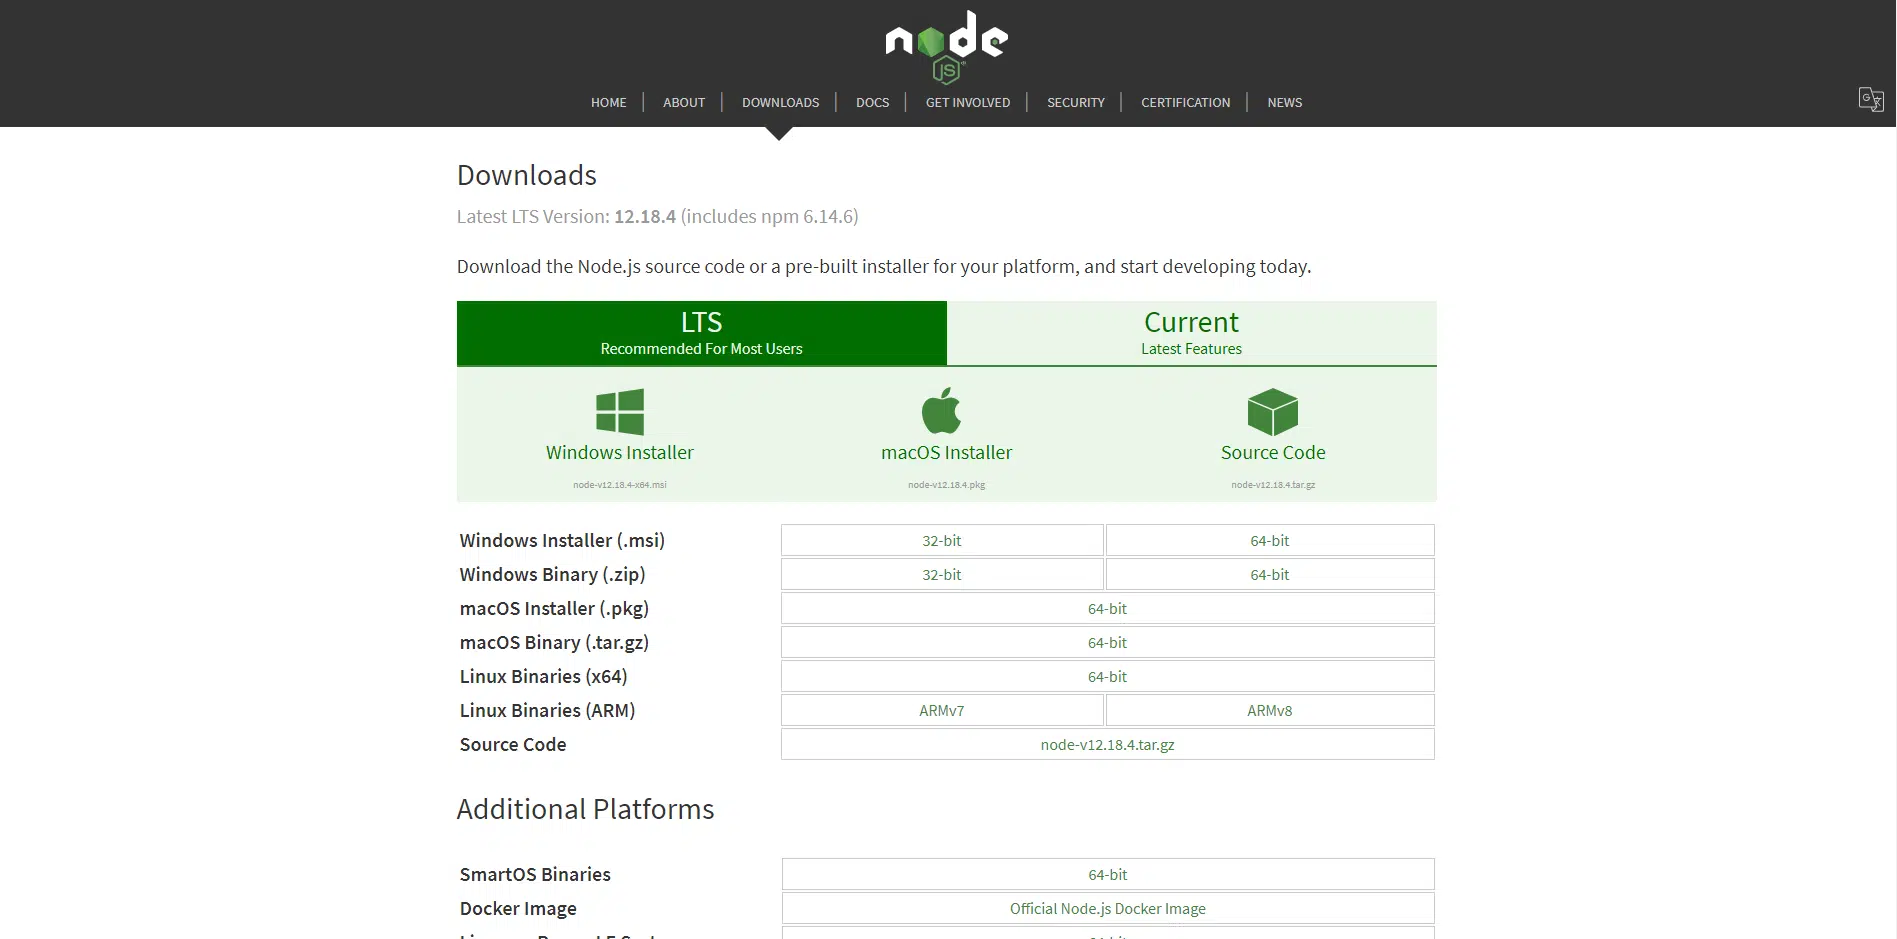
Alternatively, you can also just click on DOWNLOADS from the top menu too. If you do so, follow the next step to download Node.js for your operating system of choice.
- Depending on your operating system (Windows, macOS, Linux), you can install the LTS (Long Term Support) or the Current version of Node.js. You also have various options to install using .msi, .zip (binary), Linux binaries, or even the source code itself.
Note: If you’re using Docker, then you will want to install the Docker Image (Official Node.js Docker Image).
- Proceed with the on-screen instructions provided by the installation wizard to complete the installation. It should just be a few clicks of the ‘Next‘ button anyways.
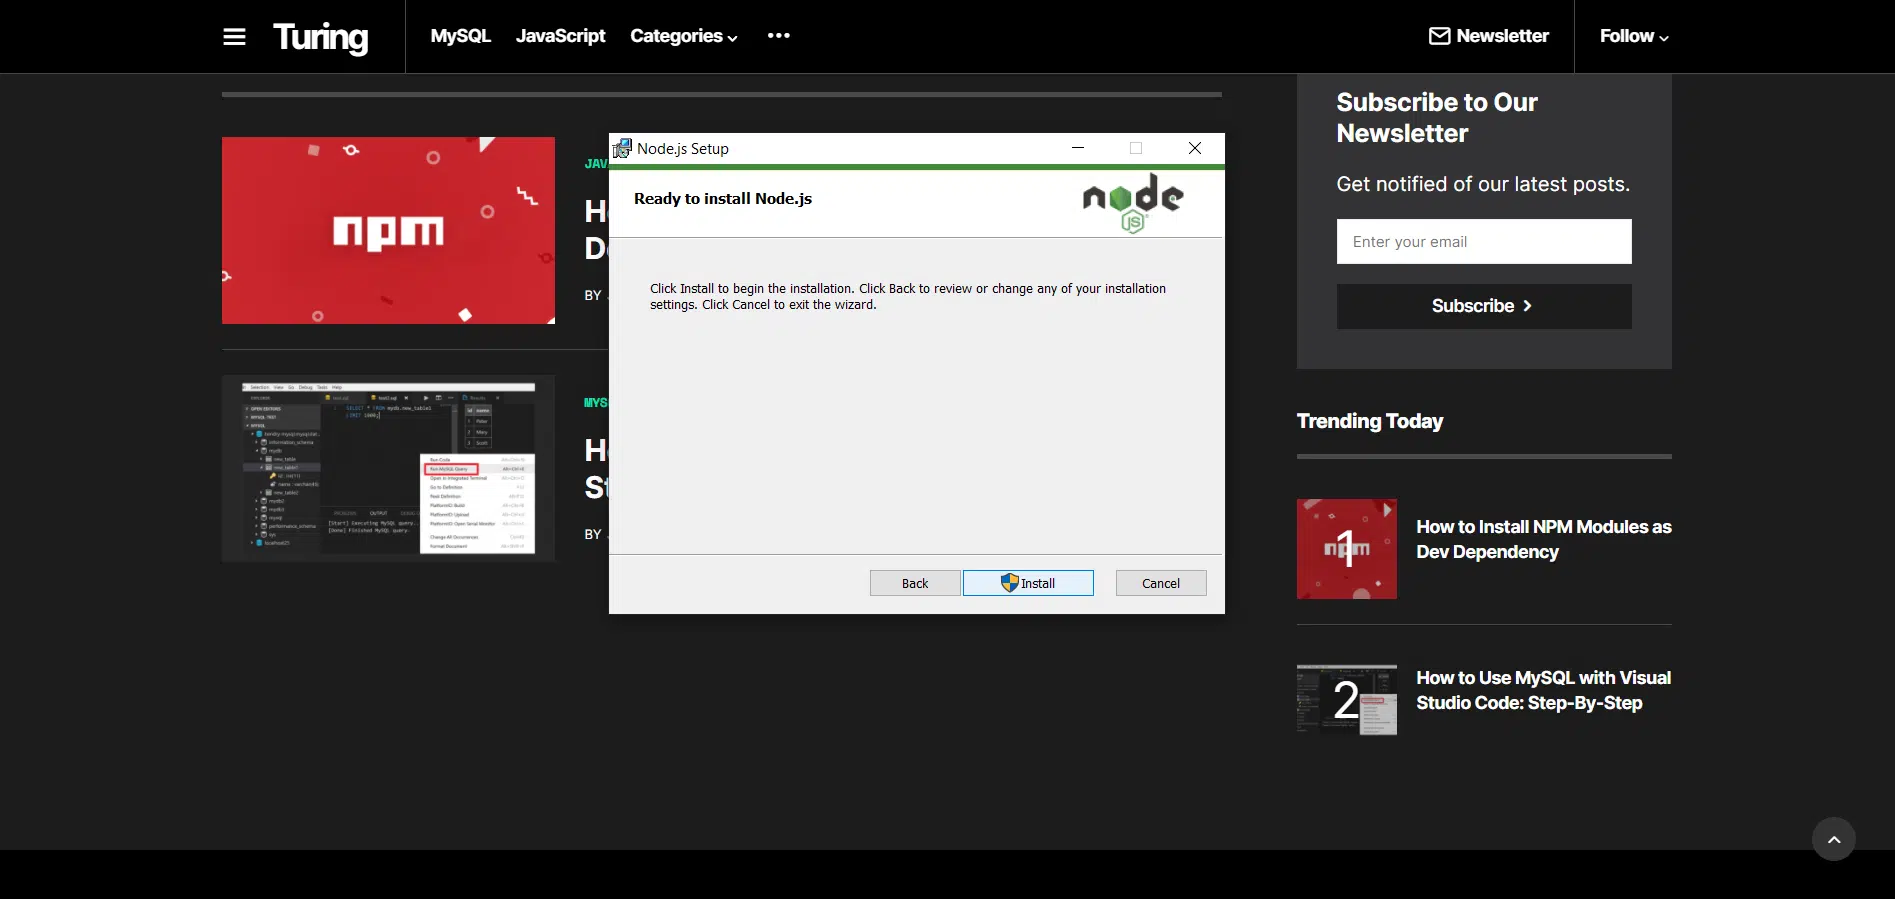
Voila! You have the latest Node.js version running on your Windows / macOS / Linux machine.
Few Tips
- To check your Node version use
npm versionornode --versioninto your terminal of choice (Command Prompt, Terminal, Git Bash, etc.) - Keep an eye on the Node.js blog which provides updates on any vulnerabilities, so you don’t miss important security releases related to Node.js.
- Lastly, if you didn’t know, every Node.js installation includes npm (Node package manager). So you do not have to look to install npm separately.
There you go. Hopefully, you’ve found the above steps useful to update Node.js to the latest version on your Windows / macOS / Linux computer. If you have any questions, feels free to let us know down below, and we will try our best to assist. 🙂
Happy coding!