
Wondering how to install PIP for Python on your Windows, macOS or Linux-running machine?
pip is the standard package manager for Python. It allows you to install and manage additional packages that are not part of the Python standard library.
Developers would use such packages to reuse a functionality or achieve something with code to solve a problem without having to reinvent the wheel with every project. These packages are often pre-written by other developers that had faced similar scenarios and are collected and stored in a central repository called the Python Package Index (PyPI).
Using pip will make the hassle of having to download, install and manage these packages seem seamless as it all can be done with a simple single line of command.
In this guide, we will show you how to properly install Pip on your Windows, macOS or Linux-running computer with step-by-step instructions. This way, you can get started with your project with Pip and make use of the tons of useful packages that will both speed up the time to meet your goal with your project as well as help resolve any challenges you may have encountered too.
Let’s dive right in.
Is PIP Installed When I Had Installed Python?
PIP only comes installed by default with Python, only if you are currently using Python 2.7.8 (or greater) or if you’re using Python 3.4 (or greater).
If you’re using an older version of Python, then you will have to either update your Python to a newer version to get PIP installed by default with the newer Python version or install PIP by using the steps below which will install it manually.
If you’re unsure about which Python version you’re using on your computer, feel free to use your complete, step-by-step guide here on how to check Python version on Windows, macOS or Linux-based machines.
Also take note that if you’re using Python using virtual environments created with virtualenv or pyenv, then PIP comes preinstalled regardless of which Python version you’re using.
How to Install PIP on Windows
If you’re on a Windows 10, Windows 8.1 or even Windows 7, you can install PIP using the steps below:
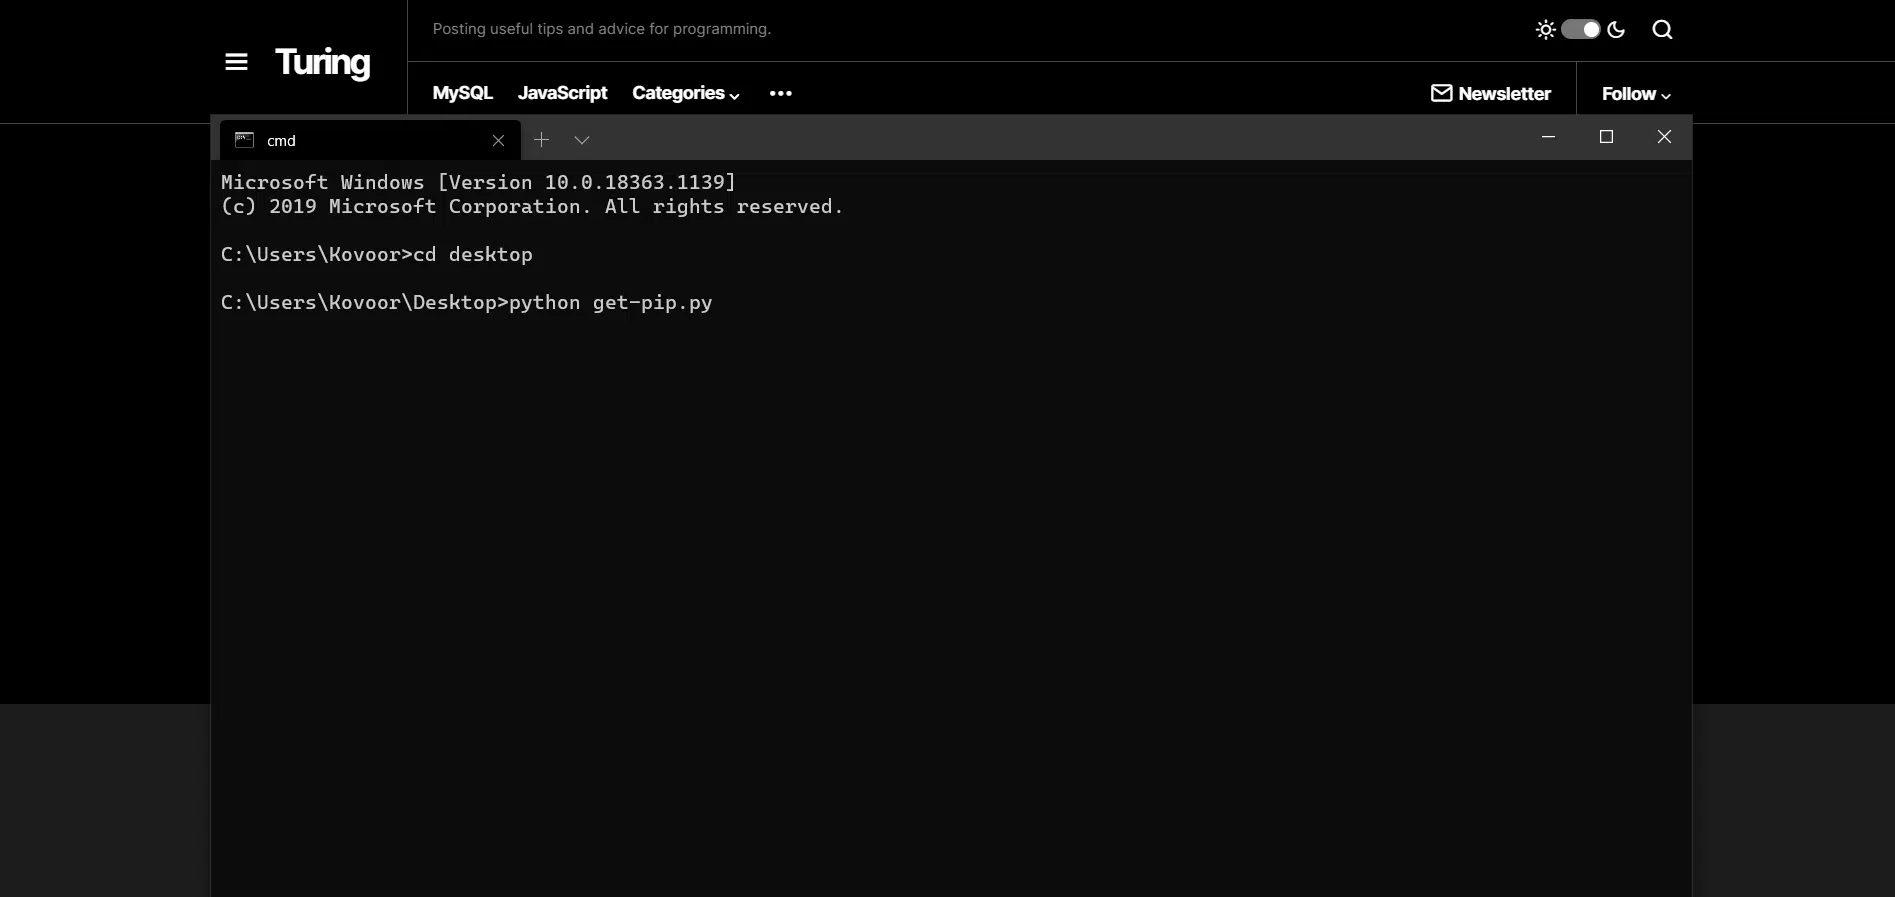
- Go ahead and download the get-pip.py installer script first (you can right-click on the page and then Save As… with the name get-pip.py). Take note of the file extension as it should be ending in .py. If you’re on Python 3.2, then you will need to download the get-pip.py installer script from here instead. We recommend having the script installed temporarily on your desktop homepage for ease of accessing in Step 2.
- Next, open up your Command Prompt and then cd into Desktop if you haven’t (as shown below) so that you’re in the same directory as the get-pip.py file as you had installed in Step 1. If you’ve installed the get-pip.py anywhere else on your PC such as your Downloads folder, then you will have to cd into there instead.
- Finally, run the command
python get-pip.pywhich will install PIP using the script file.
That’s about it! You can test by checking if pip is installed by entering the following command:
pip help
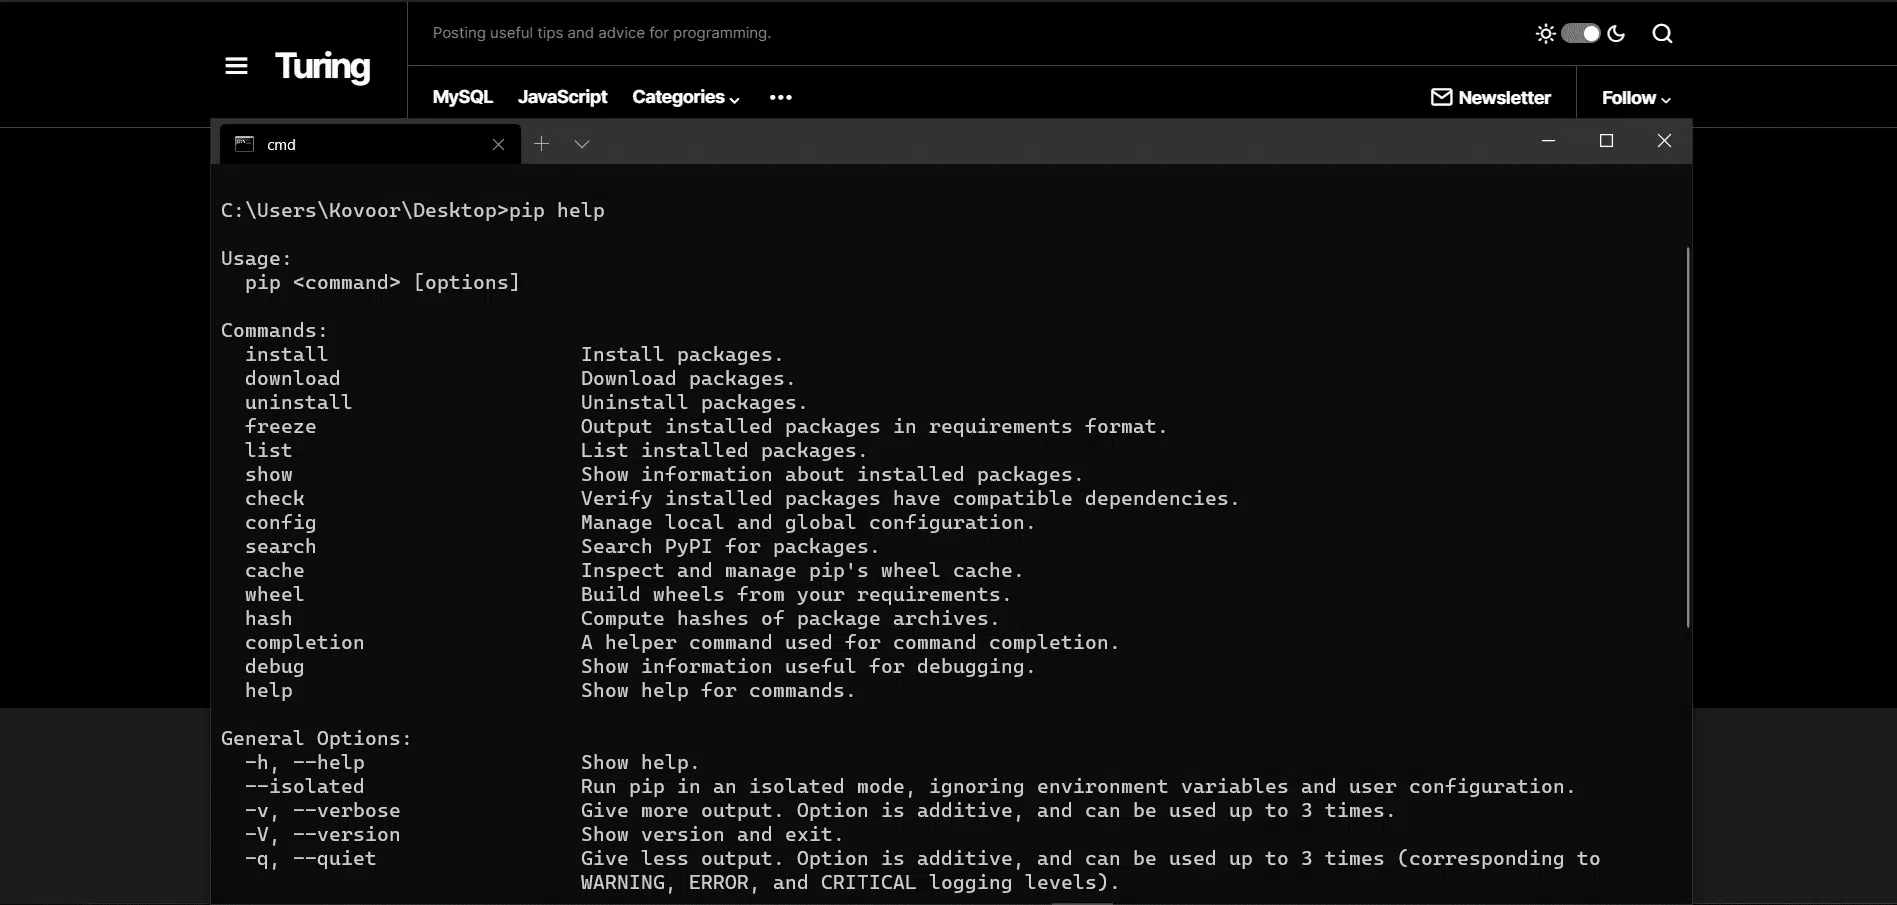
If PIP responds, then that’s a good sign that PIP is installed correctly. You should not be seeing any error messages on the screen saying that ‘pip’ command cannot be found.
pip 20.1.1 from c:\users\administrator\appdata\local\programs\python\python38-32\lib\site-packages\pip (python 3.8)
If however, you do receive an error, then simply repeat the steps above and test again.
How To Install PIP On Mac (macOS)
If you’re using the native Python installation (the one that comes without PIP together), then you can do the following to install PIP on your Mac.
Here’s how you install PIP on Mac, step-by-step:
- Open up your Terminal application. You can do so by using Spotlight Search (Command + Space Bar) and then search for the Terminal app.
- Next, enter the following command to install PIP onto your Mac:
sudo easy_install pip
That’s it! Again it’s important to check that you have successfully installed PIP onto your computer. You can check that PIP is installed correctly by running the below command on your Mac:
pip help
If PIP responds, then that’s a good sign that PIP is installed correctly. You should not be seeing any error messages on the screen saying that ‘pip’ command cannot be found.
However, in the event you do receive an error, then simply repeat the steps above and test again.
How To Install PIP On Linux
If you’re coming from a Linux-based machine which has Python already installed, then you can simply install PIP using your system’s package manager. We will list the commands below based on the different package manager tools available so that you can pick and choose which one works for you based on the package manager you have installed on your computer.
Here’s how you can install PIP on your Linux-machine:
If you’re using Advanced Package Tool (apt)
- Firstly check the version of Python that is already installed on your computer. This is crucial as the commands to install PIP using the Advanced Package Tool varies depending on the Python version you’re on! Once you’ve checked here are the commands to enter into your terminal:
If you’re using Python 2.x, then enter:
sudo apt-get install python-pip
If you’re using Python 3.x, then enter:
sudo apt-get install python3-pip
- Test to see if the PIP is installed correctly by running
pip help
If you’re using Advanced Package Tool (apt)
- Similar to using the Advanced Package Tool (apt) above, the commands to install PIP using pacman package manager varies depending on the Python version you’re on!
So if you’re on Python 2.x, then you have to enter:
sudo pacman -S python2-pip
Whereas, if you’re on Python 3.x:
sudo pacman -S python-pip
- Lastly, test using the following command to see if PIP works:
pip help
If you’re using Yum Package Manager
- Again, check the Python version you already have installed and enter the following commands based on the Python version you’re on to install PIP using the Yum package manager.
For Python 2.x, enter:
sudo yum upgrade python-setuptools
sudo yum install python-pip python-wheel
For Python 3.x, enter:
sudo yum install python3 python3-wheel
- Test using the following command to see if PIP is installed correctly and works:
pip help
If you’re using Zypper Package Manager
- Again, check the Python version you already have installed and enter the following commands based on the Python version you’re on to install PIP using the Zypper package manager.
For Python 2.x, enter:
sudo zypper install python-pip python-setuptools python-wheel
For Python 3.x, enter:
sudo zypper install python3-pip python3-setuptools python3-wheel
- Test your PIP installation by running the below command to see if PIP is installed correctly and works:
pip help
Helpful Tips
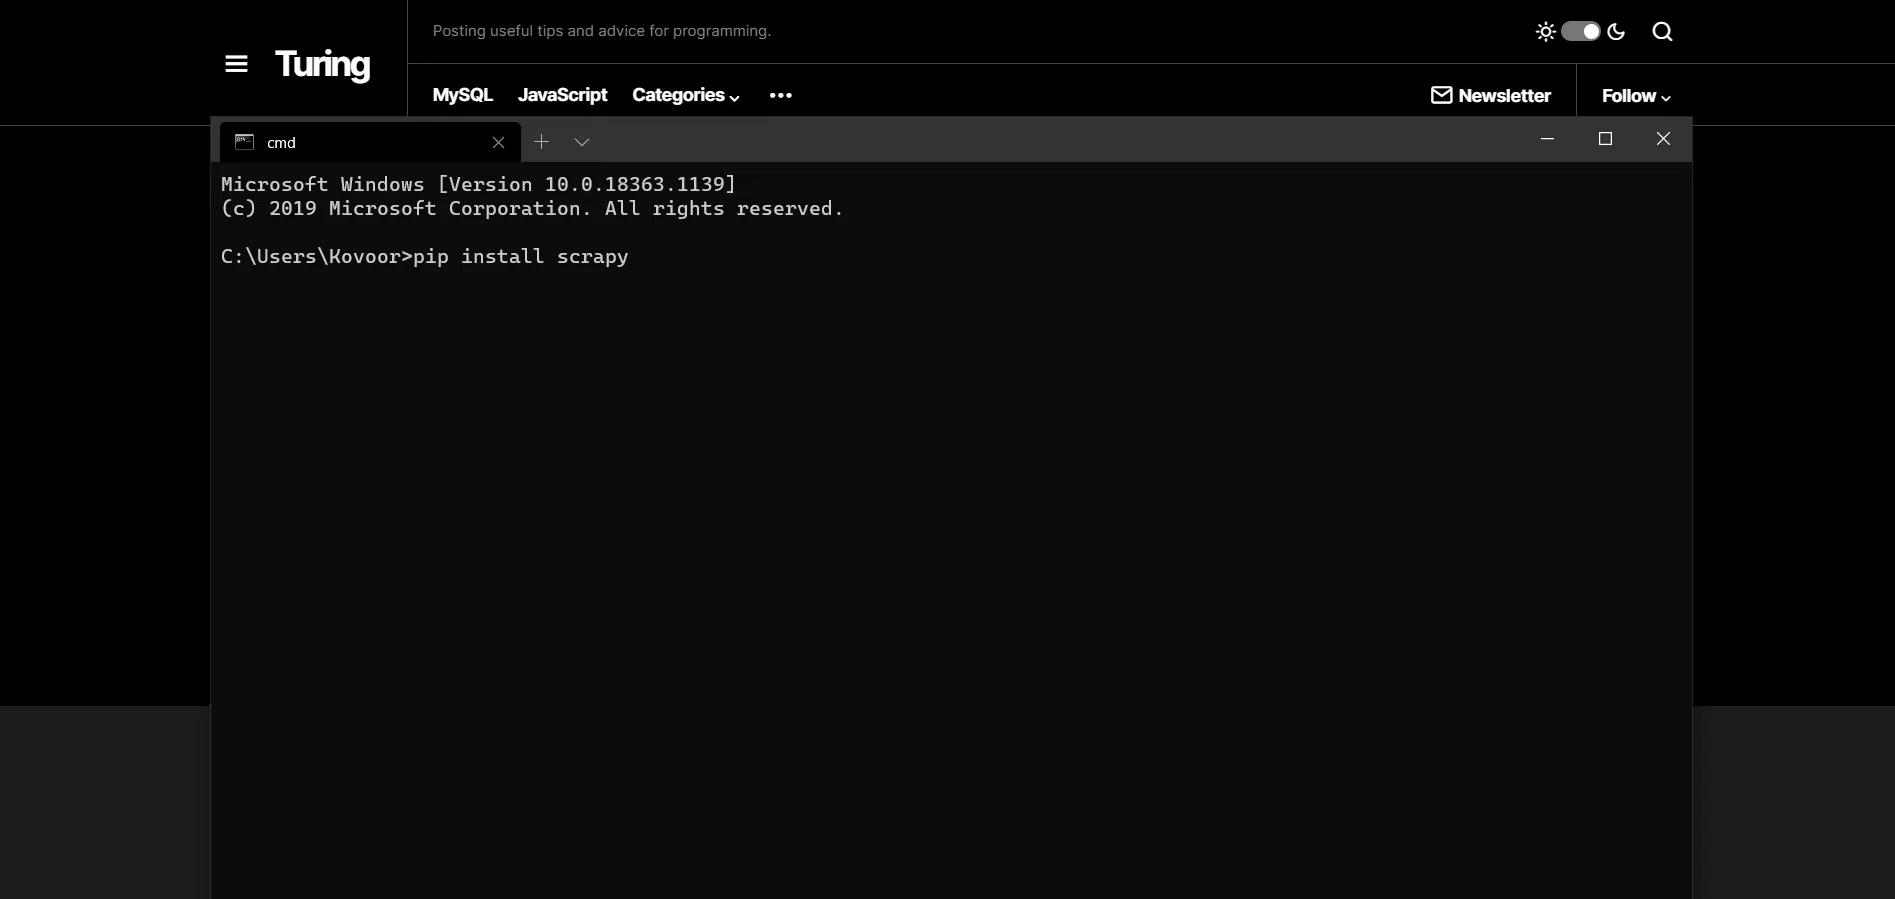
Once you have PIP installed, you can install any Python packages you want from the PyPI central repository, by entering the following command:
pip install package-name
You can also a specific version of a package instead of the latest version:
pip install package-name==1.0.0
Another super useful If you wish to upgrade any of your outdated packages (pretty useful) is to do as follows:
pip list --outdated
pip install package-name --upgrade
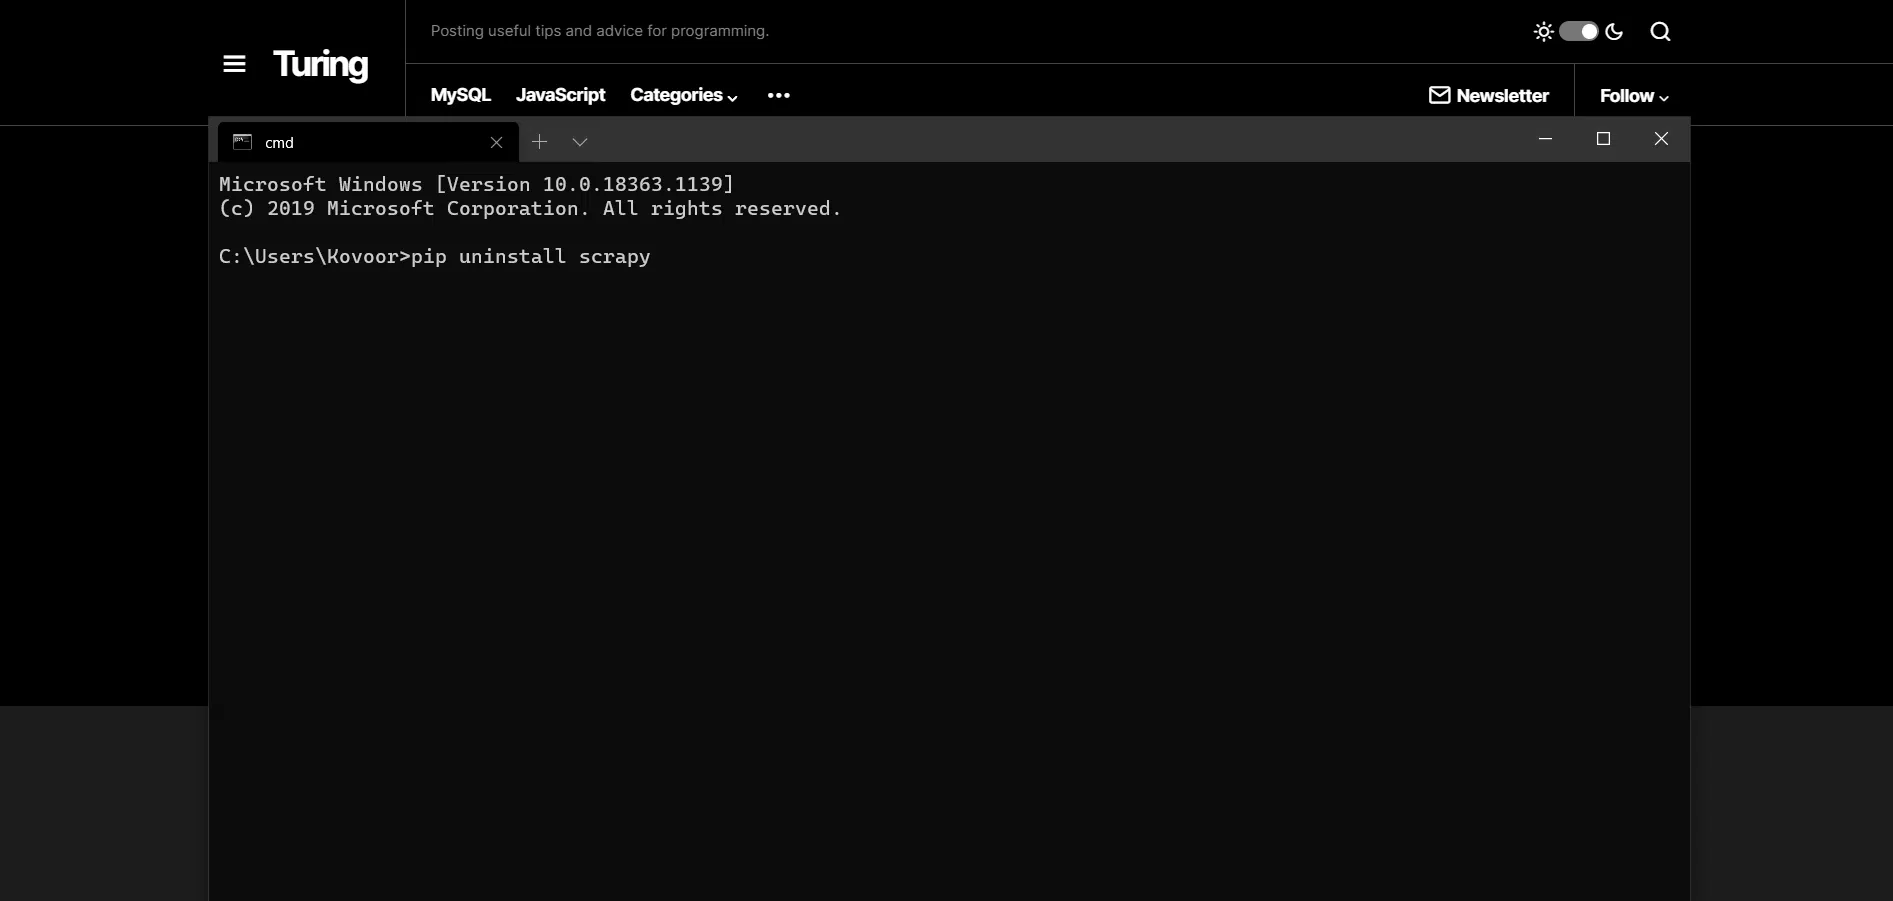
Lastly, to get rid of a package which you may have accidentally installed or just wanted to test, you can enter the following command:
pip uninstall package-name
There you go. Along with the above most used helpful commands for managing your packages with PIP, you can now use your newly installed PIP to get out more from your Python projects whilst also without having to reinvent the wheel for most functionality. Learning and utilizing PIP is one of the most crucial and most powerful skills you can have in your arsenal as a Python developer.
Hopefully, you’ve found the above steps useful to install PIP on your Windows, macOS or Linux computer. If you have any questions, feel free to let us know down below, and we will try our best to assist. 🙂
And as always, happy coding!