


Are you trying to create a virtual environment for your next Python project, but your pipenv shell is not working?
In this article, we’ll learn what a virtual environment is and how to create it in Python using the pipenv command. Furthermore, we’ll fix the pipenv shell not working error to create a virtual environment in Python correctly, so keep reading. 😊
Table of Contents
What is Pipenv?
Pipenv is a command to create and manage a virtual environment for your Python projects. It also helps add and remove packages from your pipfile when installing and uninstalling packages. The combination of package management and virtual environment control into a single tool makes pipenv a fantastic tool for developers and data scientists.
Combining virtual environment control and package management into one tool helps install, track, remove and document your virtual dependencies to create, manage, and use your virtual environment. Furthermore, pipenv manages dependencies on a project basis. Hence, it’s best to use pipenv within your project directory.
Now you know about pipenv, let’s move to the installation part.
How to Install Pipenv?
Pipenv is available for almost every primary operating system (OS) like Windows, macOS, Linux, Debian, etc. And it is mandatory to download and install that specific version for your OS.
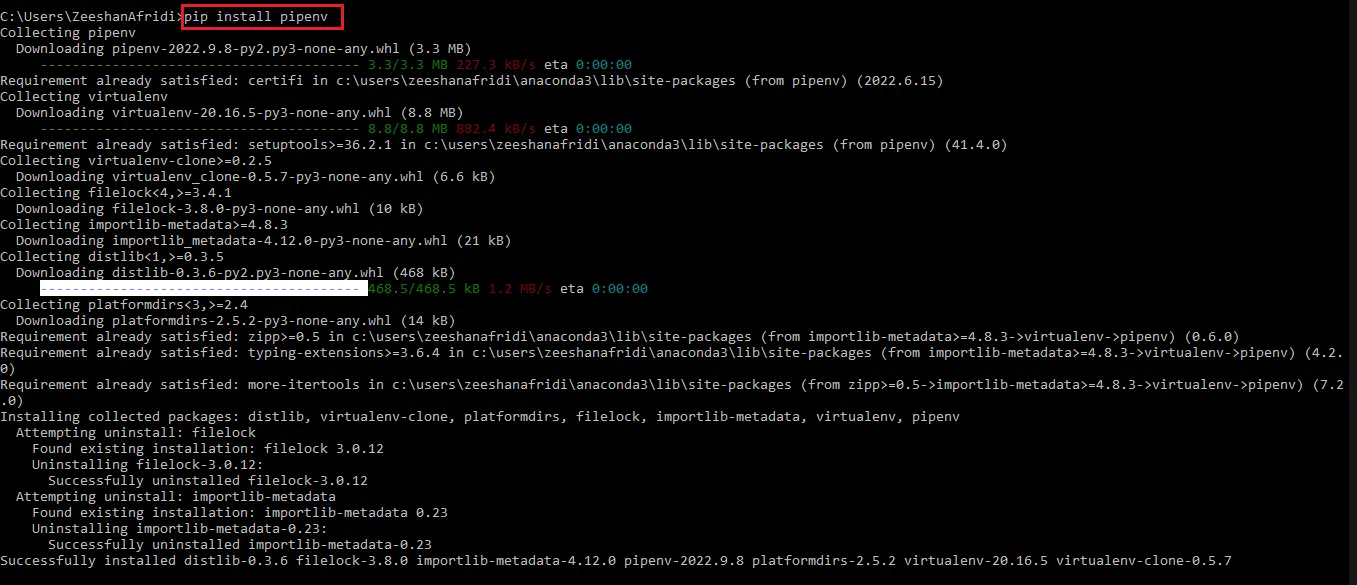
You cannot straight away use pipenv in your Command Line Interface (CLI). Instead, you have to install it first using the pip command. Otherwise, you will face an error message like ‘pipenv’ is not recognized as an internal or external command.
pip install pipenv

Output

The above command is used explicitly for Windows OS, but there are different versions for different operating systems. Let’s look at each one by one.
For Debian Buster+, you can use this command:
sudo apt install pipenv
Or, if you’re using Fedora, you follow this command:
sudo dnf install pipenv
Or, if you’re using FreeBSD:
pkg install py39-pipenv
Or, for Gentoo, you use this:
sudo emerge pipenv
Or, if you’re using Void Linux, you should follow this command:
sudo xbps-install -S python3-pipenv
Great! You have successfully installed pipenv, and now we can easily create your virtual environment.
How to Create Virtual Environment Using the Pipenv Shell Command?
Creating a virtual environment for your Python project is easy when your pipenv command is successfully installed and runnable. In our case, we’ve just installed it so we can create a virtual environment using pipenv shell command.
To follow along, go to your command line interface (CLI) or Terminal and run the below command to create a virtual environment:
pipenv shell

Output
You can see that the above command has successfully created a virtual environment for us.
Whenever you begin a Python project with pipenv, the tool automatically creates a virtual environment, piprfile.lock, and a pipfile for the project. The new virtual environment is named the project directory, where the environment is initialized. The project dependencies and packages are stored in the pipfile, which is required to run the project’s code.
How to Fix Pipenv Shell Not Working?
Suppose you are trying to activate a virtual environment for your Python project, and the pipenv shell doesn’t start. On top of that, if the above solution has not worked for you, then you can follow these alternative solutions to fix pipenv:
- To fix the pipenv shell, you should uninstall it by entering the terminal, pip uninstall pipenv, and reinstall it by entering pip install pipenv.
- If pipenv still isn’t working for you, you can use virtualenv. Still, you must install it using the pip install virtualenv command, then use virtualenv -p python3 your_env_name; remember to replace your environment name with env_name.
I hope these solutions help you create a virtual environment for your next Python project.
Conclusion
To summarize this article on how to fix the pipenv shell not working, we have learned what a virtual environment is and how to install the pipenv into your local machine on different operating systems. Additionally, we have seen two alternative options to use while fixing the pipenv shell not working.
Here is a quick recap of the topics we have covered in this article
- What is pipenv?
- How to install pipenv?
- How to Create Virtual Environment using the pipenv shell command?
- How to fix the pipenv shell not working?
A quick question, can we use pipenv in your Azure pipeline steps to install dependencies.