


Wondering how to setup, create, run or test a Jenkins CI/CD pipeline locally on your machine?
In the world of Software and DevOps engineering, custom Continuous Integration and Continuous Development (CI/CD) pipelines play an integral role in the entire DevOps philosophy. With a CI/CD pipeline, the manual and tedious work that ensues when building, testing, and deploying your project to a remote server are all done automatically and handled by the pipeline, typically written in code. As such, it saves teams time and reduces human error!
Jenkins is one of the most popular CI/CD servers used today by enterprises. Even better, it is free to use as it is FOSS! So, in this article, we’ll be detailing how to run a Jenkins pipeline locally on your dev system in 4 simple steps so that you can get hands-on experience with how Jenkins and its CI/CD pipeline work. Specifically, we’ll be going through the installation and setup process and how to write your first pipeline. After that, you can decide whether or not you want it in your projects or at work!
Sounds good? Let’s get started.
Table of Contents
Prerequisites
Jenkins is made using the Java programming language, which means it can run on various operating systems that support the Java Virtual Machine (JVM). However, for this tutorial, we will detail how to install and set it up on the two most widely used OSes: Windows and macOS.
For Windows, it’s important to note the following system requirements:
- 256 MB of RAM
- 1 GB of drive space (although 10 GB is a recommended minimum if running Jenkins as a Docker container
As for the Java version required, it is recommended that Java 11 is installed on your computer.
After that, the steps for both OSes are largely the same, so we’ll split each step into each OS’s respective portions.
Step 1: Download Jenkins
For this tutorial, we’ll install the LTS version of Jenkins since it’s more stable.
Windows
First, we’ll need to download Jenkins’ Generic Java Package or .war from the official download page.
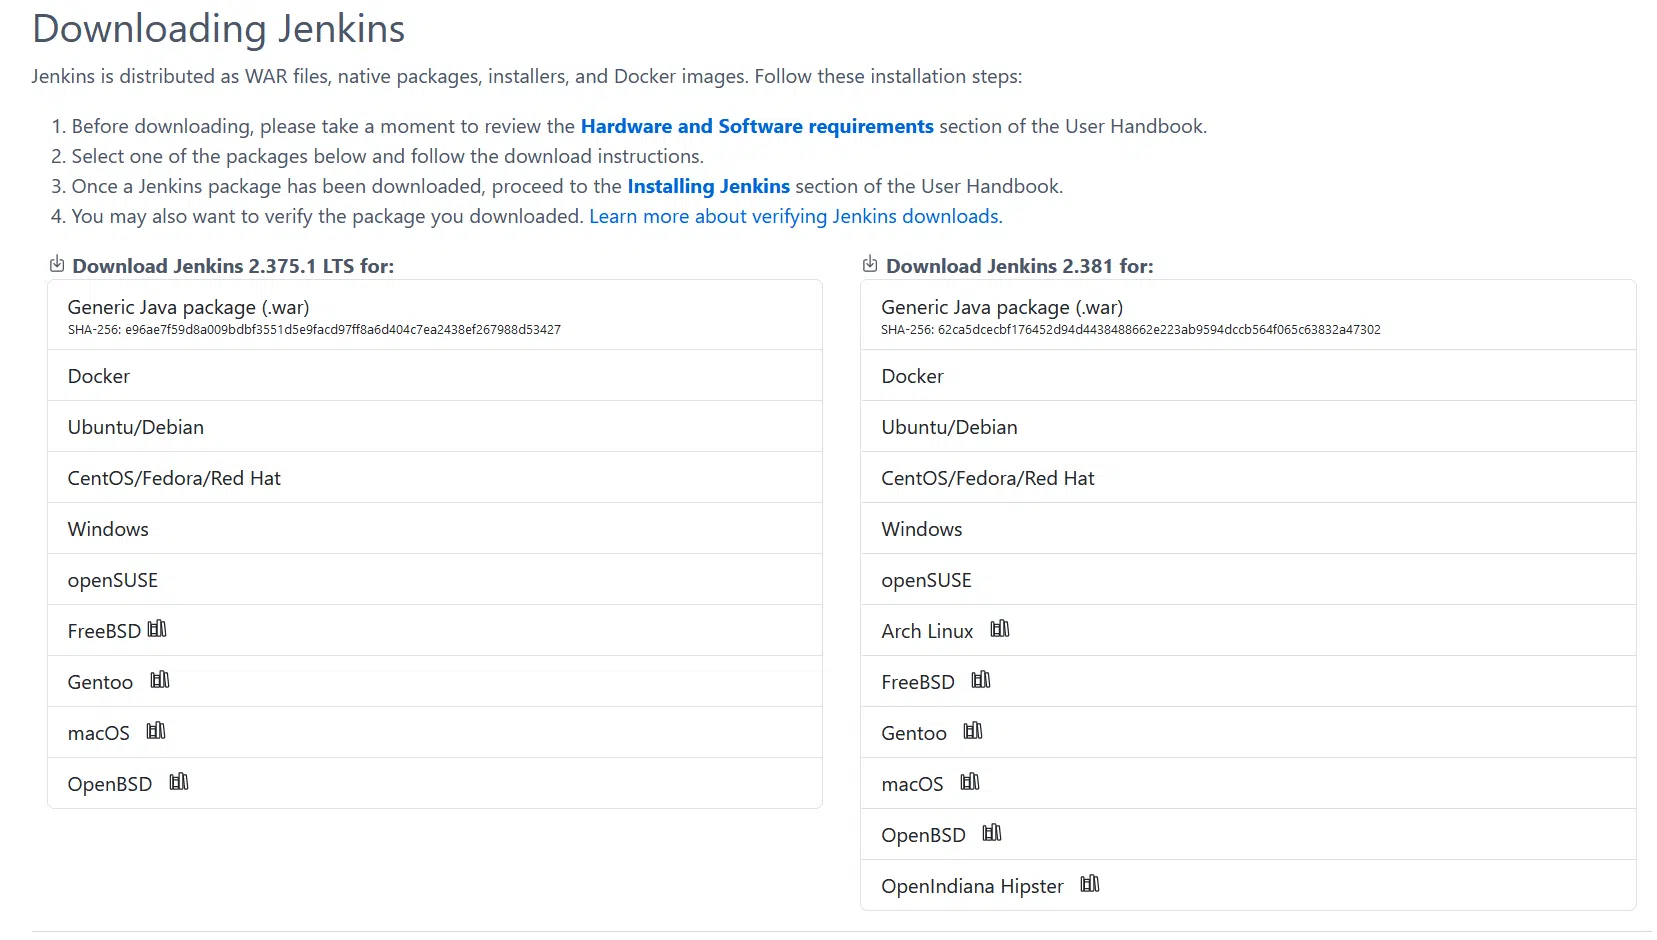
Here we can see a bunch of options for almost any OS you can think of. Of course, download the appropriate one for your computer’s OS. We’ve provided a quick Windows download link if you don’t want to go to the site itself.
What you’ll get is an .msi file that you can use to install Jenkins as if it was any other program.
macOS
You’ll need to install Jenkins through the homebrew package manager for macOS. It’s convenient to install apps and software, so you should install it if you haven’t already.
Once you have homebrew installed on your Mac, follow the steps below to Download and install Jenkins.
- Firstly, start by opening a terminal.
- Then, in the terminal, run the following command to install the LTS version of Jenkins:
brew install jenkins-lts
- Once homebrew has successfully installed Jenkins and the console is freed, run the following command to start the Jenkins LTS background service:
brew services start jenkins-lts
- Finally, close the terminal you opened.
Once that’s done, you’ve successfully installed Jenkins on your Mac!
You can skip to Step 3 since Step 2 is only for the Windows version of this installation.
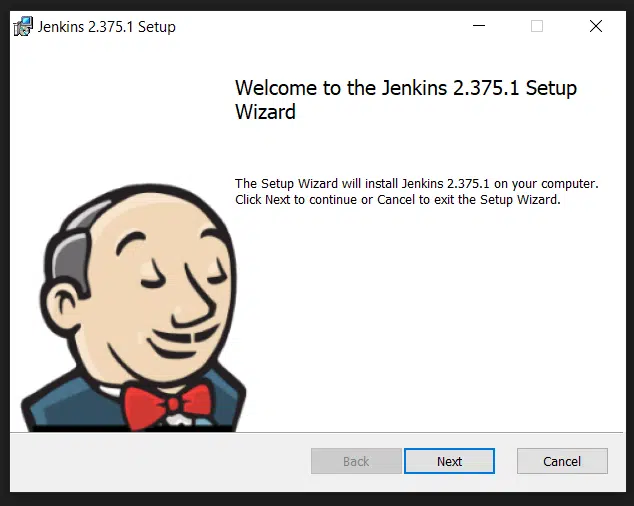
Step 2: Run Jenkins Install Wizard (Windows)
If you’re installing Jenkins on Windows, then you’ll need to go through the Jenkins Install Wizard provided in the .msi file you downloaded. macOS users do not need to go through this step since Jenkins was installed using the homebrew package manager.
So, go through the install wizard after opening the downloaded jenkins.msi file.
- Start by clicking Next on the first page.
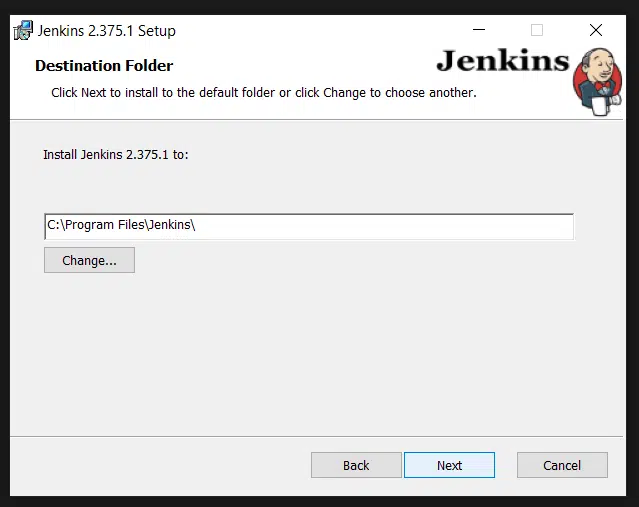
- Then, change the install path to your desired path or leave it as the default path.
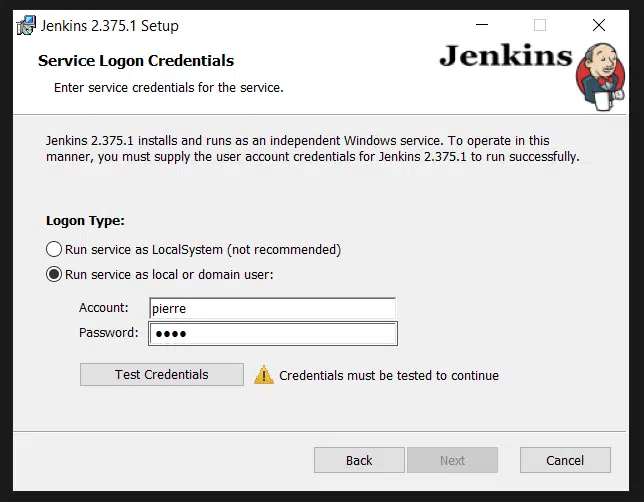
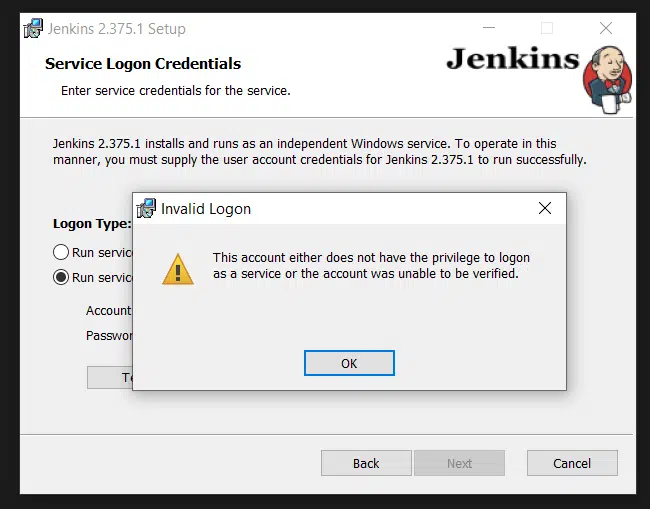
- Next, input the credentials for your user account for Jenkins to run as a logon Windows service. You will need to test your credentials before you can proceed. If you encounter an error when testing your credentials saying that your user does not have the privilege to logon as a service, perform the steps in Step 2.5 to resolve the issue.
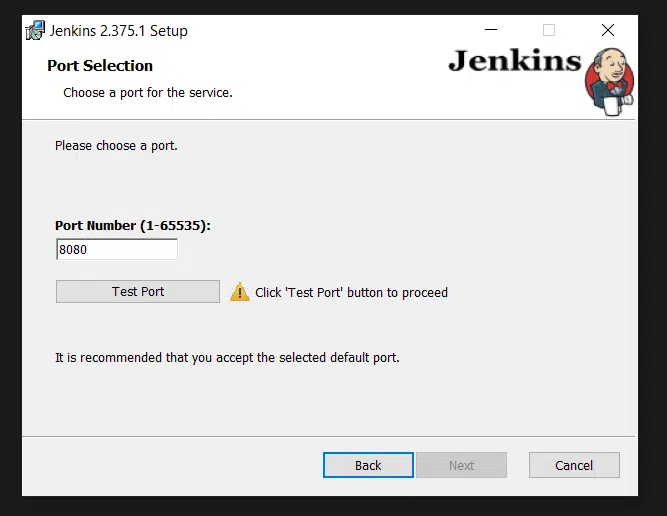
- After that, assign a port for the Jenkins web server. We recommend leaving it on the default 8080.
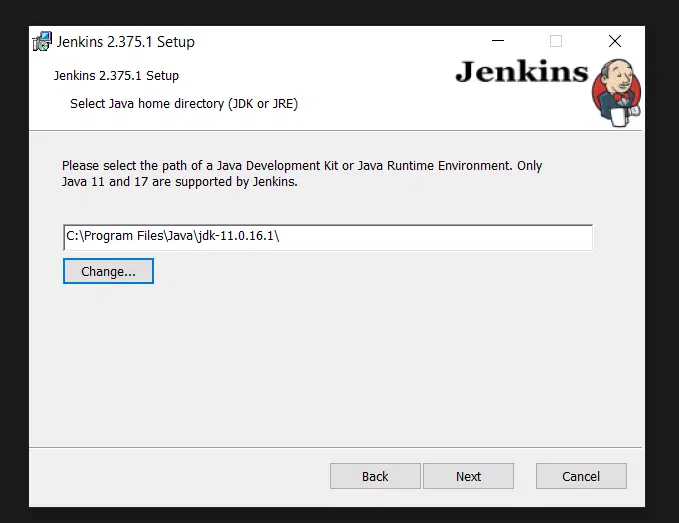
- Moving on, you’ll need to point Jenkins to the directory where your Java 11 or Java 17 JDK/JRE is.
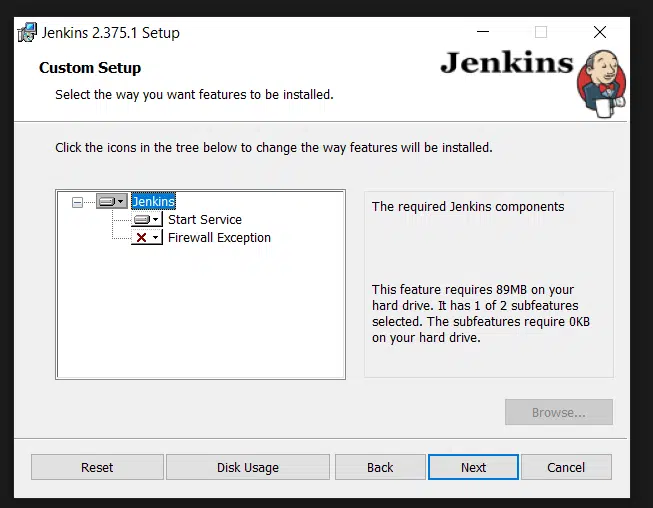
- Next, select the components you’d like to install for Jenkins. The default options are good.
- Finally, give the installer Administrator privileges to install Jenkins.

Step 2.5: Add User to Logon Service
You only need to perform these steps if the Jenkins Install Wizard cannot run as a logon service.
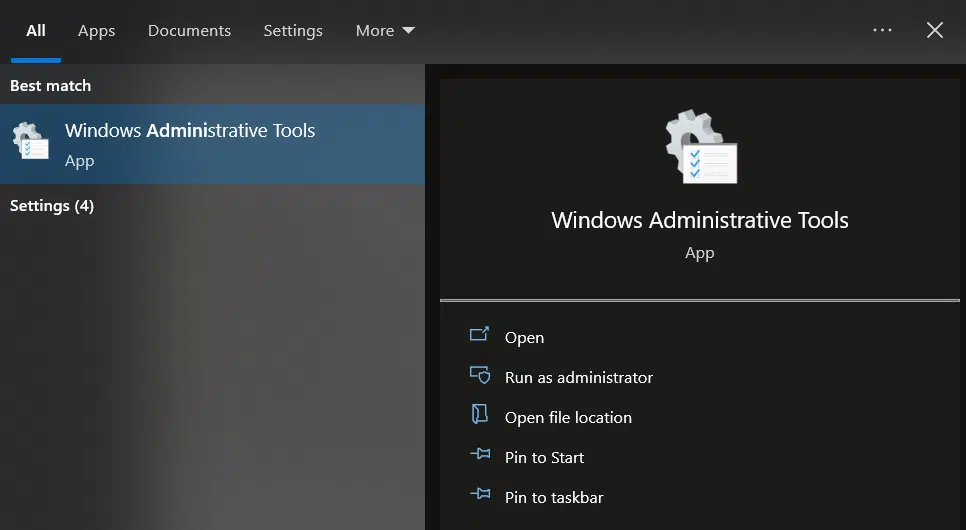
- First, ensure you are logged on to the computer with administrative privileges.
- Then, open ‘Administrative Tools’
- In the newly opened window, click on ‘Local Security Policy’
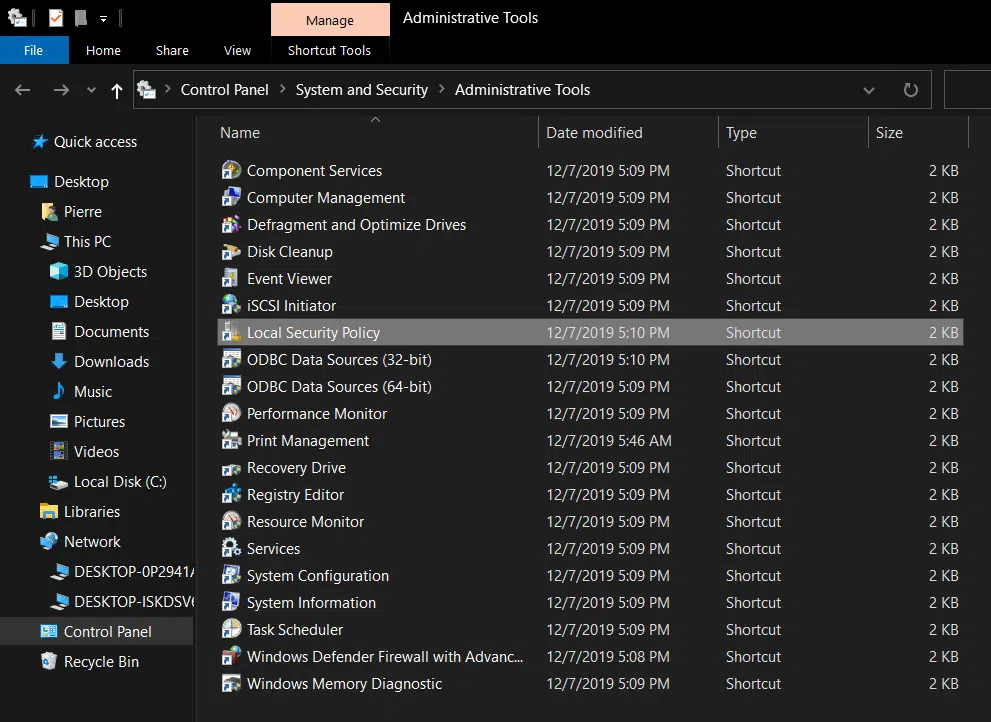
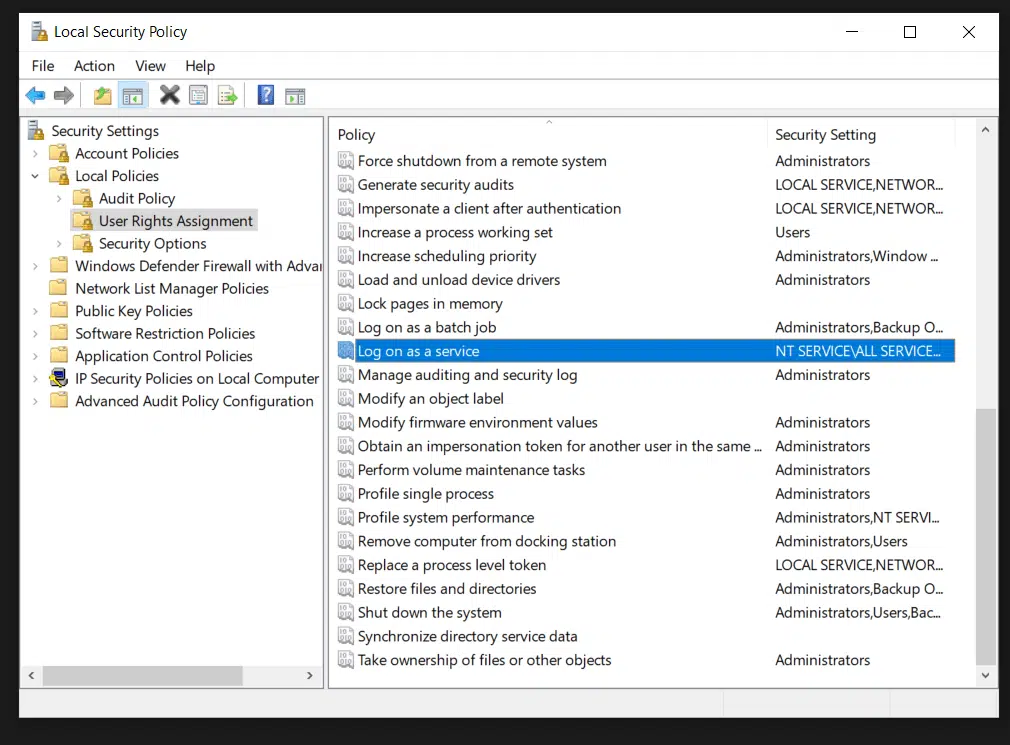
- Then, on the left side of the Local Security Policy window, expand ‘Local Policy’ and click on ‘User Rights Assignment’
- Right-click ‘Log on as a service’ in the right pane and select properties.
- Click on the Add User or Group… button to add the new user.

- Then, in the dialogue box, type the username of your account and then click on OK to add it.
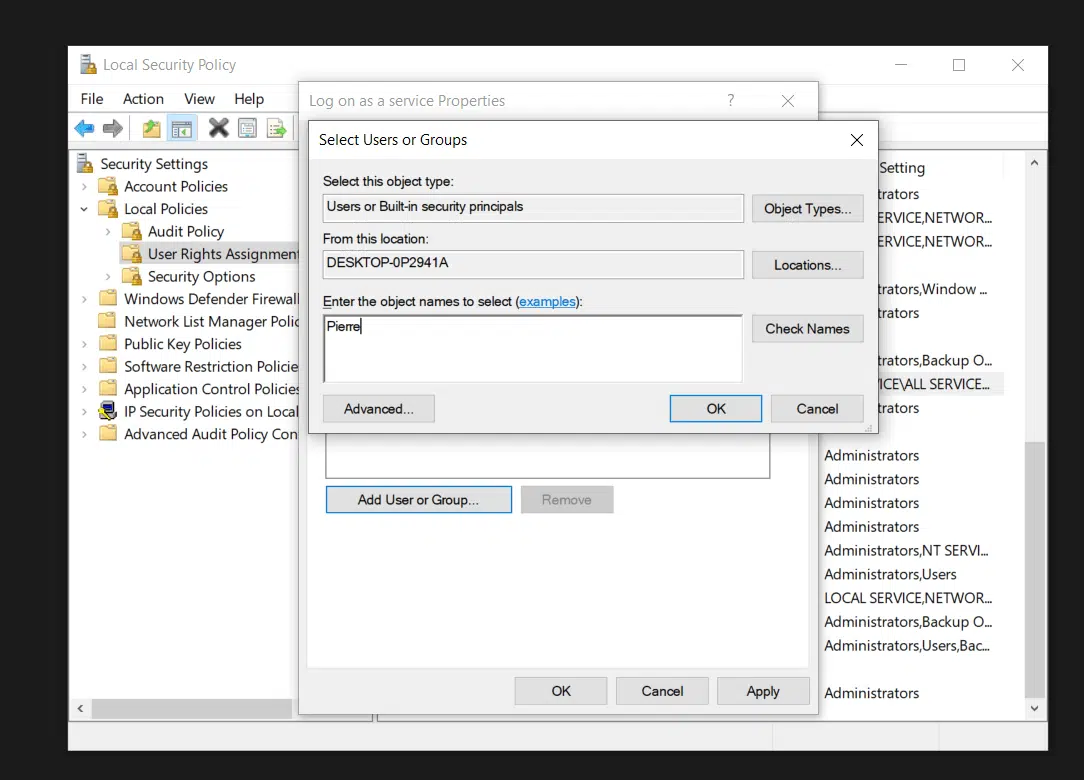
- After that, you should now see your user in the list.

- Finally, click on the OK button to change your changes.
Step 3: Complete Post-installation Setup Wizard
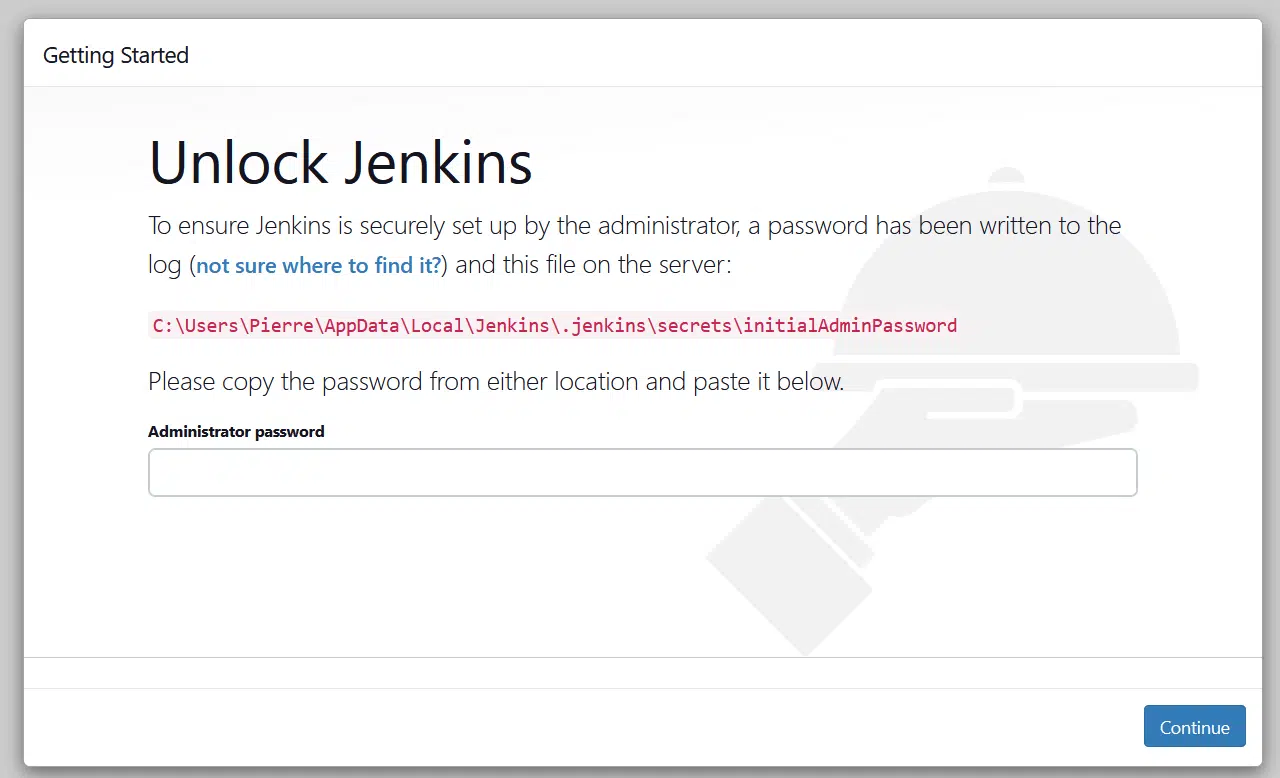
After Jenkins has completed installing and it has started running as a service, go to http://localhost:8080 (or whichever port you configured for Jenkins when installing it) and wait until the Unlock Jenkins page appears.
Here, you will need to input the Initial Admin Password of your Jenkins installation, which is available in a file. If you’re unsure about its location, it is also provided in the prompt. So, simply open the file in a text editor, copy-paste the password into the input prompt, and click Continue.
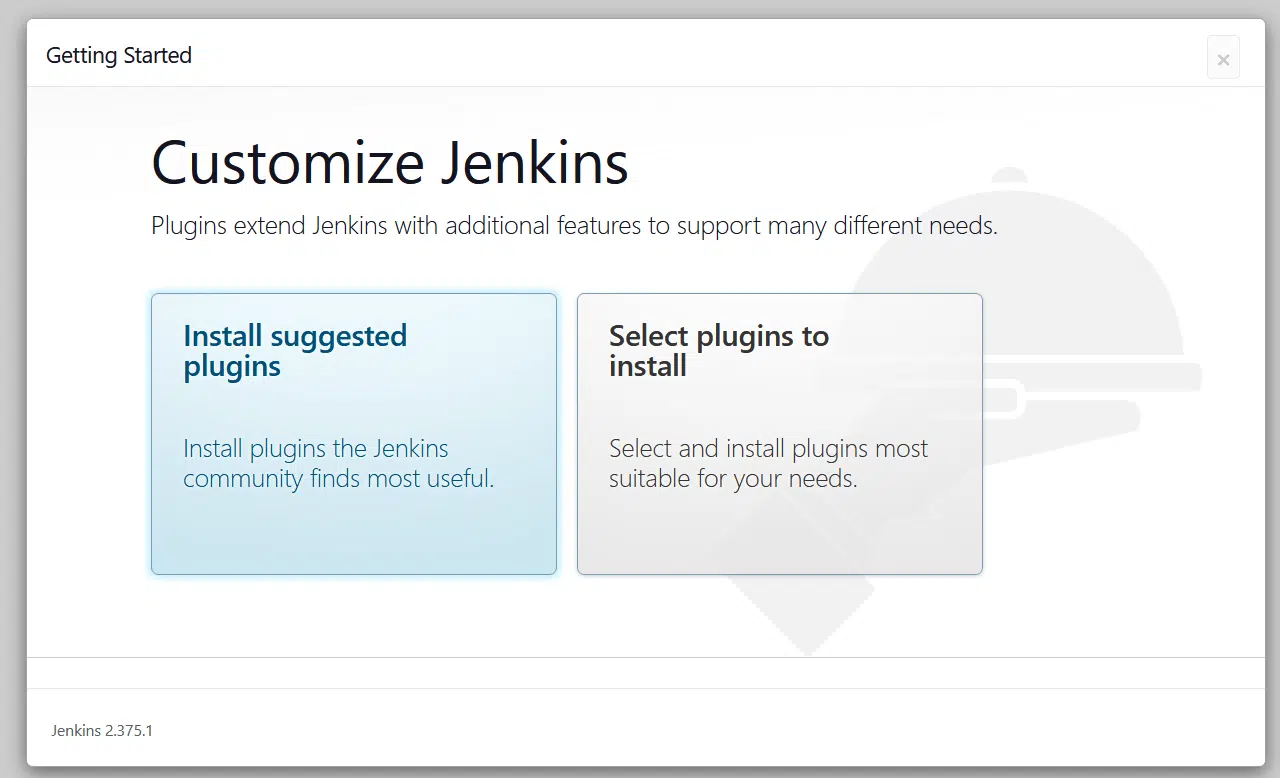
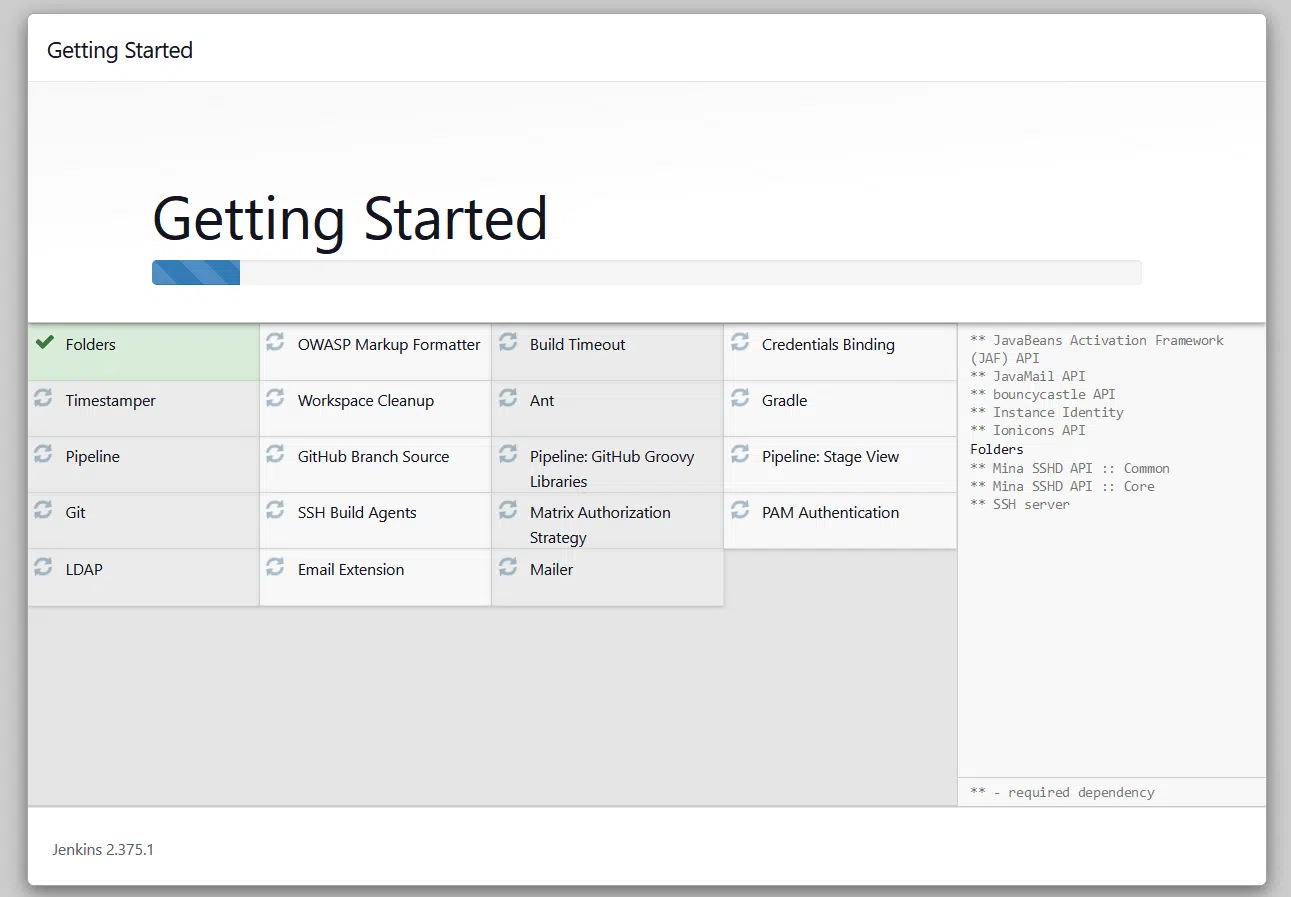
Next, you’ll need to install the initial plugins. You can install all the suggested plugins or choose which ones to install by hand. Here, we’re just going to install all the suggested plugins. It takes a while, so sit tight and wait for a few minutes.
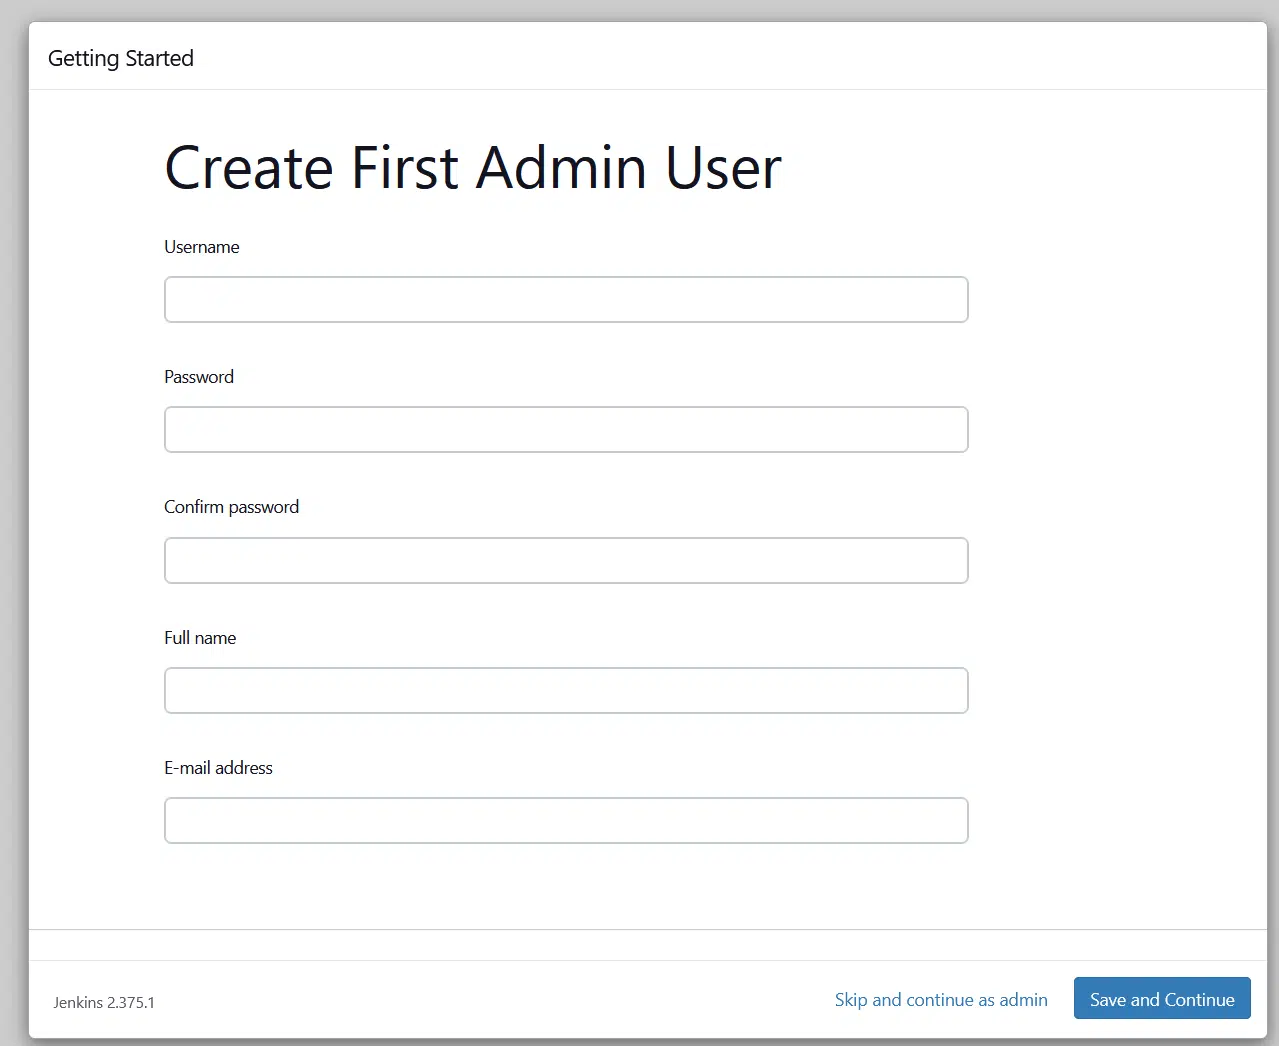
Once that’s done, you’ll need to create the first administrator user for Jenkins. We recommend filling this out instead of skipping it and continuing as admin. Once you’re done, click on the Save and Continue buttons.
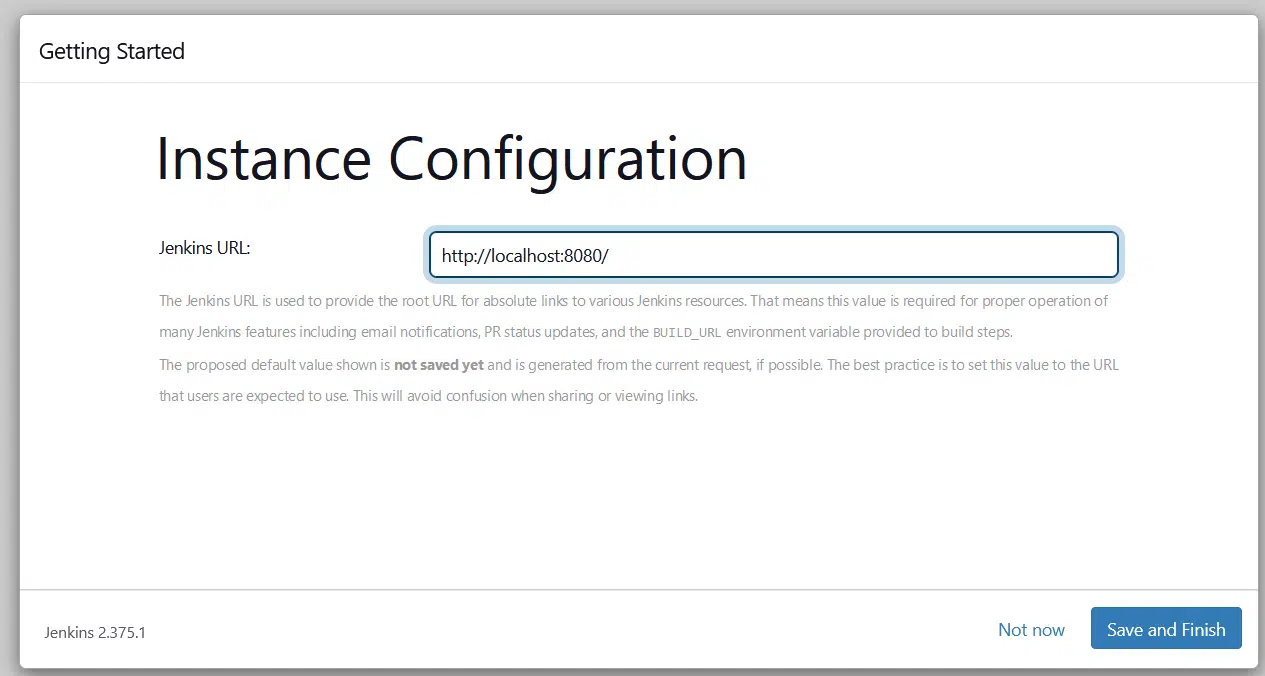
Finally, you’ll need to set the Jenkins URL for this instance. This will usually be the server that hosts Jenkins’ domain name or IP address. However, having it as the default value is just fine since this is just a local install. Click on Save and Finish to complete the installation.
You will then be greeted with the Jenkins web console. If you don’t immediately see this, simply refresh the page.

Step 4: Create Your First Pipeline
Now that you have Jenkins installed locally, it’s time to start running pipelines locally using this Jenkins instance.
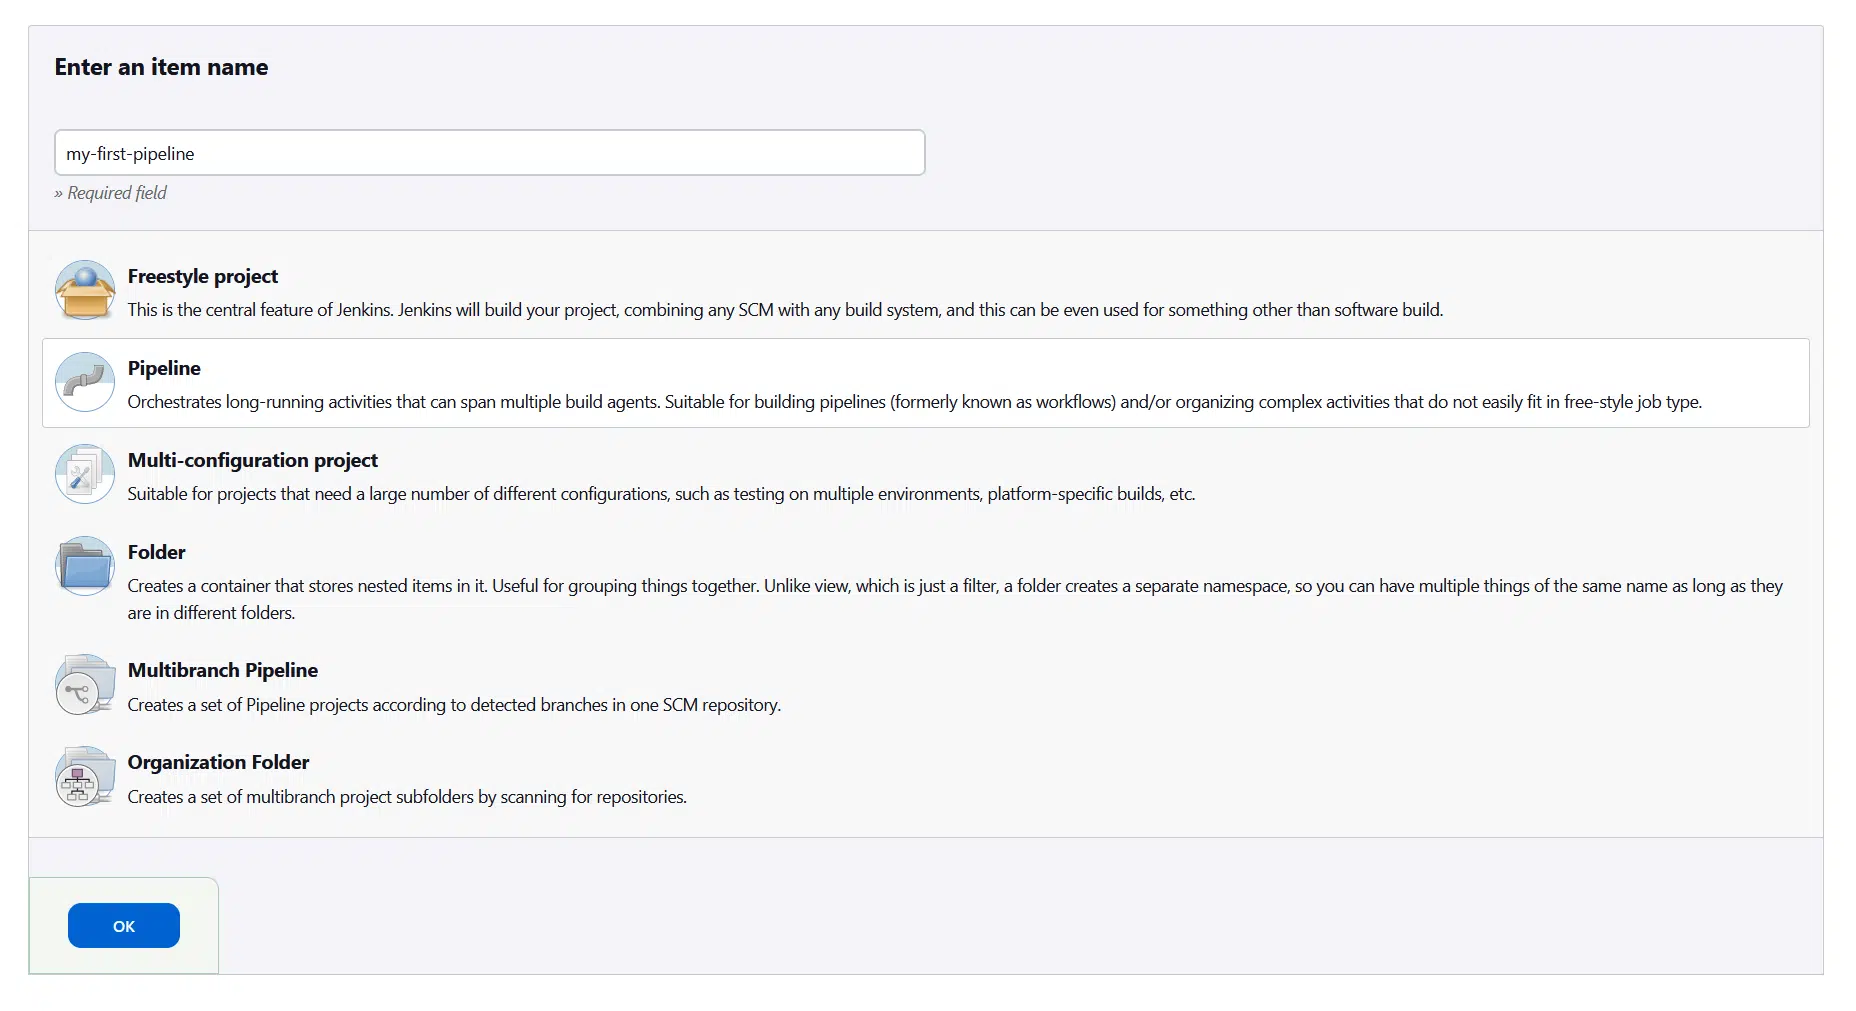
So, start by clicking on the New Item button in the top left corner of the Jenkins web console.

Then, give your pipeline a name, choose the Pipeline type in the list below and finally click on the blue OK button.
After that, you’ll be brought to the configuration page for the pipeline. Scroll down to the Pipeline section, where you can specify the pipeline’s pipeline script, typically a Jenkinsfile that’s checked into a project’s repository. Here, you can choose for a Jenkinsfile to be defined either through a script typed in the console itself or by specifying a Jenkinsfile in the project’s source code.
For this example, we’ll define the Jenkinsfile in the console itself.
There are two ways to write a Jenkinsfile: Declarative and Scripted. For this example, we will be using the Declarative style. To learn more about both styles, you can read more about it here.
Here’s a simple sample Declarative Jenkinsfile that prints ‘Hello World’ to the console:
pipeline {
agent any
stages {
stage('Hello') {
steps {
echo 'Hello World'
}
}
}
}
So, copy-paste this script into the console and you should have this:
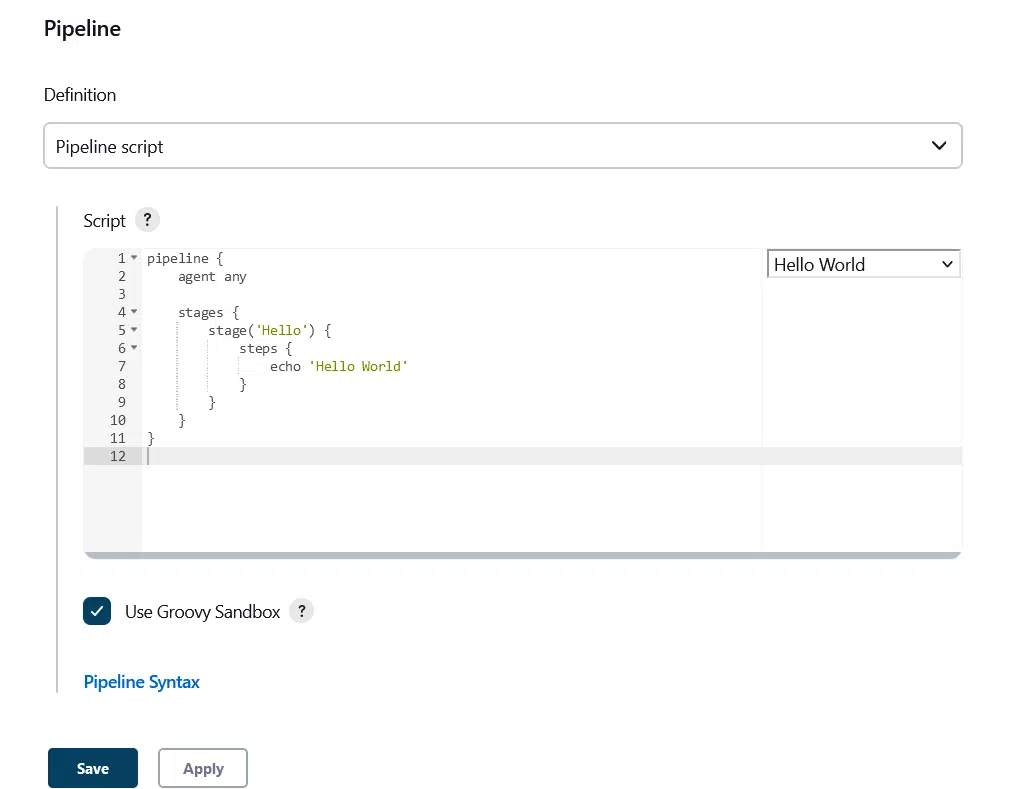
Complete the basic pipeline by pressing on the blue Save button.
After clicking Save, you should be brought to your pipeline’s own page. In the left side of the interface, start the pipeline by clicking on the Build Now button.
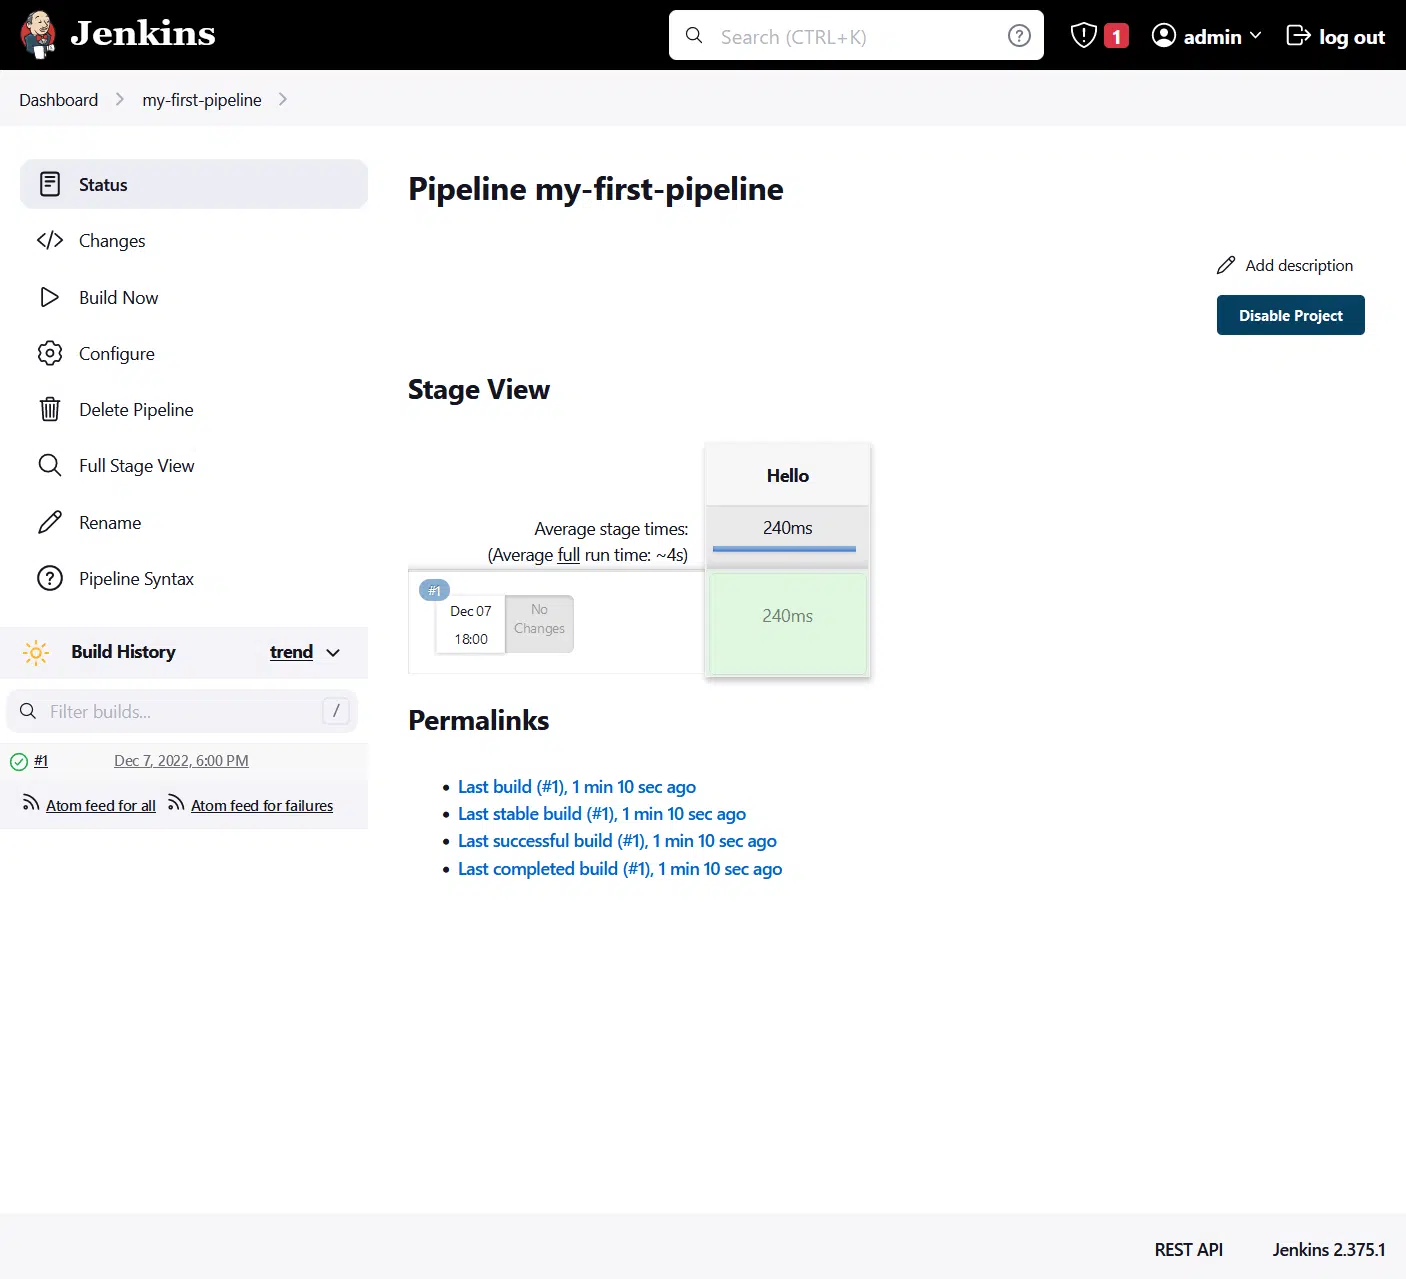
You should see it being added to the Build History section of the page on the left. If the run was successful, you should see a green tick next to it, along with the time it took to complete.
To see the console output of the pipeline, click on the green tick.
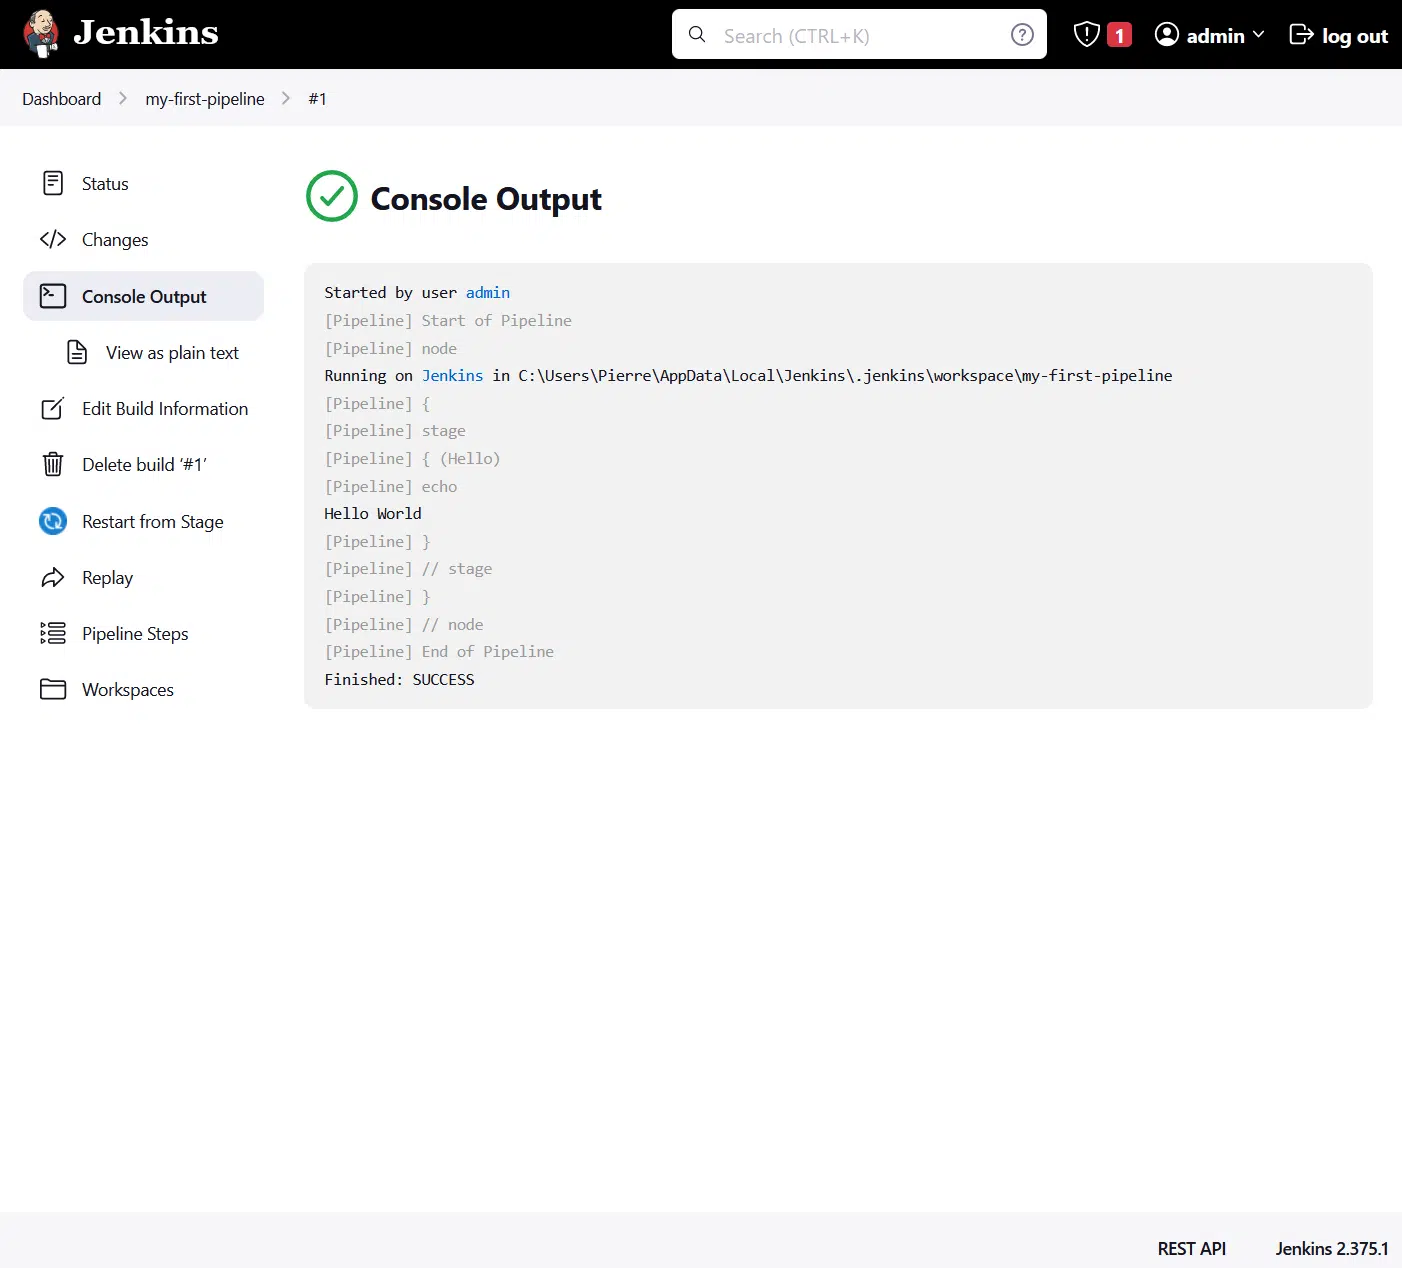
Here we can see that the pipeline did print out ‘Hello World’ to the console as we instructed in the channel.
Conclusion
That wraps up our guide for installing and setting up Jenkins locally on your dev system! It’s an elegant way to determine if Jenkins is the right CI/CD tool for your projects, whether it be your projects or even for work! What we went through was installing Jenkins as a service on your system’s OS and how to write your first pipeline for it to be run locally. However, since all Jenkins needs is the JVM, it can even be run using Docker! That concludes our quick 4-step guide on how to run Jenkins locally.
Hopefully, the guide helped you out and was easy to understand!
Be sure to sound off in the comments down below if you have:
- Any questions for us?
- Any errors in the article.
- Other suggestions to speed up the installation process.