


One of the best parts of having a text code editor like Visual Studio Code is you can have everything that you use in one place, even including your MySQL connections.
However one of the stumbling blocks to getting to set up with Visual Studio Code was that there wasn’t any straightforward set of instructions to getting it to work.
So after much trial and error, we’ve FINALLY managed to get and use MySQL with Visual Studio Code.
The steps below are the quickest and simplest way of getting set up and we will guide you around on how to do it with your own version of Visual Studio Code program installed on your Windows 10 PC or macOS machine.
Step 1: Open Visual Studio Code and Install the ‘MySQL’ Extension.
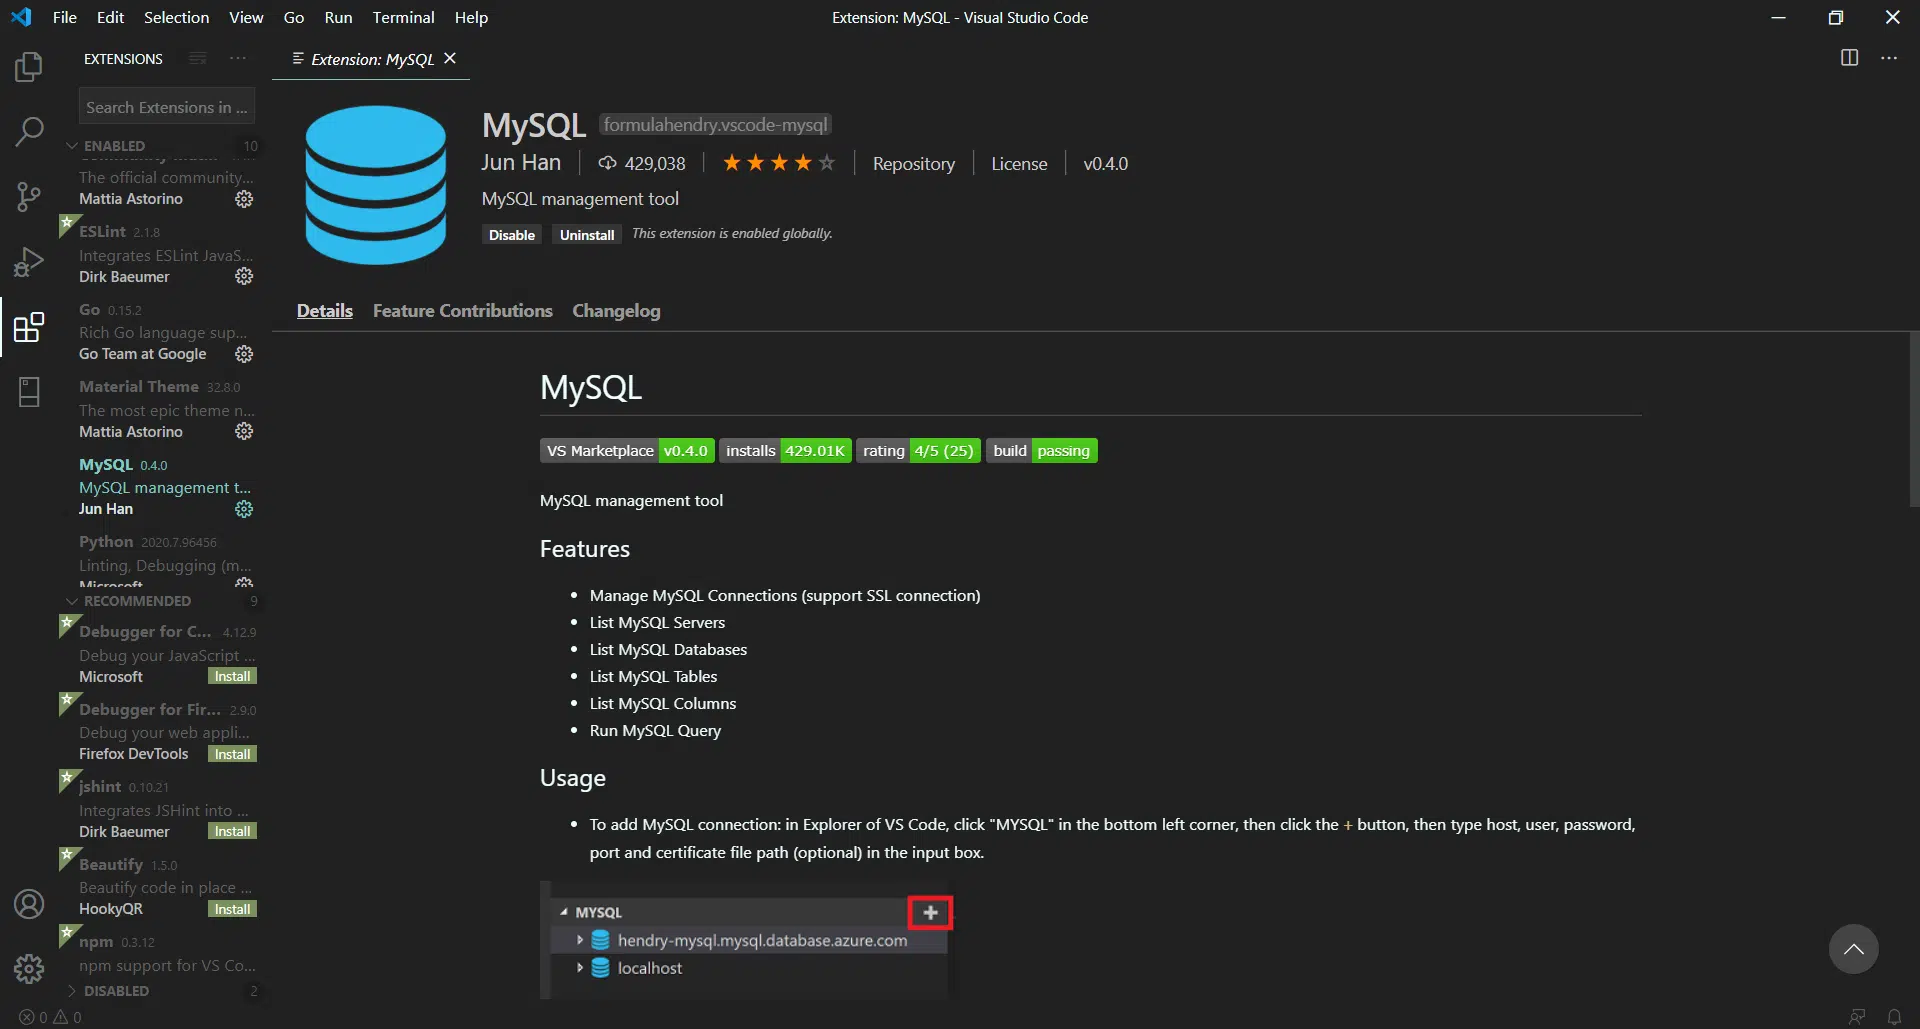
Go ahead and open your Visual Studio Code program on your machine, and then click on the Extensions button from the left-side panel.
Next, search for the ‘MySQL‘ extension created by Jun Han (credit). Click on the MySQL extension and then hit the Install button right under it in green.
Step 2: Set Up Your MySQL Server (If You Haven’t)
Now before you proceed, it’s important that you have a MySQL server running on your machine. You create a MySQL server simply by installing and running from here: https://dev.mysql.com/downloads/mysql/ (the link directs to the MySQL Community Server download page, which is the community version (free) contrary to the Enterprise Version which is paid).
We’re not going to go through on how to set up a MySQL server because we assume that you have already done so. If you’ve not, the steps provided here by the MySQL team should suffice. We will create a different post on how to get started and create a MySQL server in a future writeup. 🙂
Step 3: Time to Use MySQL with Visual Studio Code!
Once you have the server setup, you will have your hostname (server name), user, password, port and certificate file path (optional) information for the server you have set up, you can jump back into Visual Studio Code.
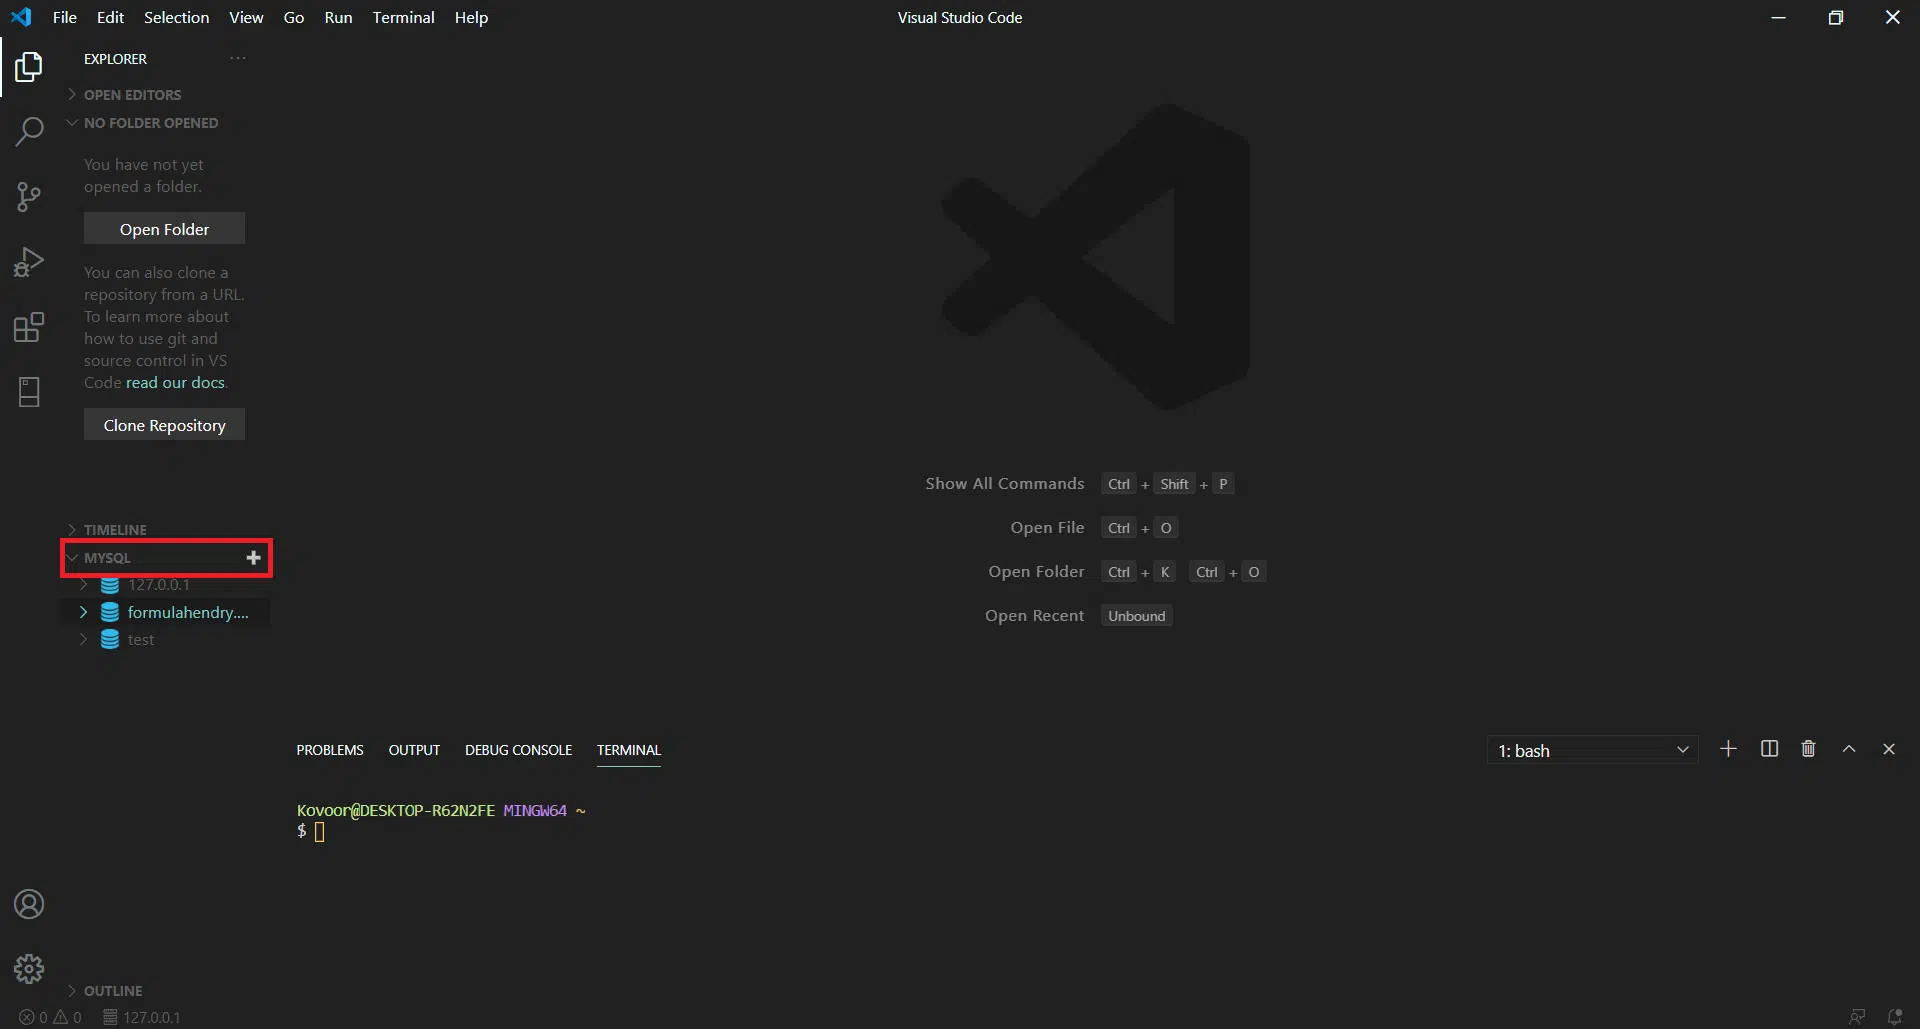
Inside Visual Studio Code, open your Explorer and look for the little “MYSQL” in the bottom left corner, then click the + button.
You will be prompted to enter the hostname of the database, the MySQL username, the MySQL password, the port number to connect to, as well as the SSL certificate path (which is optional). Assuming you’ve entered the exact, correct information which you’ve got from creating the MySQL server in Step 2, you should see the connection be established.
Help! I am unable to establish the connection.
If you get an error above, it’s most likely either that you’ve entered the incorrect information for access to that server or often the most likely culprit, a used port. For the latter, in which case, we recommend that you change the port number entered to a different port number. This should effectively fix the issue since the port may have been preoccupied by a different server instance running on your machine.
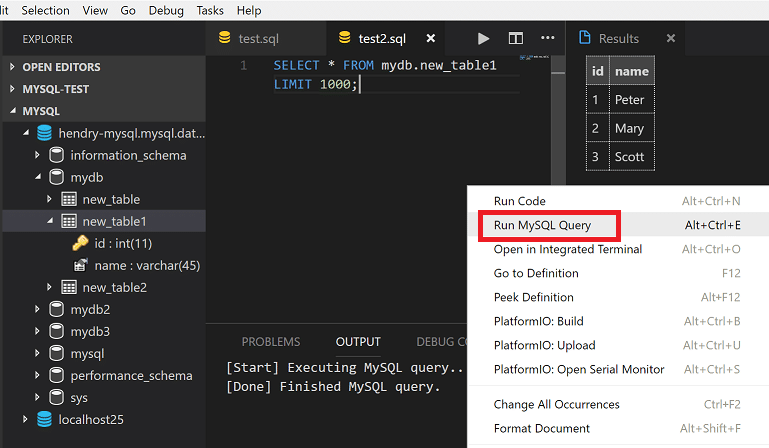
That’s pretty much it! You can now create and execute your SQL queries directly from within Visual Studio Code.
Tip: To run a MySQL query, open a SQL file first then right-click on the SQL file, then click Run MySQL Query in the editor context menu. You can also use the shortcut Ctrl+Alt+E to run the file.
Tip: To create a MySQL query file, simply right click on either the MySQL database (indicated by the blue stack) or MySQL server (grey container stack) and then select New Query.