
Wondering how to install your NPM modules as dev dependency?
It can be a little difficult to wrap your head around how to install NPM modules as dev dependencies especially with the numerous npm commands to remember.
In this step-by-step post, we will guide you on how to do so as well as clear up any confusion you may have. 🙂
Now first things first, you may be confused as to what is the difference between a dependency and dev dependency is when it comes to handling NPM modules. Let’s clear that up first.
However, if you do understand their distinction, then, by all means, I encourage you to jump straight to the steps on how to install them.
Let’s begin.
So what’s the difference between a dependency and a dev dependency?
To quote Ciro Santilli’s excellent answer:
[dependencies]are installed on both:npm installfrom a directory that containspackage.jsonnpm install $packageon any other directory
[devDependencies]are:- also installed on
npm installon a directory that containspackage.json, unless you pass the-productionflag - not installed on
npm install "$package"on any other directory, unless you give it the-devoption. - are not installed transitively.
- also installed on
dependencies are required to run, whereas devDependencies only to develop. Example: unit tests, CoffeeScript to JavaScript transpilation, minification, …
In layman’s terms, generally, a dependency is if you require the NPM module to be used to run whereas the dev dependency is as its name suggests is earmarked solely for the purpose of development. When we mean by “development”, it can be tests, conversions, modification, etc. tasks which are not crucial for the running of the application if they were to be removed.
Now that you know the difference between a dependency and dev dependency let’s jump straight into how you can install an NPM module as a dev dependency. 😄
How to Install NPM Modules as Dev Dependency: Step-By-Step
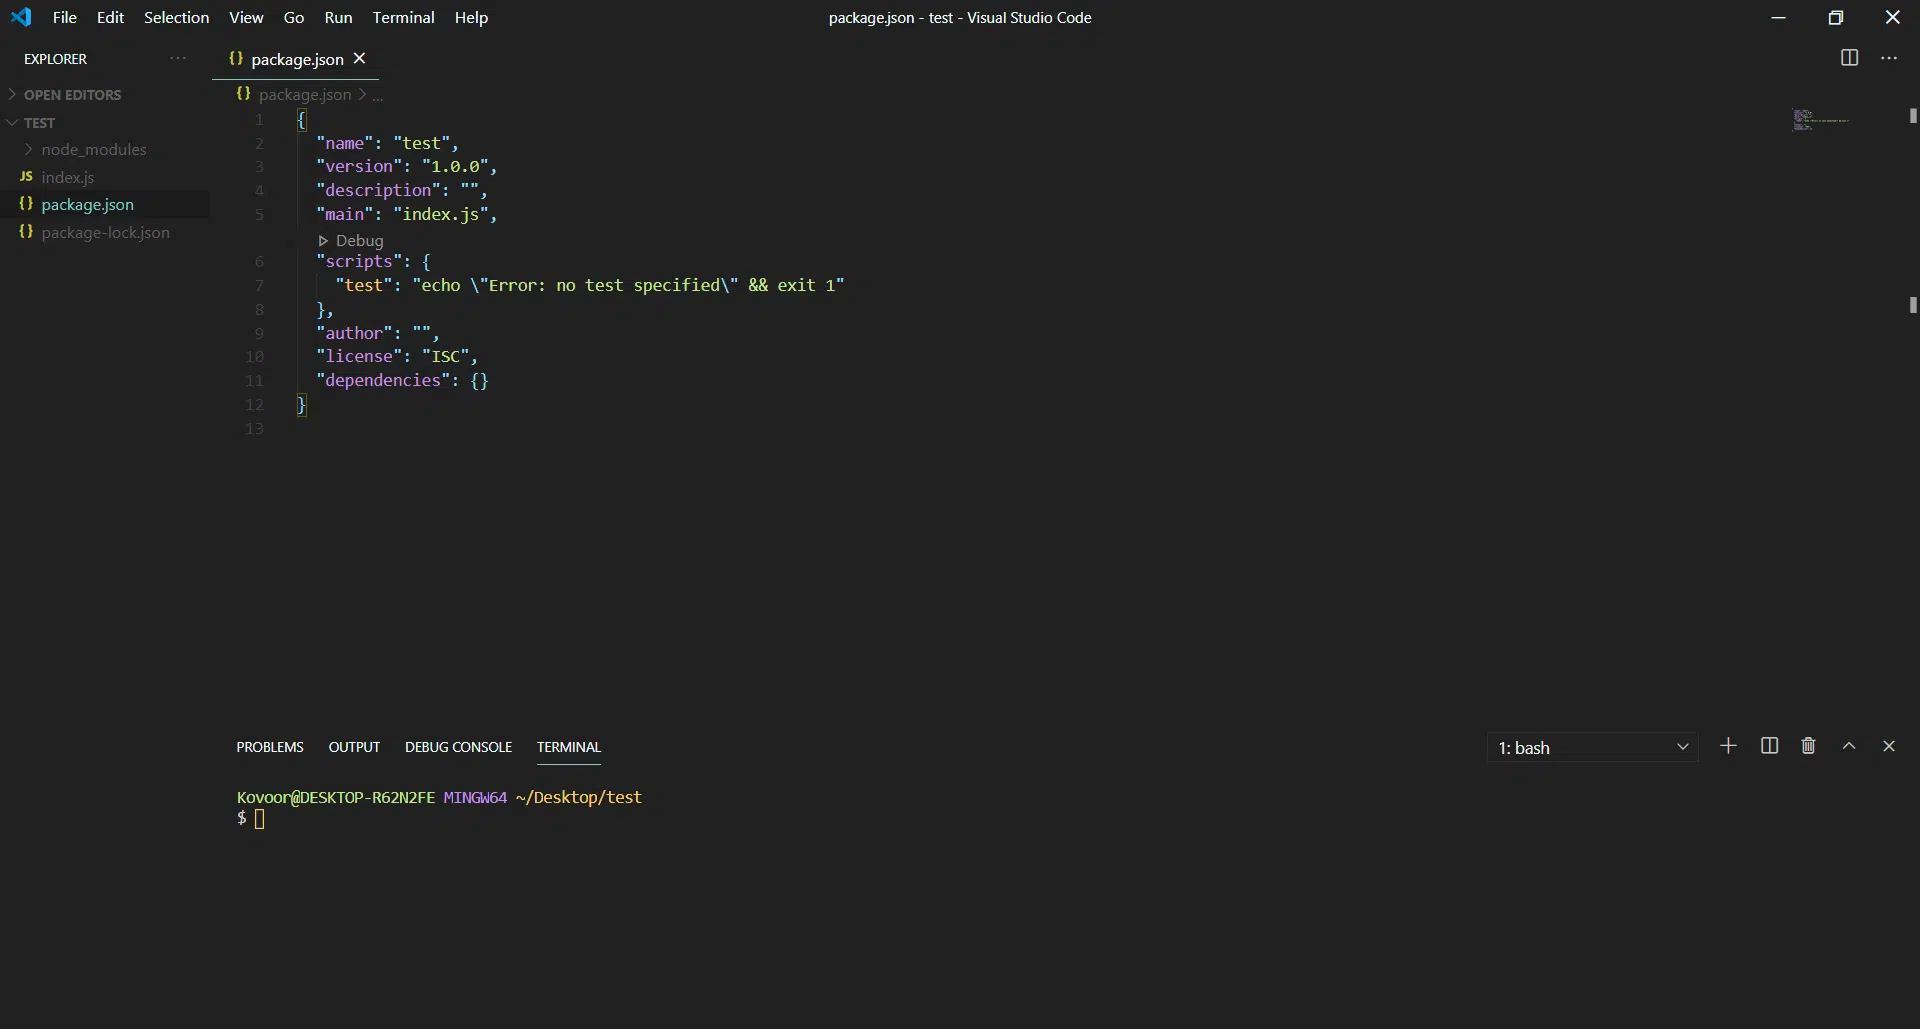
- Open your terminal into the project folder (where your files will live). The choice of the terminal is up to you, whether that’d be your Git Bash, Command Prompt (Windows), zsh (macOS/Linux), etc. but it’s key that you’ve opened the terminal into your folder. For the purposes of this post, I’ll be using Git Bash as my terminal along with VS Code.
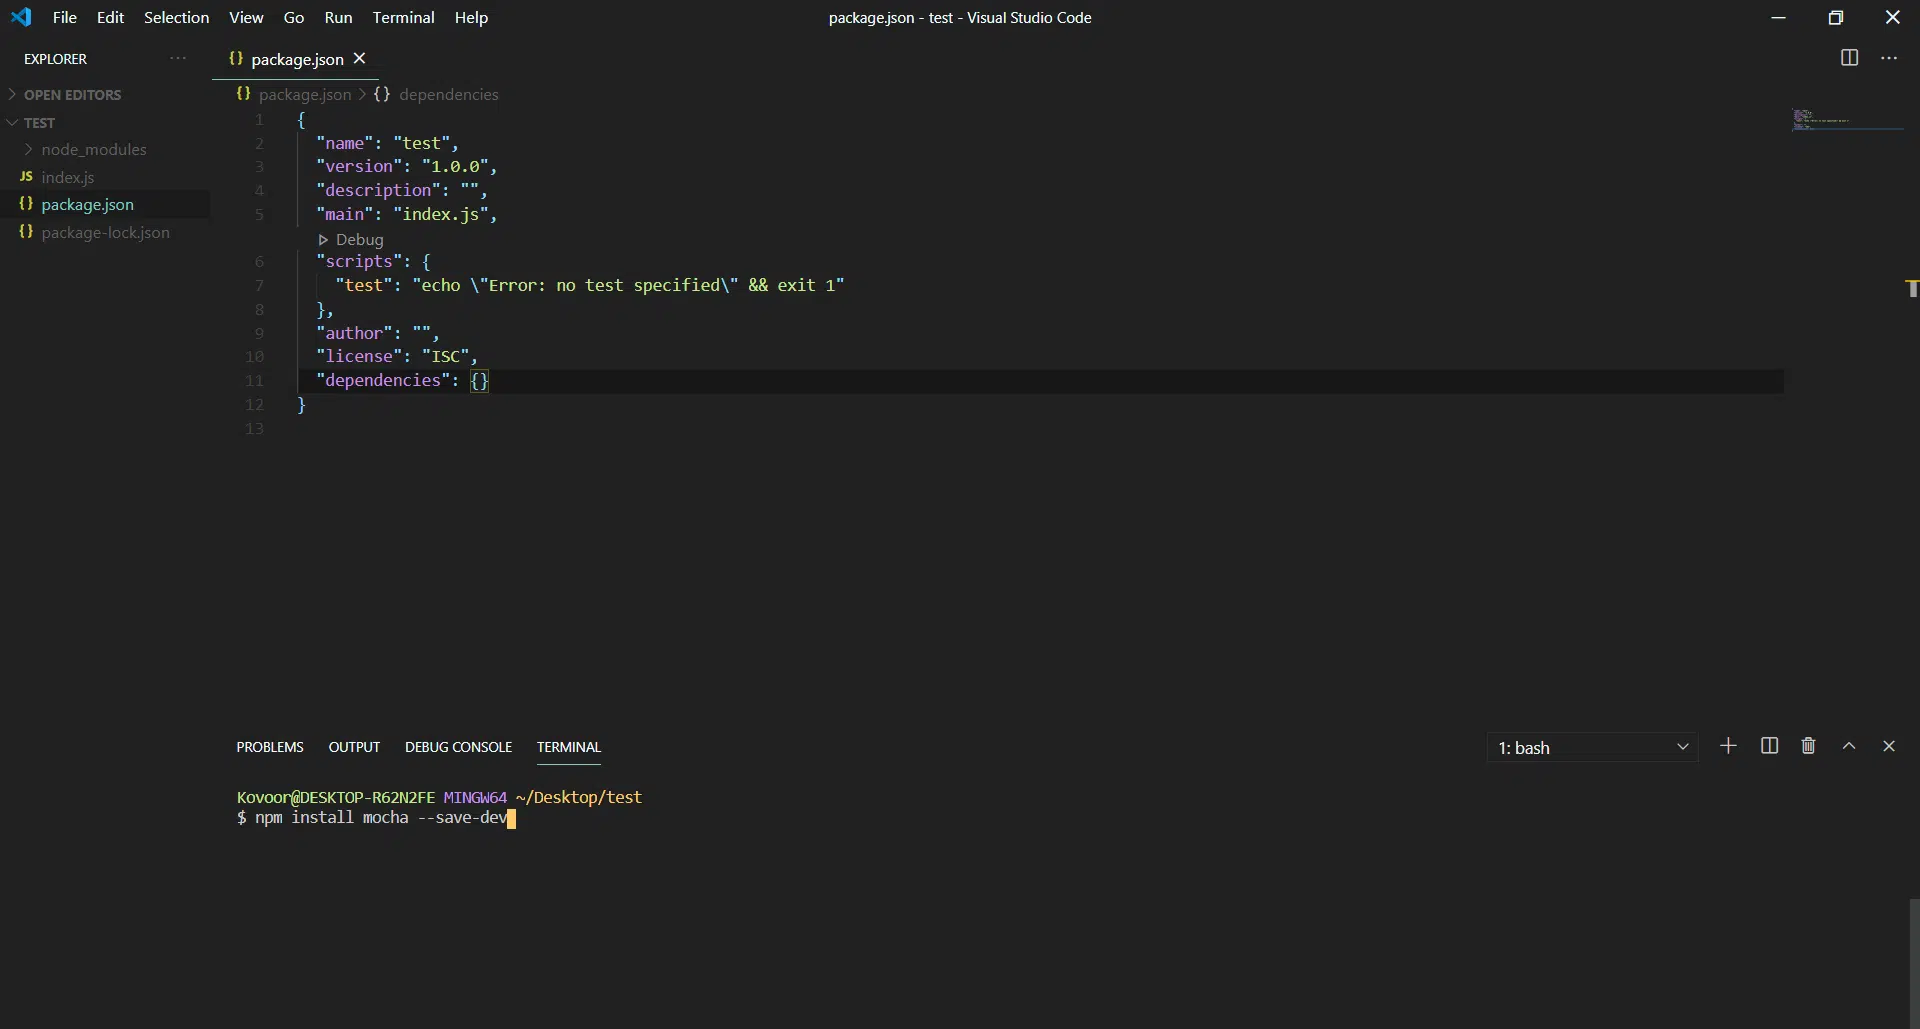
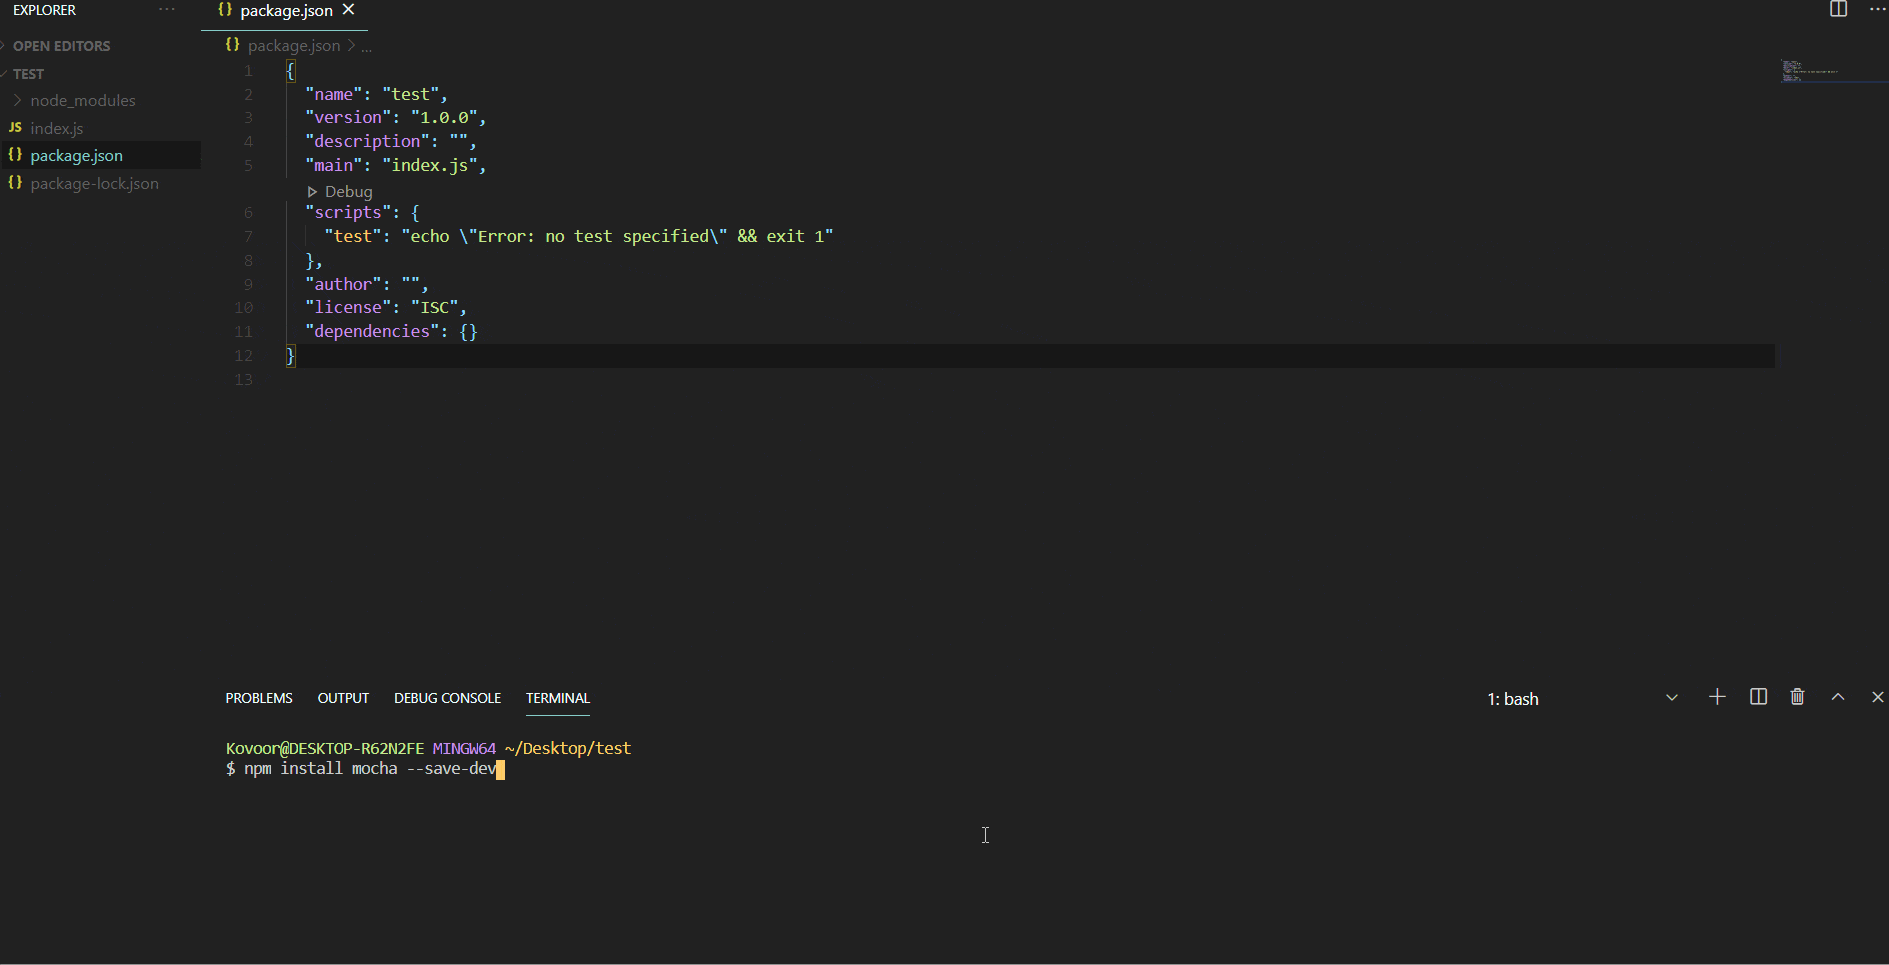
- Great! Next, type in
npm install "$package" --save-dev. The use of"$package"here can be the name of any NPM module that you’re interested in installing. For example, if I wanted to install the Mocha testing library for my project, I would enter the following:npm install mocha --save-dev. The magic happens with the-devkeyword as it will install the NPM module as a dev dependency.
- Lastly, wait for the NPM module to be completely installed, and you’re done! You can check your package.json file which will be created when you had first
npm initto begin using NPM with your project.
That’s pretty much it! If you’ve come across any issues whilst doing the steps above or if you were unable to install the NPM module as a dev dependency, then the following solutions should help you out.
Unable to Install NPM Modules as Dev Dependency? Here’s What You Can Do
1. Try Using --only=dev
One of the solutions which have been found helpful is to try using the following command:
npm install --only=dev
The use of the ‘only’ keyword here will cause only devDependencies to be installed regardless of the Node environment (NODE_ENV).
2. Removing --production flag
It’s also possible that the —production flag is set to true for the NPM configuration of your project. When the production flag is set to true, NPM modules that you install will only be installed as dependencies and never dev dependency even if you try to add the —dev keyword.
By setting the production flag to false, you can begin to install NPM modules as dev dependencies. You can do so with the following two commands:
npm config get production
npm config set -g production false
3. Verify Your NPM Initialization
Lastly, it’s likely if you’ve tried all of the above and you still find unable to install NPM modules as dev dependencies, then it’s most likely a faulty installation.
You can verify if this is the case by creating a new folder (anywhere but the same filesystem which you’re currently experiencing problems with). As suggested by arcseldon’s answer over on Stack Overflow, it would be better if the folder was closer to the base C: drive.
Great. Next, run the following command to initialize NPM
npm init --yes
Then try to install a few test NPM modules as follows::
npm install underscore --save

npm install mocha --save-dev
Check your package.json and see if the underscore is under dependencies and mocha is under dev dependencies. If it is correct, then that points to the fact that there is likely a problem with the folder where you’re unable to install NPM modules as dev dependencies.
In which case, you can try to delete the node-modules folder and the package-lock.json file and then run npm install again to reinstall all the NPM modules and configurations to see if that fixes.
That’s pretty much it! Hopefully, that provides an in-depth guide on how to install NPM modules as a dev dependency. If you do come across any other tips and advice on this, feel free to share it below, and we will be happy to include your suggestions into our post with your credit. 🙂
Happy coding!