
Can’t seem to figure out how to run Pytest in a Docker container?
Fret not, we know exactly how and we’re going to teach you how to set it up yourself! But first, what’s the importance of running tests and doing them in a container?
There are several reasons why we should run tests on our code. To start, running tests can assist us in locating bugs and other issues in our code. By identifying these issues early on, we can save time and effort that would otherwise be spent on debugging. Furthermore, running tests can assist us in ensuring that our code works as expected and meets our requirements. This can give us confidence in our code’s quality and dependability, which is important for both personal projects and professional software development.
Since you clicked on this article, you’re probably concerned with using Pytest as your test framework. It is designed to make writing and running tests for Python code easy. Pytest allows us to write tests using a simple, natural syntax, and it provides a rich set of features to help us organize and run our tests. Pytest is widely used in the Python community and is a key part of many testing and continuous integration pipelines. Using pytest, we can quickly and easily write tests for our Python code and ensure that it works as expected.
On the other hand, we have the ever-popular Docker containerization framework. Well, what’s its significance, you ask? By running pytest in a Docker container, we can ensure that our tests are run in a consistent environment isolated from the host system. This can be particularly useful when running tests on a continuous integration server or sharing tests with other development team members.
Doesn’t that sound great? Hence, in this tutorial, we will learn how to create a Docker image configured to run pytest and use that image to run our tests in four simple steps! Specifically, we’ll be writing Dockerfiles designed for running Pytest and how to use the Docker engine in the terminal.
Whenever the process differs, we’ll provide OS-specific instructions for any of the prerequisites or steps for macOS and Windows, the two most widely used development OSes.
With that out, let’s finally get to the meat and potatoes!
Table of Contents
Prerequisites
Alright, so obviously, we’re going to be dealing with Docker. So, if you haven’t already, you’ll need to install it before we can begin development. We’ve provided some handy links and commands to get you up to speed like we always do quickly.
Step 1: Install Docker
Cool, so now you’ve got the latest version of Python on your system. Now, we need to install the other puzzle piece: Docker. Like before, we’ll detail how to do it for Windows and macOS.
Windows
So, as usual, you’ll need to head over to the official Docker download and installation page for Windows, which is available here.
Then, after downloading the installation exe, open it up and install it like you normally would for any program.
Be sure to take note of the system requirements listed on the page itself, of course!
macOS
Like we typically recommend since it’s dead simple, you can install Docker on macOS using the homebrew package manager. Here’s the command you’d need to run in your terminal:
brew install docker
Don’t have a homebrew setup on your system? You can also install it the traditional way with a .dmg file available on Docker’s official download and installation page for macOS here.
That’s pretty much the only prerequisite you need to run Pytest in Docker. Just be sure to run the Docker app so that you have access to the Docker engine!
If you’re wondering why there was no section on installing Python, or Pytest for that matter, it’s because they’re going to be installed in the Docker container, not natively on your system. Yes, you’ll definitely need to install Python or Pytest if you want to run them natively on your host OS. However, since we want to run it in a Docker container, it’s Docker that has to install those dependencies instead – Docker containers are like an isolated environment that prevent any external factors from affecting the container which is perfect for Pytest.
So, let’s see how to do just that!
Step 2: Create A Dockerfile
The first thing we’ll need to do is to create a Dockerfile. A Dockerfile is a text file that contains instructions for building a Docker image. A Docker image is a self-contained package with an application and its dependencies. When we build a Docker image, Docker reads the instructions in the Dockerfile and uses them to create it. You can think of it as a recipe for our Docker image.
So, in your project’s root directory, create a file named Dockerfile. Then, its contents should look a little something like this:
# Start from a Python 3.8 base image
FROM python:3.8
# Set the working directory to /app
WORKDIR /app
# Copy the current directory contents into the container at /app
COPY . .
# Install the project’s required Python packages
RUN pip install -r requirements.txt
# Run pytest when the container launches
CMD ["pytest"]
First, with the FROM keyword, we’re telling it to base the Docker image off the python Docker image with version 3.8. If you want a specific or cut-down version of the image, you can visit Python’s Docker hub page to see all the valid Docker base image names. For example, the tags ending with -slim are lightweight versions, just in case you don’t need all the packages.
Then, with the WORKDIR keyword, we set the working directory in the Docker image so that any further commands will be run in that specific directory.
After that, we use the COPY keyword to copy the contents of your local dev system’s project directory to the working directory of the Docker image. The first argument is your local dev system’s target, while the second argument is the destination in the Docker image – both can be relative or absolute file paths. Of course, since we’re copying the entire
Next, using the RUN keyword, we instruct the Docker image to install all of the project’s Python dependencies from the requirements.txt file that we copied over.
Finally, the CMD keyword instructs the Docker image to run the pytest command when the Docker image is run.
Of course, it’s important to note that your Dockerfile may look different depending on your project’s file structure or how you set up your tests with Pytest. This tutorial guides you on how to Dockerize your existing Pytest files and source project files into a Docker container so they can easily be run. While the Dockerfile we’ve provided should suffice for most projects, if you need a reference for how to customize the Dockerfile even further, you can head over to the official Dockerfile reference page. Here, you can see all the different types of syntax for Dockerfiles.
Optionally, suppose you want to exclude certain files or directories from being copied into the Docker image, like secrets or environment variables. In that case, you can create a .dockerignore file in the project’s root directory. Its syntax is exactly like .gitignore if you’ve used it before.
Here’s a sample .dockerignore file:
# Ignore files that are generated when running tests
*.pyc
# Ignore directories that are not relevant to the application
venv/
Step 3: Build the Docker Image
So, like with any Dockerized application, we’ll need to build it once we’ve created the Dockerfile. This is so that we can run whatever we specified in the Dockerfile instructions and easily share it with any of our coworkers or friends who need to run the tests.
As such, here are the steps to build your Docker image using the Dockerfile:
- First, start by opening your terminal or command prompt.
- Then, navigate to your project’s root directory where the Dockerfile is located.
- In that directory, run the following command:
docker build -t <your Docker image name here>:<version> .
Here, the docker keyword is used since we want to invoke the Docker engine’s functionalities, specifically the build command.
The -t argument is for specifying the Docker image’s tag. It’s your Docker image’s name. Typically, you’d want to follow it up with a colon and the image’s version for version tracking. However, this part is optional, and Docker will automatically assign it the latest tag if omitted.
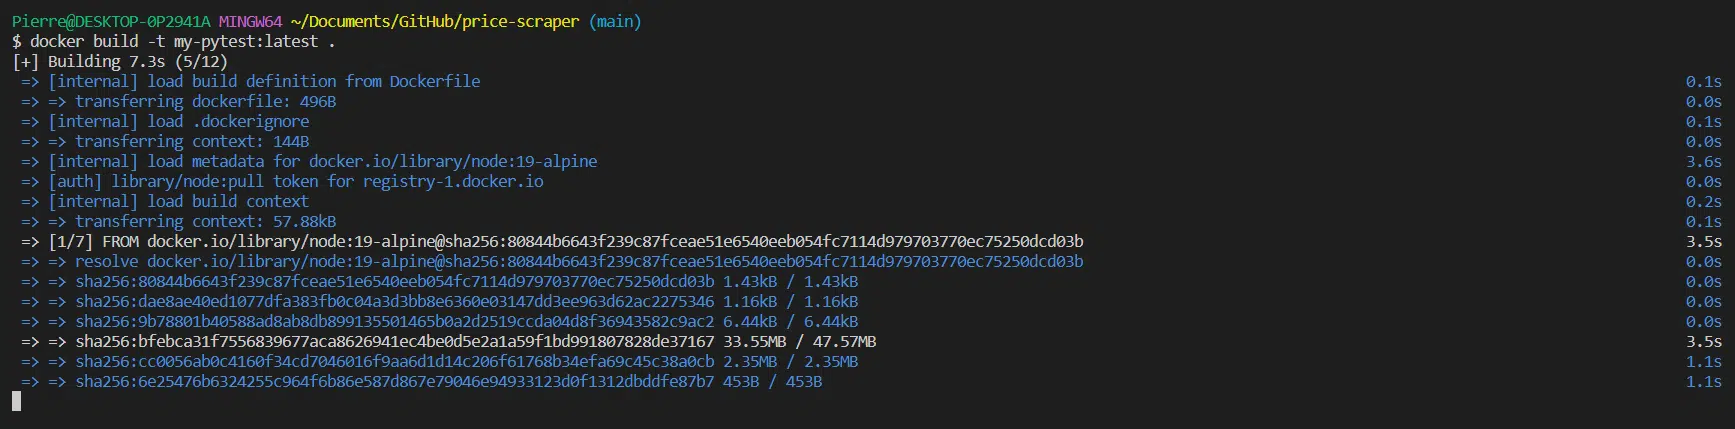
Finally, the last argument for the build command is the directory in which the Dockerfile is located. Of course, since we’ve already navigated to the project’s root directory, we only need to put a relative file path of “.”
Then, if all goes well, the Docker engine should build your engine and provide a neat progress animation.
Step 4: Run the Docker Image
Now it’s finally time to run the Docker image! Running a Docker image will invoke whatever command was specified with the CMD keyword in the Dockerfile. So, based on our sample Dockerfile, it will run the pytest command.
First, we’ll need to verify that the Docker engine created the image and is stored on your dev system. To do so, we can run the following command:
docker images
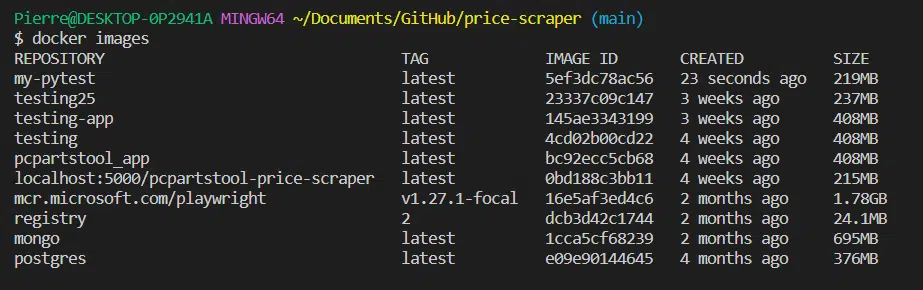
You should see an output like this where you have information like the image id, image name, tag, when it was created, and size, all in a tabularized format.
So, once you see that your image is there, you can run it with the following command:
docker run <image name> --name <container name>
Running the Docker image with this command will run it in attached mode, meaning that your native terminal will start displaying the container’s logs as if it were natively running the commands. Hence, you’ll see all the Pytest outputs in your terminal. Once done, it’ll automatically bring you back to your native terminal. The –name argument, as its name implies, gives
If you want to run the Docker container without having your terminal be hijacked, you can add the -d argument to run it in detached mode like so:
docker run <image name> -d --name <container name>
As you may already know, pytest can be run just for specific files to use the -k argument. Well, you can do that, too with Docker. Here’s how:
docker run <image name> -d --name <container name> pytest -k test_my_function
This command will only run tests that have “test_my_function” in their name.
Step 5: Check Docker Logs
Additionally, if you’d like to see the log outputs of your Docker image without having to run the Docker image again or if you run it in detached mode, Docker also allows you to do that.
First, you’ll need to find out the name of your container, which you may have specified with the –name tag earlier. If you don’t, it’ll be assigned a random name. So, run this command in your terminal to find out its name:
docker ps -a

A similar tabularized output will be shown of all the Docker containers you’ve run. What’s important is the NAMES column.
Once you’ve identified the name of your Pytest Docker container, you can use it to get its logs. Here’s how to check the logs for a specific Docker image using your terminal:
docker logs <container name>
You should get the container’s output on its previous run!
Conclusion
Well, that’s pretty much it for how to run pytest in Docker! As mentioned, we can guarantee that our tests are run in a consistent environment that is secluded from the host machine by running pytest inside a Docker container. If you run tests on a continuous integration server, this aspect of Dockerization becomes incredibly beneficial! Even more so if you need to share an easily replicable test suite with other development team members.
Hence, that’s been our quick and easy 4-step guide on how to run pytest in Docker! Hopefully, the guide helped you out and was easy to understand!
Be sure to sound off in the comments down below if you have:
- Any questions for us.
- Any errors in the article.
- Other suggestions to optimise the Dockerfile for Pytest
- Install Docker
Head over to the official Docker download and installation page for Windows, which is available here.

- Create A Dockerfile
A Dockerfile is a text file that contains instructions for building a Docker image.
- Build the Docker Image
This is so that we can run whatever we specified in the Dockerfile instructions and easily share it with any of our coworkers or friends who need to run the tests
- Run the Docker Image

- Check the Docker Logs