
Whether you’re attempting to remove, uninstall or completely reinstall Visual Studio Code (VS Code) and its settings on your Windows, macOS or Linux (Ubuntu) machine, this simple guide provides the steps to achieve this.
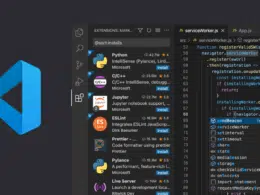
Visual Studio Code is a code editor developed by Microsoft for Windows, Linux, and macOS. It can be used for various purposes but it’s especially synonymous with web development and programming with Javascript. Besides that, Visual Studio Code also offers features such as debugging and version control among many more.
Additionally, Visual Studio Code also has a large number of extensions available in the extensions marketplace which enables developers to add on additional features and tweak the editor according to their preferences. All of this and much more makes Visual Studio Code a strong contender for being one of the best source-code editors available to developers and programmers of different specialities.
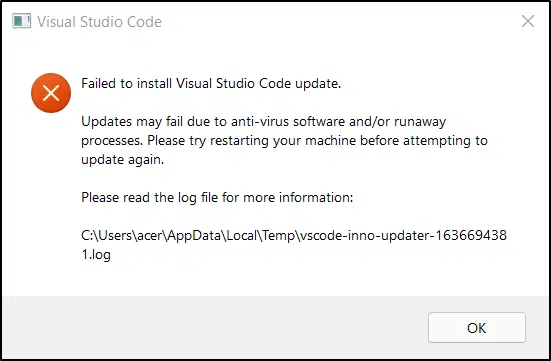
However, the Visual Studio Code program may experience problems or display various error messages as its settings conflict with the system, or if it wasn’t updated or installed correctly. Thus, if its installation is corrupted you may notice that no matter what you try, the program doesn’t launch. So, an effective fix for various VS Code issues is to completely reinstall it along with its settings.
That being said, when it comes to uninstalling Visual Studio Code from our machines and reinstalling a fresh version, we might realize that our settings and preferences remain the same. This is because, in addition to uninstalling Visual Studio Code from our machines, we also have to delete its settings and data for a complete reinstall. This takes a few more steps.
In this guide, we’ll go over how to not only uninstall Visual Studio Code, but also its settings on Windows, Linux, and macOS. Furthermore, we will also look at how to reinstall Visual Studio Code on the aforementioned operating systems to ensure that you’re running a new and fresh version.
Table of Contents
Steps to Uninstall and Reinstall Visual Studio Code on Windows
If you would like to uninstall the Visual Studio Code program on a Windows machine:
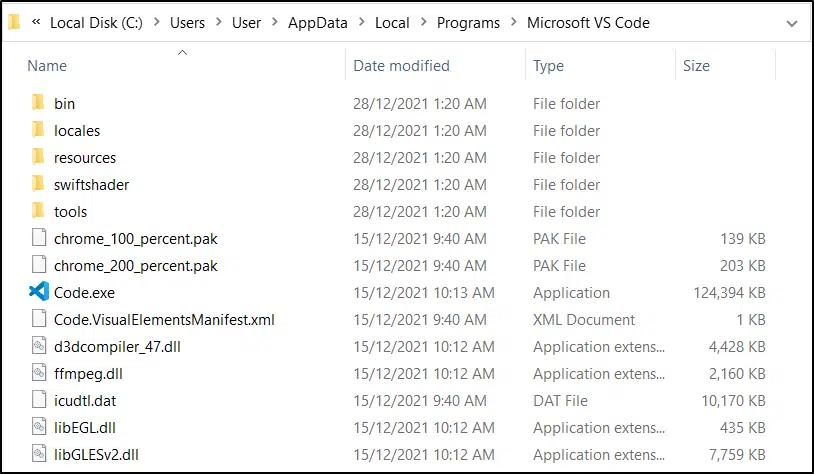
- First, visit the following path using File Explorer, which is where Visual Studio Code is installed:
C:\Users\User\AppData\Local\Programs\Microsoft VS Code
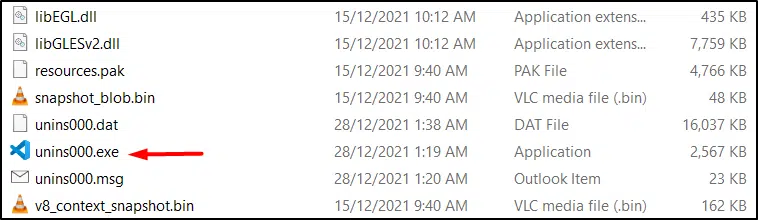
- Next, locate the unins000.exe file and double-click to open it.
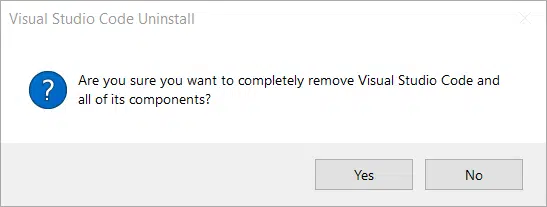
- Then, a popup should appear asking if you want to remove the application and its components. Here, click Yes.
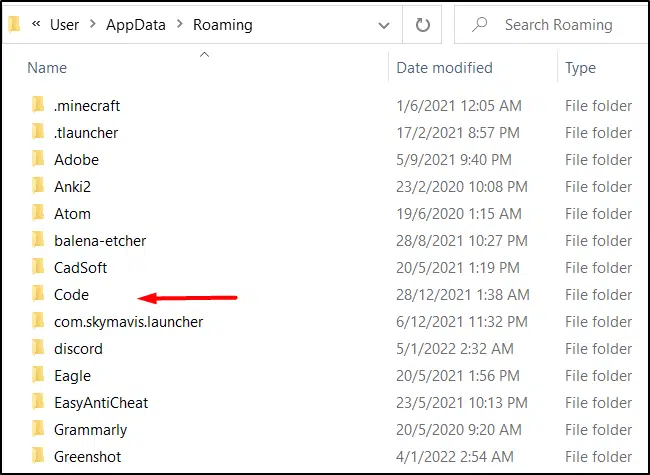
- To reset Visual Studio Code’s settings, visit the following path and delete the Code folder:
C:\Users\User\AppData\Roaming
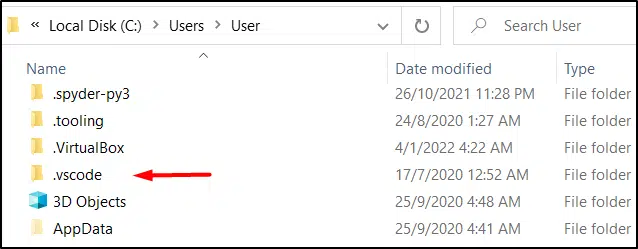
- Next, visit the following path and delete the .vscode folder:
C:\Users\User
This should uninstall Visual Studio Code and reset its settings from your Windows machine. In order to install it again:
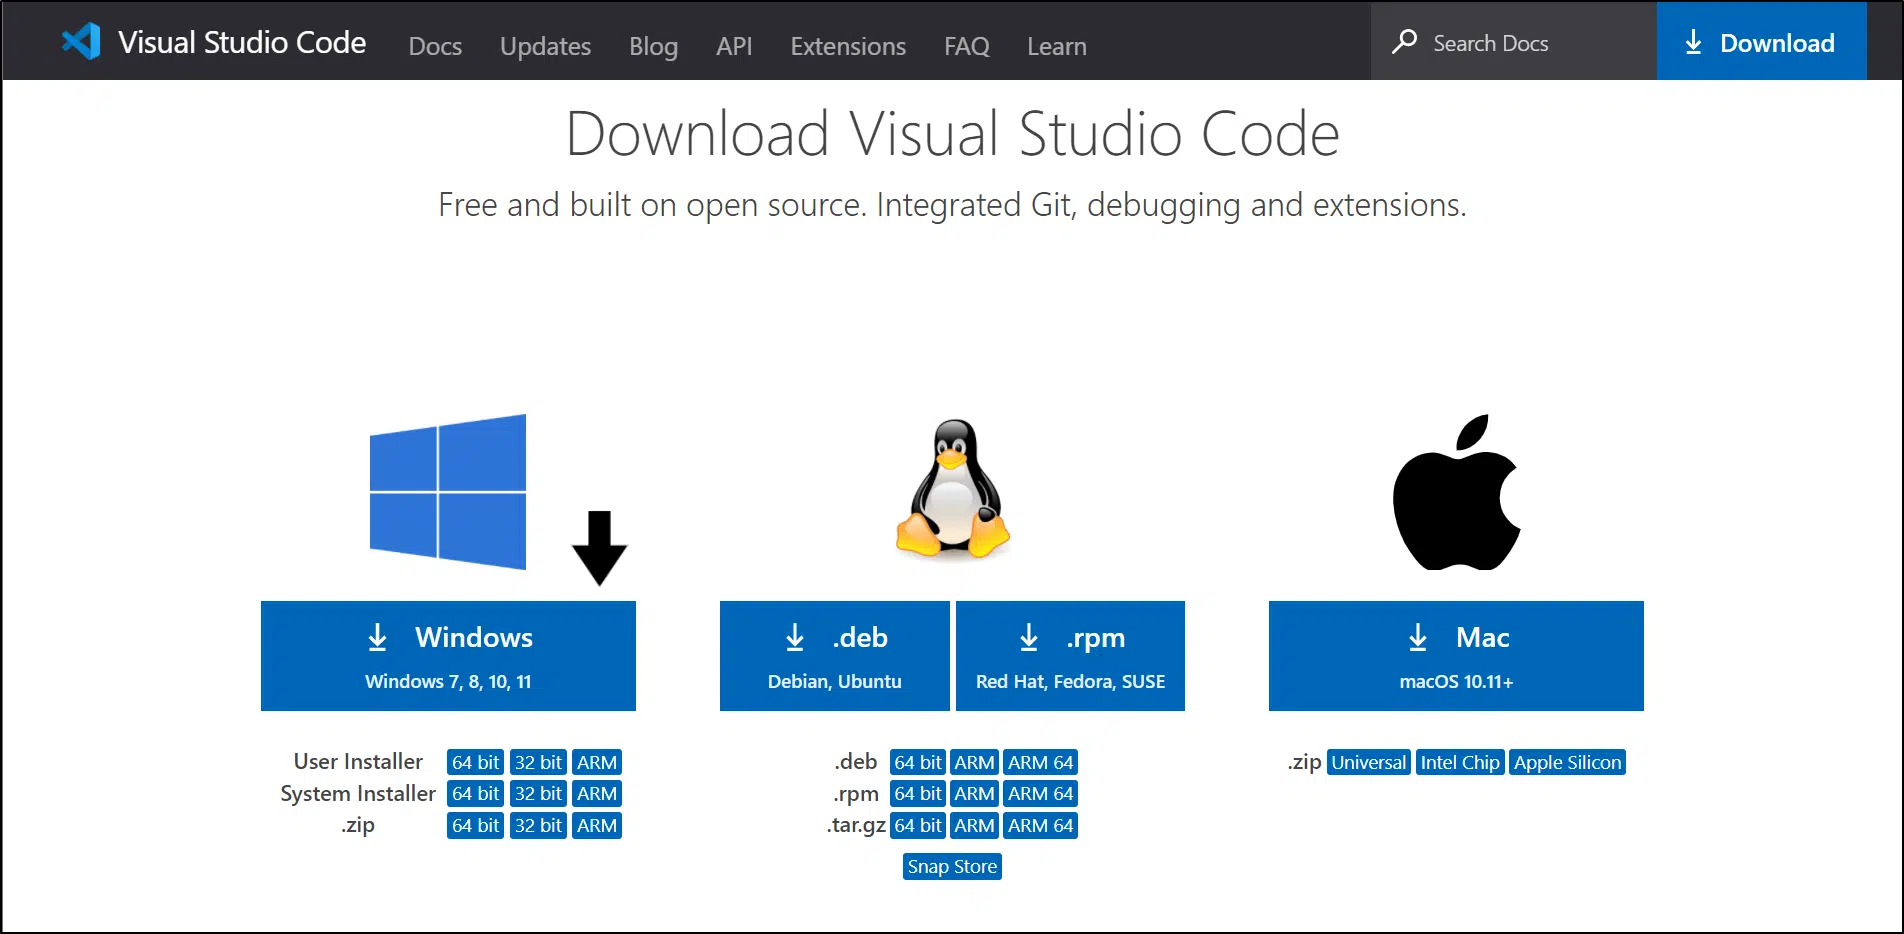
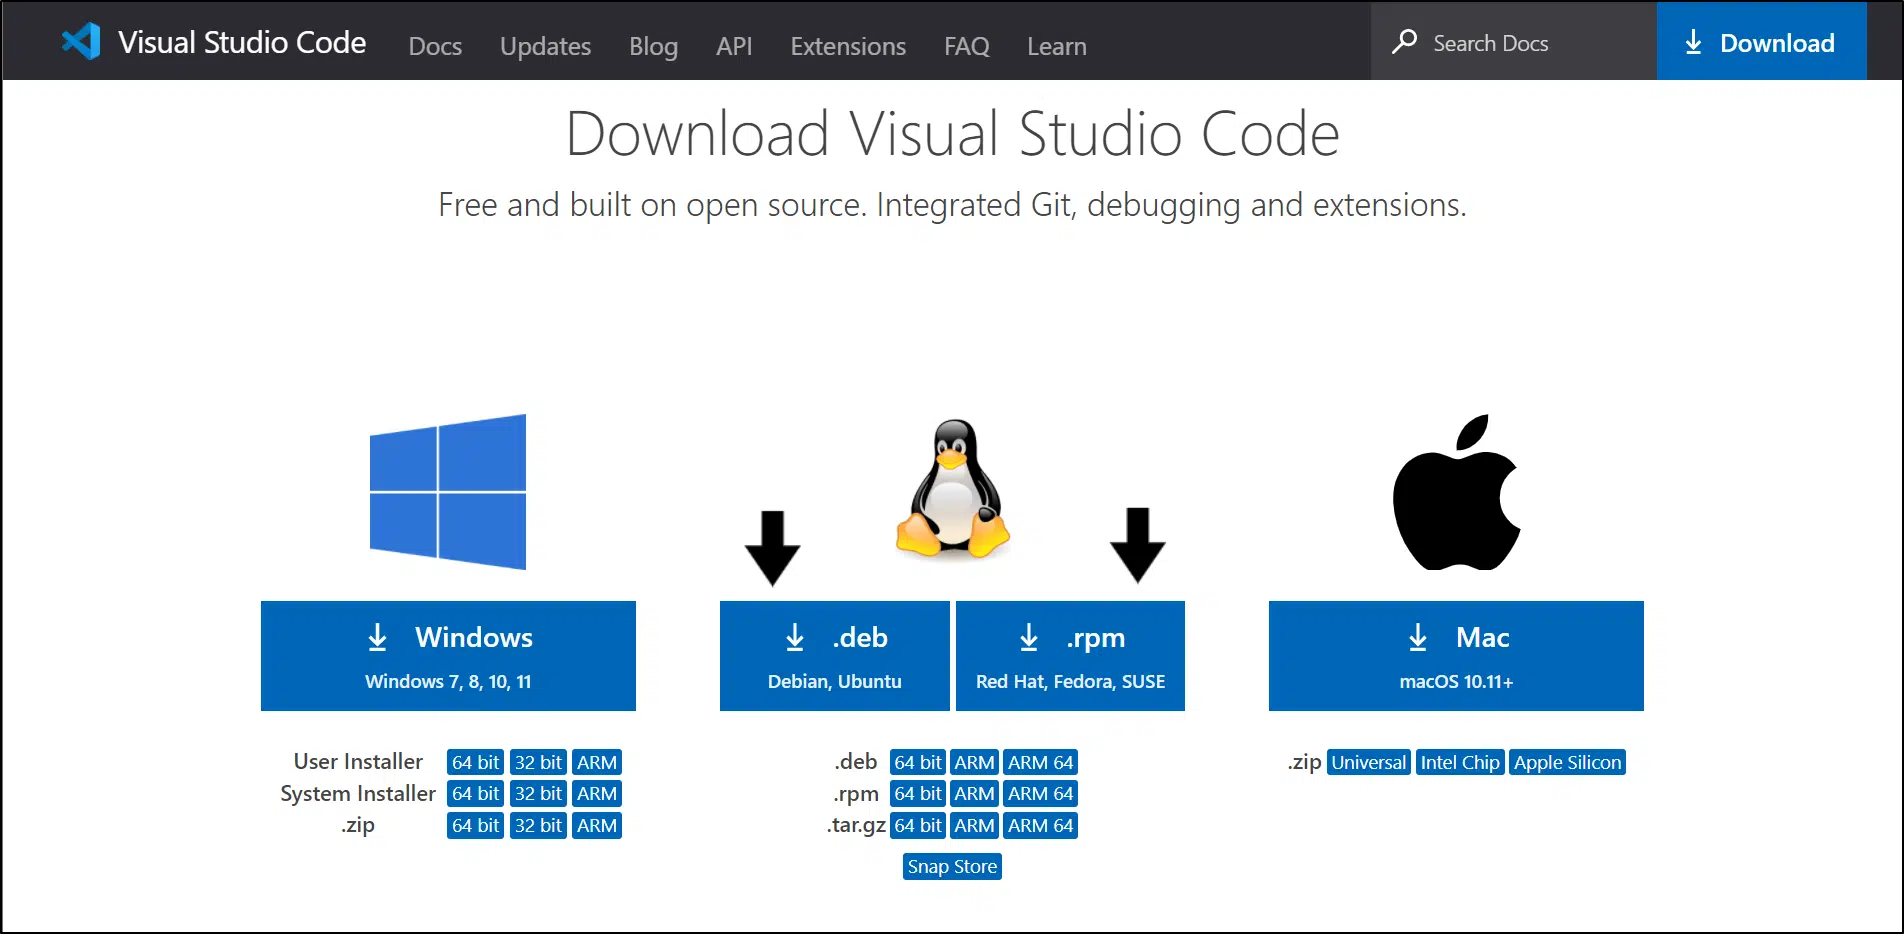
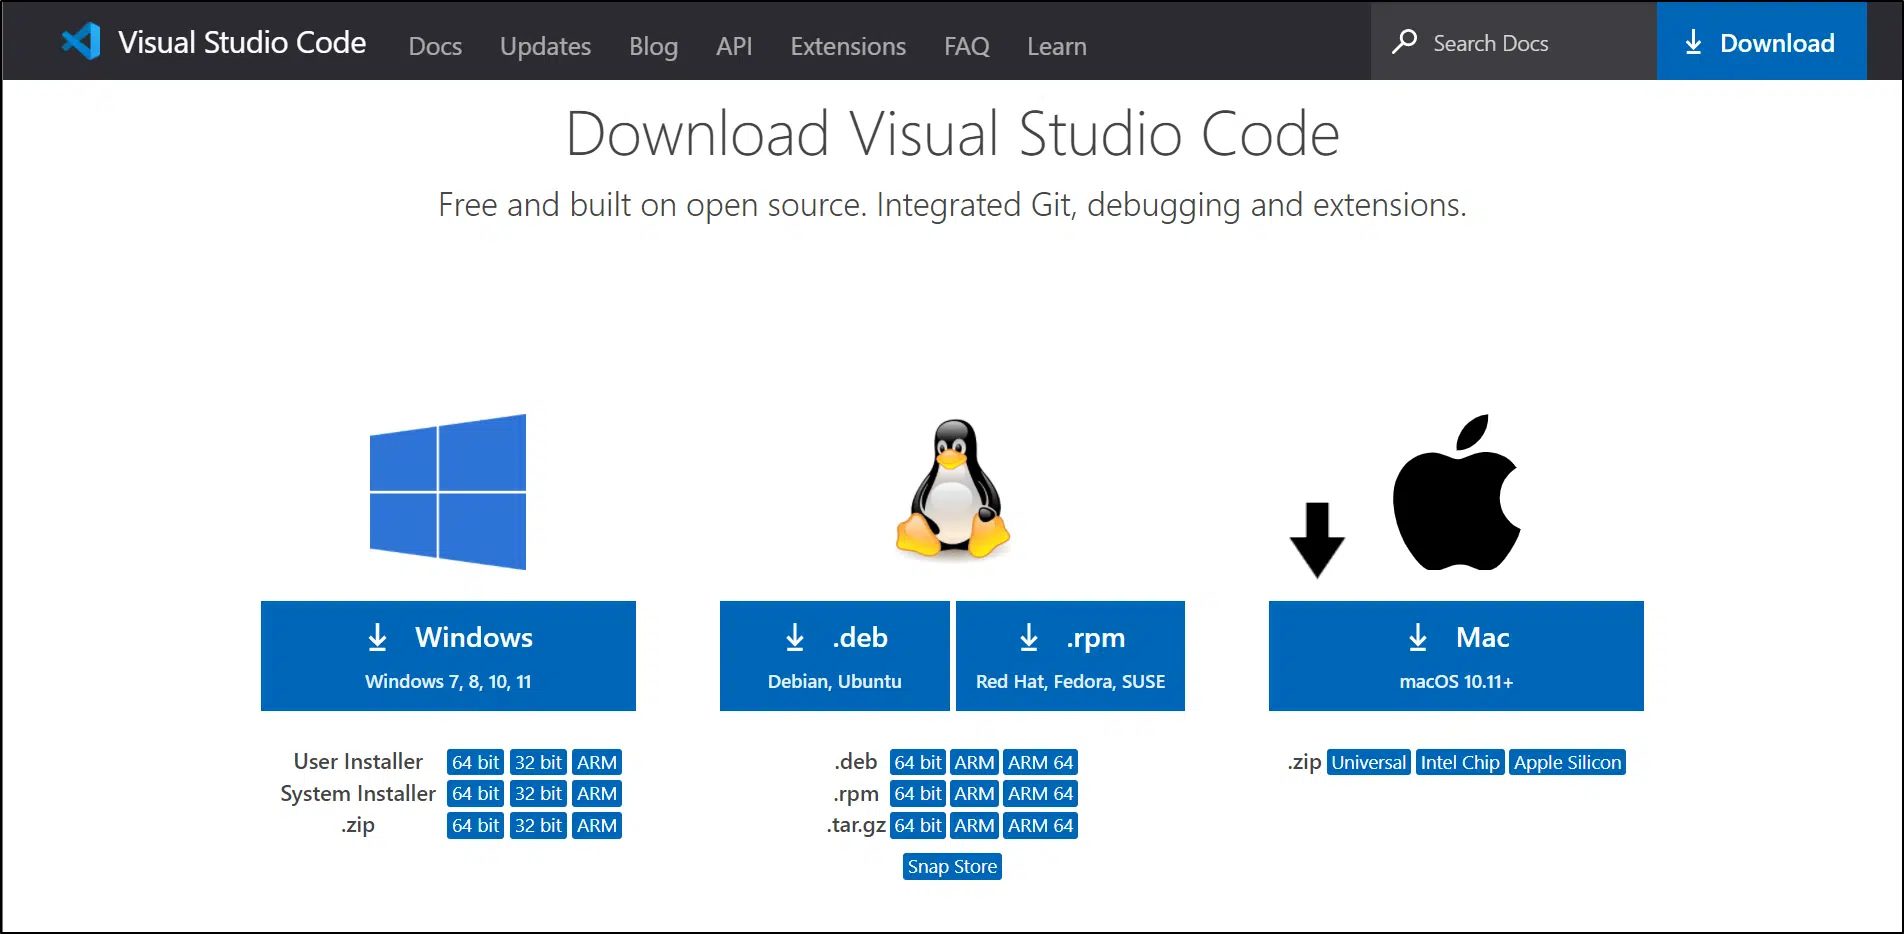
- For starters, visit the download page here and click the download button for Windows.
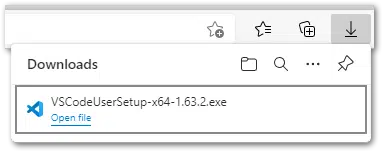
- After that, click on the download from your browser’s Downloads page to open it.
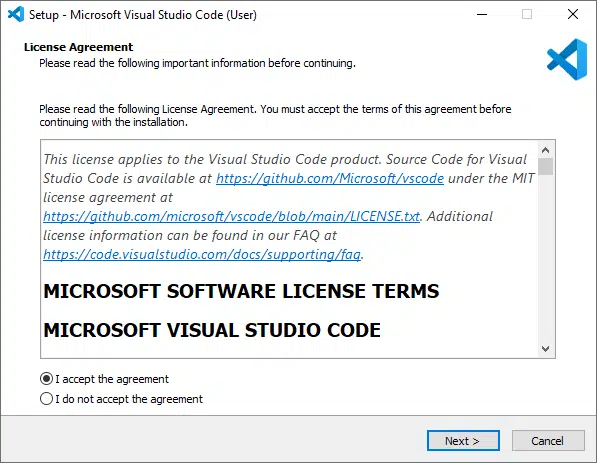
- Accept the agreement.
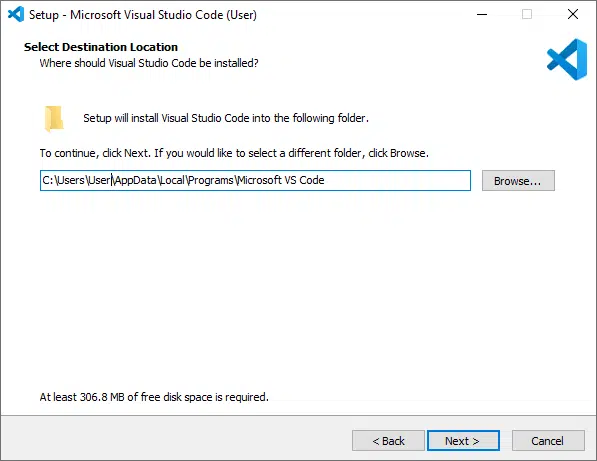
- Next, select the path where you would like VS Code to be installed.
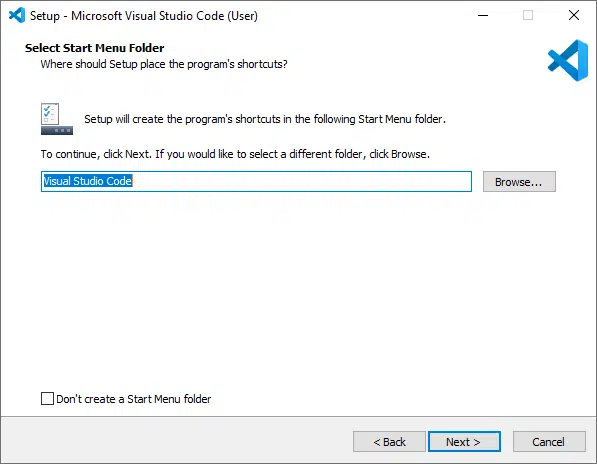
- Following that, you have to select the Start Menu folder. You can also check the box at the bottom left if you don’t want a start menu folder.
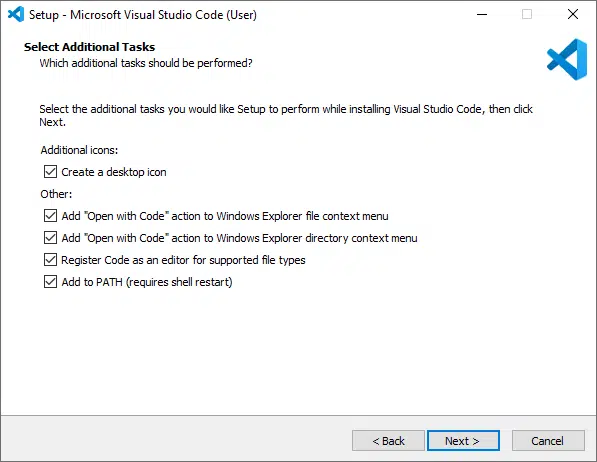
- Subsequently, you can select any additional preferences you would like together with your brand new installation of Visual Studio Code.
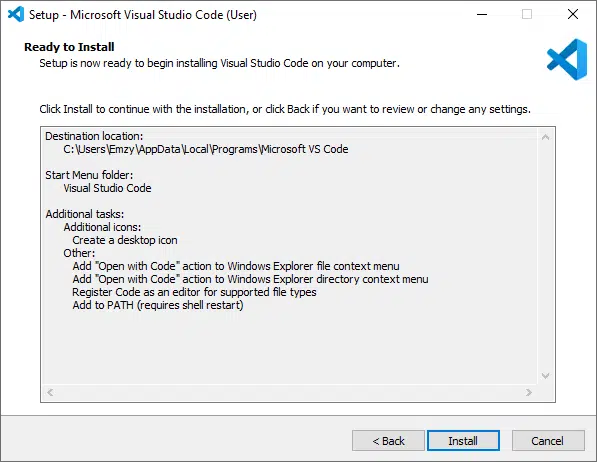
- Finally, verify all the selections made and click Install.
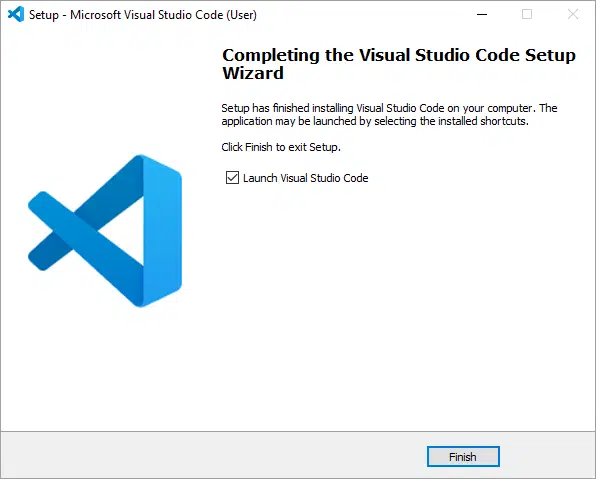
With that done, Visual Studio Code should be successfully installed! Click Finish and check the Launch Visual Studio Code box to open and start using VS Code.
Steps to Uninstall and Reinstall Visual Studio Code on Linux
The following are steps to uninstall Visual Studio Code on a Linux machine, and in this example, we’re using a device running Ubuntu:
Uninstalling Using Terminal Commands (Snap, APT)
If you installed VS Code using a Snap:
sudo snap remove vscode
If you installed VS Code using apt:
sudo apt-get purge code
Additionally, you can remove any custom configurations or settings made on the Visual Studio Code program by entering the following command:
cd ~ && rm -rf .vscode && rm -rf .config/Code
Uninstalling Using the Ubuntu Software Center
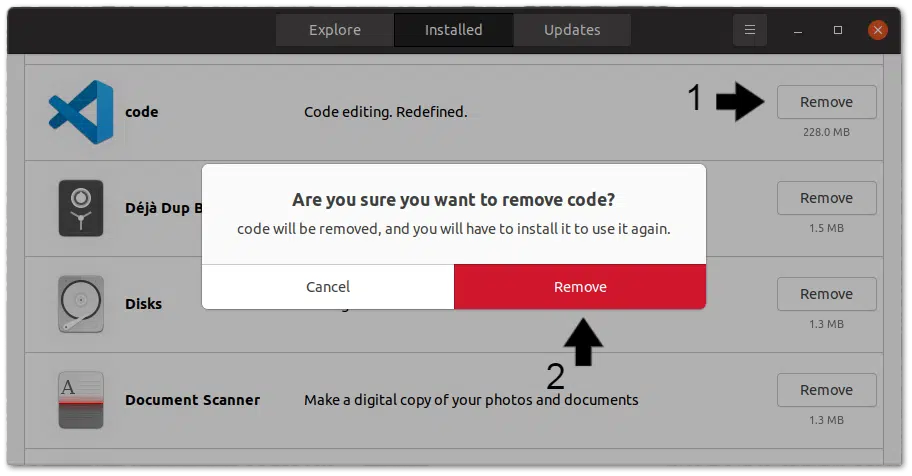
If you installed VS Code using the Ubuntu Software Center, open the Ubuntu Software, then within the Installed category, search for the app, right-click it and select Remove.
Uninstalling Using the File Manager
For this method, you can start by renaming the following file, to render it ineffective but kept as a backup while ensuring that the program creates a new version:
~/.config/Code/User/settings.json
Moving on, you can either move or delete the following folders:
~/.config/Code

~/.vscode
Any of the above steps should uninstall Visual Studio Code and its settings from your Linux machine. With that done, the following ways can be used to reinstall it on Ubuntu:
Installing From the Official Visual Studio Code Downloads Page
One way to install the Visual Studio Code program on your Linux machine is by downloading its file from their official downloads page. Here, you can choose to download the file suitable for your device’s particular distro, whether it’s running Ubuntu, Debian, Red Hat, etc.
Installing Using the Ubuntu Software Center
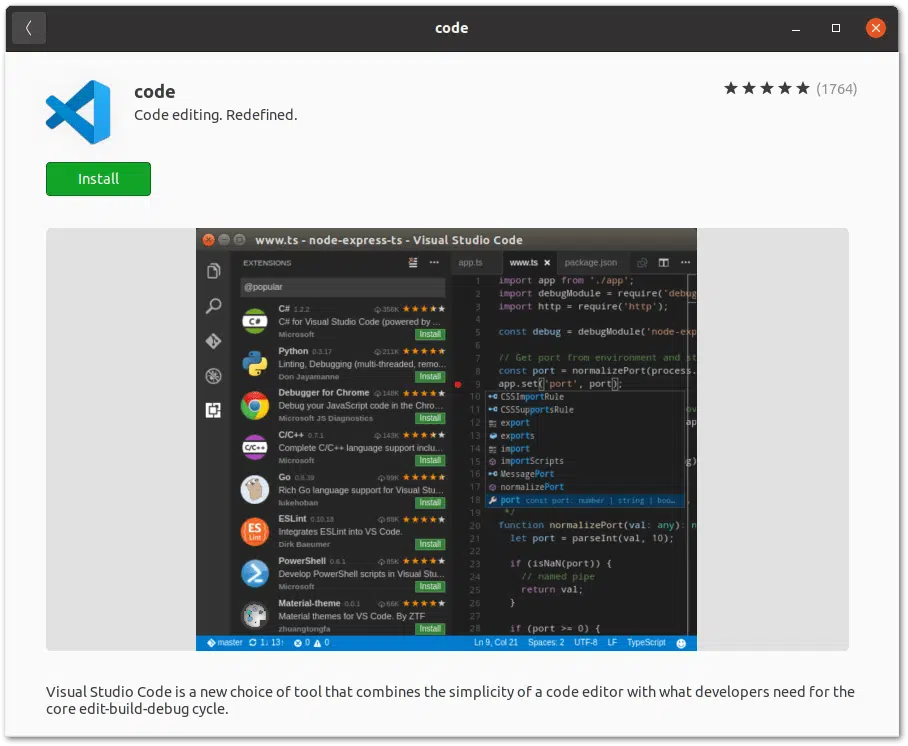
As you might know, the Ubuntu Software Center is a package management system with a graphical user interface, so it’s sort of like an app store that’s easy to access and navigate on your device. Here, you can also find the Visual Studio Code program to download and install.
Simply search for the Visual Studio Code application, open its page, and select the Install button. Afterwards, you may need to authorize the download by entering your system user password.
Installing as a Snap Package
A snap is a safe and easy to install software package on Linux that is containerized. So, the Visual Studio Code snap can be installed by entering the following command in the Terminal:
sudo snap install --classic code
Installing Using Advanced Packaging Tool (APT)
Before installing VS Code using APT, there are a number of steps we need to follow.
- Firstly, update the packages on your machine by entering the following command in the terminal:
sudo apt update
- Next, install the depository’s required dependencies by entering the following command:
sudo apt install software-properties-common apt-transport-https wget
- After that, import Microsoft’s GPG key by entering the following command:
wget -q https://packages.microsoft.com/keys/microsoft.asc -O- | sudo apt-key add -
- Then, enable the Visual Studio Code repository:
sudo add-apt-repository "deb [arch=amd64] https://packages.microsoft.com/repos/vscode stable main"
- Lastly, install the Visual Studio Code package:
sudo apt install code
Steps to Uninstall and Reinstall Visual Studio Code on macOS
If you would like to uninstall Visual Studio Code on a macOS machine:
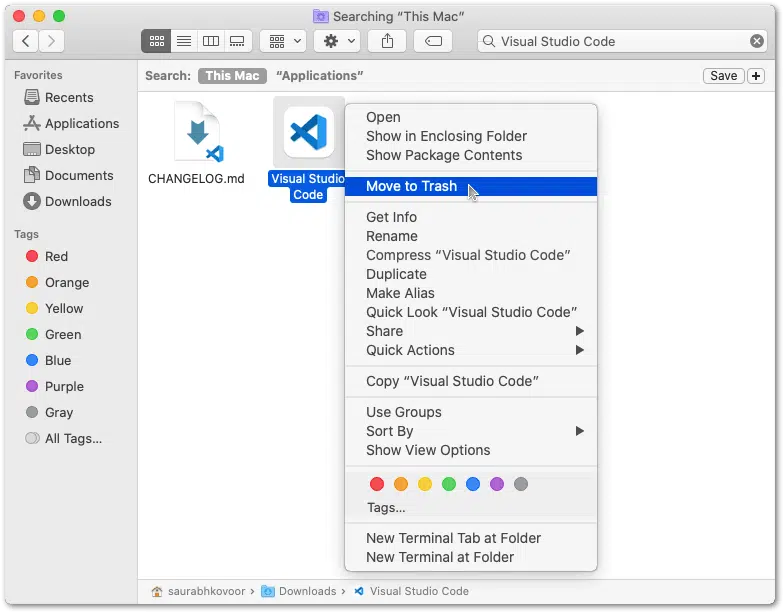
- Start by deleting the Visual Studio Code app from the Applications folder in Finder.
- Once the app itself has been deleted, enter the following commands into the Terminal to delete and reset VS Code’s settings:
rm -rf ~/Library/Preferences/com.microsoft.VSCode.helper.plist

rm -rf ~/Library/Preferences/com.microsoft.VSCode.plist

rm -rf ~/Library/Caches/com.microsoft.VSCode

rm -rf ~/Library/Caches/com.microsoft.VSCode.ShipIt/

rm -rf ~/Library/Application\ Support/Code/

rm -rf ~/Library/Saved\ Application\ State/com.microsoft.VSCode.savedState/

rm -rf ~/.vscode/
- If you would also like to delete any hidden folders in the home directory, enter the following command:
rm -rf ~/.vscode*
The above steps should successfully uninstall Visual Studio Code and its settings from your macOS machine. Once that’s done, the following steps can be used to reinstall it on macOS:
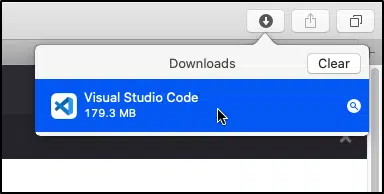
- First, download Visual Studio Code for macOS here.
- Then, open the downloaded archive from your browser’s downloads.
- After that, extract the archive and drag Visual Studio Code app to the Applications folder.
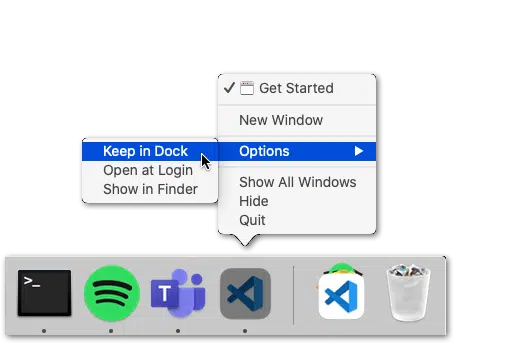
- Additionally, for easier access, VS Code can be added to the Dock by right-clicking the icon and selecting Options > Keep in Dock.
Conclusion
To recap, completely uninstalling Visual Studio Code from your machine can be somewhat tricky at first. However, it is straightforward once you know the additional steps that need to be taken.
Some may want to completely uninstall Visual Studio Code from their machine just as a way of restarting fresh to resolve application errors or they may want to switch to a different code editor or IDE. Whatever the reason is, this is the perfect guide for you!
In this article, we looked at how to completely uninstall Visual Studio Code and delete its settings on Windows, Linux, and macOS devices. Additionally, we also looked at how to reinstall it on each of the above platforms after uninstalling it.
Having said that, we hope you’ve found this guide helpful when it comes to completely uninstall and reinstall Visual Studio Code.
Feel free to share this post with your fellow coders to guide them through reinstalling Visual Studio Code!