


Are you trying to find out how to install NumPy and import it to your IDE (Visual Studio Code, Pycharm, Anaconda, Spyder) on your Windows, macOS, or Linux PC? Well look no further this is the perfect guide to get you started with NumPy! 🧐
NumPy is known as one of the most powerful libraries in Python. Basically, it’s a short form for Numeric Python or Numerical Python where the word “Num” represents the word Numeric or Numerical, whereas the word “Py” represents the word Python.
Essentially, it’s an open-source library for the Python programming language, which is often utilized for scientific computing and working with arrays. Aside from its multidimensional array object, it also gives high-level functioning tools for working with arrays.

That being said, NumPy has become more and more popular as it is known to be very fast and it is utilized in a lot of production systems. Therefore, it’s important to understand and know more about what this library offers.
Now that you know more information on NumPy, let’s dive right into how you can install and import NumPy for Python! This guide will show the steps to install NumPy on Python, whether you’re using Windows, macOS, or Ubuntu Linux.
Table of Contents
Checking If Python is Already Installed
Before moving into the importing part, it’s very important to make sure Python is installed in your operating system. Python can be installed in many types of operating systems, which include Windows OS, Ubuntu OS and macOS.
Hence, in the sections below, before getting into the steps to Install NumPy, we’ll go over the steps to check if Python is present on your device’s OS. If not you’ll need to download and install that as well.
Installing NumPy on Windows OS
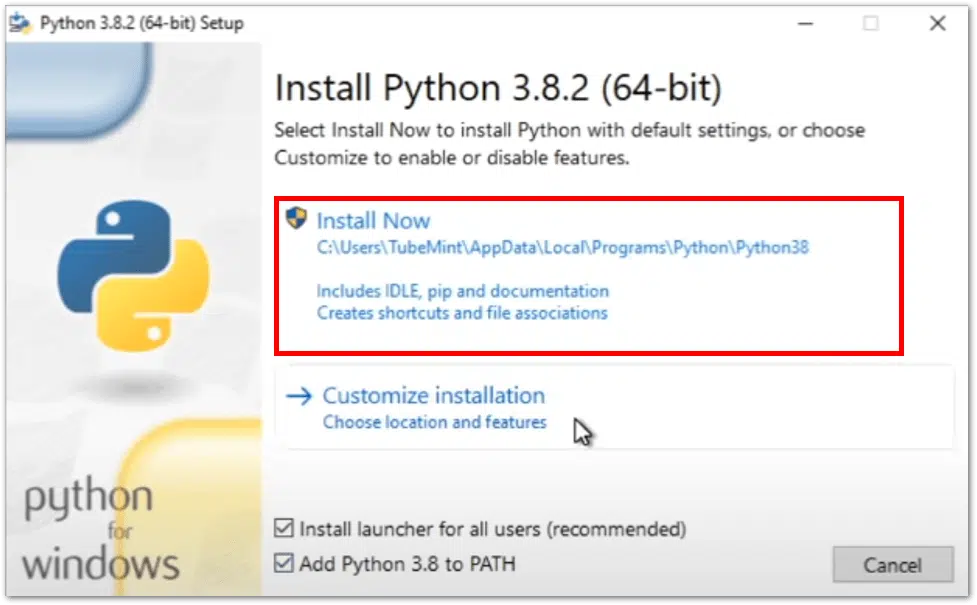
Windows OS doesn’t have Python installed by default, so we need to install Python’s executable installer onto our Windows OS first. To do this, we can go to the Python Downloads page, and then download the version you wanted
After you’re done downloading, run the executable installer and click Install Now.
After having Python installed in our Windows OS, we can check whether Python is installed as well as its version by typing: python -–version or python -V in the Command Prompt.
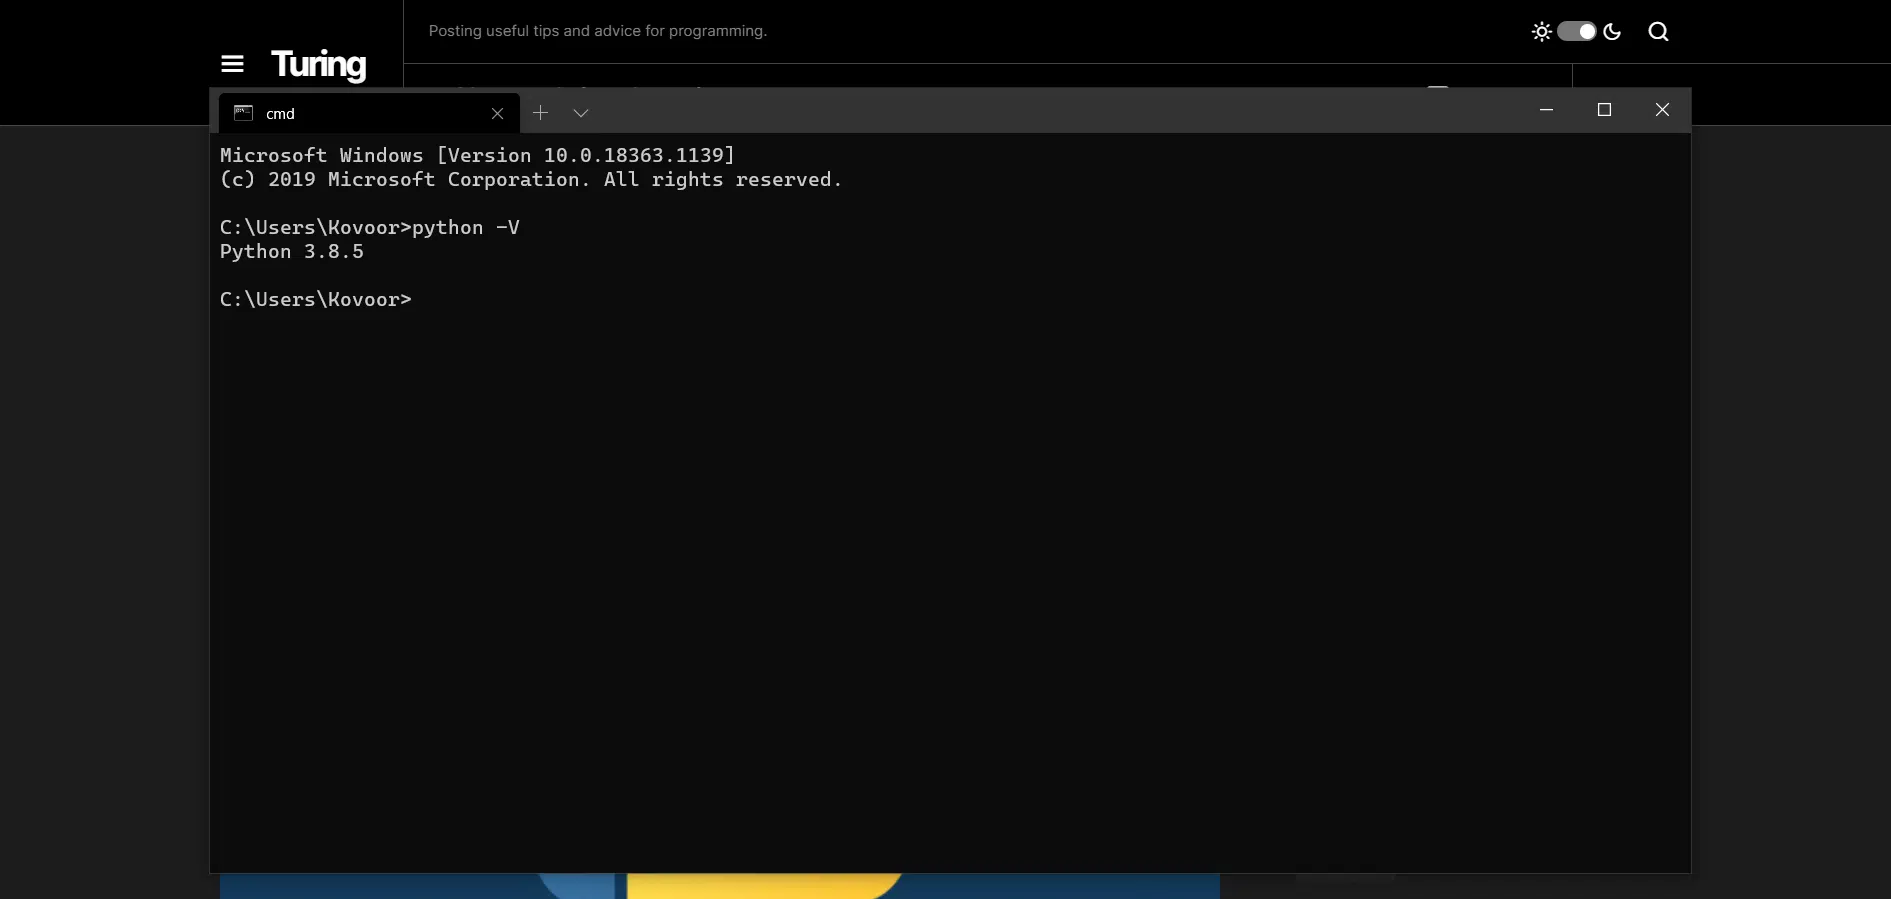
Whereas if we want to check for Python3, we can do so by typing python3 –version or python3 -V.
Steps to Install PIP on Windows
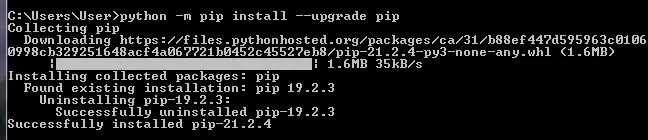
Next, it’s important to install PIP on your Windows OS and upgrade it to the latest version. For this, you can also check out our other guide for installing PIP on your PC. You can do this by typing the following command in the Command Prompt:
python -m pip install –upgrade pip
That’s about it! With that done, you can check if pip was installed successfully by entering the following command:
pip help
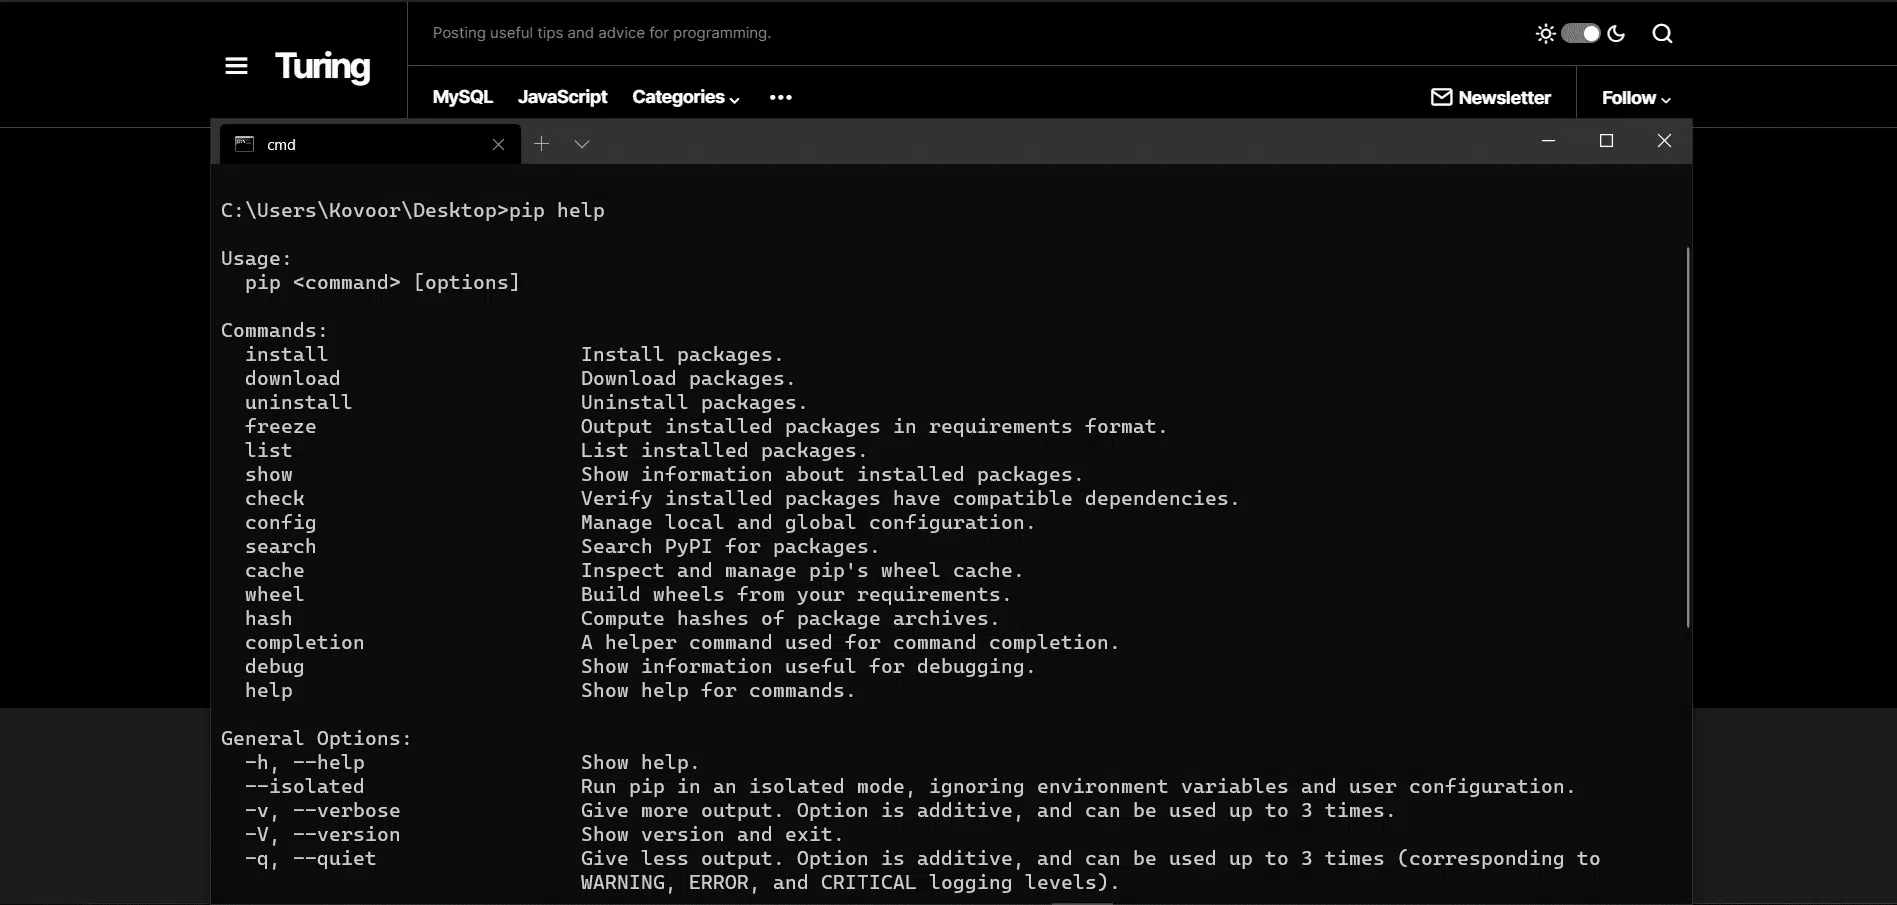
If PIP responds, then that’s a good sign that PIP is installed correctly. You should not be seeing any error messages on the screen saying that ‘pip’ command cannot be found.
pip 20.1.1 from c:\users\administrator\appdata\local\programs\python\python38-32\lib\site-packages\pip (python 3.8)
If however, you do receive an error, then simply repeat the steps above and test again.
Steps to Install NumPy on Windows
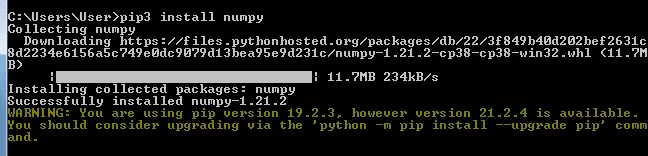
Then, install NumPy by typing the command pip install numpy or pip3 install NumPy. In this case, I am using pip3 install NumPy:
pip install numpy
Installing NumPy on Ubuntu OS (Linux)
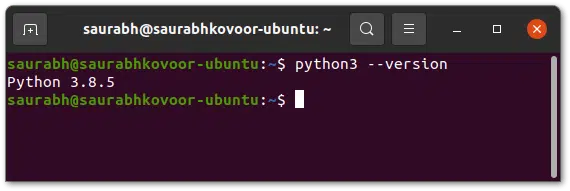
Python is already installed inside Ubuntu OS by default. However, to double-check whether it is there, type python –version or python –V for Python, and type python3 –version or python3-V for Python3.
If Python is not installed in your Ubuntu OS machine, there are 3 ways to install it, which are:
- Using the Apt Method
- Using Deadsnakes PPA
- Using Source Code
If you have Python installed in Ubuntu OS already you can skip ahead to the steps to install NumPy.
Steps to Install Python on Ubuntu Linux
(i) Using the Apt Method (easiest method)
For starters, we’ll try the first method (i.e., Using the Apt Method), which is the easiest way to install Python on your Ubuntu OS machine:
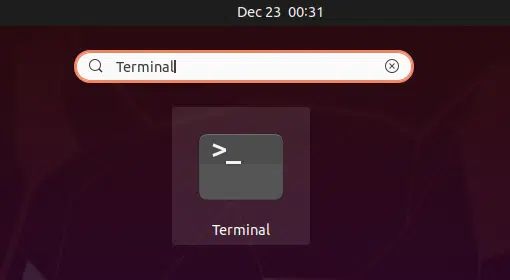
- To do this, go to your terminal by pressing Ctrl + Alt + T or select the Terminal icon inside Ubuntu.
- Next, update the system’s repository list by entering:
sudo apt-get update
- Finally, download the latest version of Python by entering:
sudo apt-get install python
After the installation is completed, you now have Python in Ubuntu.
(ii) Using Deadsnakes PPA
This is an alternate way if the Python package is unable to be downloaded from the official Ubuntu repository. Hence, you can try adding Deadsnakes PPA to the system’s repository list instead. PPAs (Personal Package Archives) are repositories that are designed especially for Ubuntu users.
By default, PPAs cannot be added to the system’s package lists. Thus, the “software-properties-common” package gives an efficient way to manage and add PPAs to the system.
With that said, to install Python using Deadsnakes PPA on Ubuntu Linux:
- Firstly, install the package by entering:
sudo-apt-get install software-properties-common
- Next, to add the official Deadsnakes PPA link to the system’s repository list, enter the following command:
sudo apt-repository ppa:deadsnakes/ppa
- Then, download the latest version of Python from the added PPA by entering:
sudo apt-get install python3
After the installation is complete, you now have Python in your Ubuntu machine.
Note: As Deadsnakes PPA consists of almost every version of Python in its database, older versions of Python can be installed as well. So, this can be done by replacing the package name with the version of Python you want to install. For example, if you wanted to install python 3.2, you can do so by entering:
sudo apt-get install python3.2
(iii) Using the Source Code Method
This is also an alternative method to install Python on Ubuntu. It may look a bit difficult, but actually it’s very easy once you know the process.
- First, update the system’s repository list by entering:
sudo apt-get update
- Next, install supporting dependencies on your system with Apt by entering:
sudo apt-get install build-essential zlib1g-dev libncurses5-dev libgdbm-dev libnss3-dev libssl-dev libreadline-dev libffi-dev wget
- After that, make a directory for storing Python files:
mkdir /python && cd /python
- Then, download the Python Source Code from their official FTP server:
wget https://www.python.org/ftp/python/3.9.1/Python-3.9.1.tgz
- Extract the tgz file that was downloaded:
tar –xf Python-3.9.1.tgz
- Following that, tests and optimizations need to be done before installing as it increases the execution of your code by 10% to 20%.
cd python-3.9.1
./configure --enable-optimizations
- Use the MakeFile present in the directory to build the package:
sudo make install
After you’re done installing Python on Ubuntu OS, we can start installing NumPy in Ubuntu OS. But before that, to test if Python was installed successfully we can check the Python version, by entering: python –version or python –V. Whereas for Python3 you can check by entering python3 –version or python3-V.
Steps to Install NumPy on Ubuntu Linux
After checking the versions, we can start installing NumPy. There are different methods to do so, depending on which Python version you’re using and which method you prefer:
(i) For Python2 from the Ubuntu repository:
sudo apt install python-numpy
(ii) For Python3 from the Ubuntu repository:
sudo apt install python3-pip
(iii) For Python2 using PIP
pip install numpy
(iv) For Python2 using PIP
pip3 install numpy
Installing NumPy on macOS
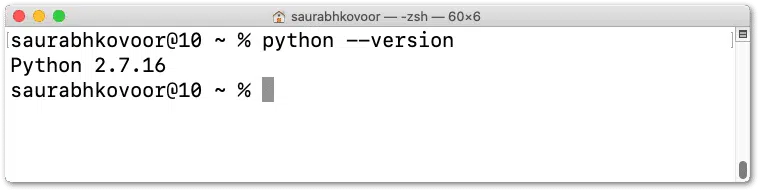
Before we can start installing NumPy, we need to make sure if Python was already installed in the macOS machine. For this, we can check by entering python –version or python -V for python and python3 –version or python3 -V for python3 in the Terminal.
If Python is not installed on macOS, we can go to the Python Downloads page and download Python. After downloading Python, click continue and agree to its terms and conditions. Once you’re done with these steps, wait for Python to be finished installing.
Finally, with Python installed, like before, we can check whether Python is properly installed by entering python3 –version and pip3 –version in the Terminal.
Steps to Install PIP on macOS
We’ll be installing NumPy using PIP, a standard packet manager for Python to install and manage various packages that you don’t get with the Python Standard Library. Therefore, before we’re able to utilise PIP we’ll need to install it first. For more information on this, you can check out our other guide to installing PIP on your PC.
That being said, to install PIP on macOS, enter the following command in the Terminal:
sudo easy_install pip
After that, you can check if PIP was installed correctly by running the below command on your Mac:
pip help
If PIP responds, then that’s a good sign that PIP is installed correctly. You should not be seeing any error messages on the screen saying that the ‘pip’ command cannot be found. However, in the event you do receive an error, then simply repeat the steps above and test again.
Steps to Install NumPy on macOS
Once that’s done, we can start installing NumPy by typing pip install numpy for Python or pip3 install numpy for Python3.
pip install numpy
How to Import NumPy in Python?
Now that we’ve installed Python in our Operating System, we can start importing NumPy and check the version of the NumPy installed by using the following command in the Command Prompt or Terminal, as well as at the beginning of your Python program code in your IDE:
import numpy as np

np.__version__
Following that, the output should be similar to this (depends on what version your NumPy is):
‘1.21.2’
Conclusion
In this article, we have discovered that NumPy is very popular and one of the most powerful Python libraries ever created. It has many types of usages as well as benefits for developers. Hence, we should appreciate the creation of NumPy that gave a lot of benefits to us.
Not only that, there are many different ways to install Python in different types of Operating Systems. For this, it’s important to check the version of Python installed first before installing NumPy.
Besides that, there are also many ways to install NumPy, and it all depends on which version of Python you’re using or prefer.
Lastly, we hope that you find this article helpful, and happy coding!
Feel free to share this post with your fellow coders to guide them to install and import NumPy on Python.