WordPress themes work wonders until they don’t—WordPress themes not uploading, not installing, “installation failed” error, so on and so forth.
Every WordPress website user knows just how much of a helping hand WordPress themes are in website building. As you’re reading this, there’s an estimate of 31,000 WordPress themes available on the internet. 🌐
Readily available and sophisticated themes save you from the nooks and crannies of programming or web page designing. That said, there are several WordPress theme issues you may encounter from time to time.
Luckily, most of the complications will have been reported and resolved by other users before you. We have listed the common WordPress theme issues and their best solutions to help you from scouring the internet for them.
1. Upload Your WordPress Theme Through FTP
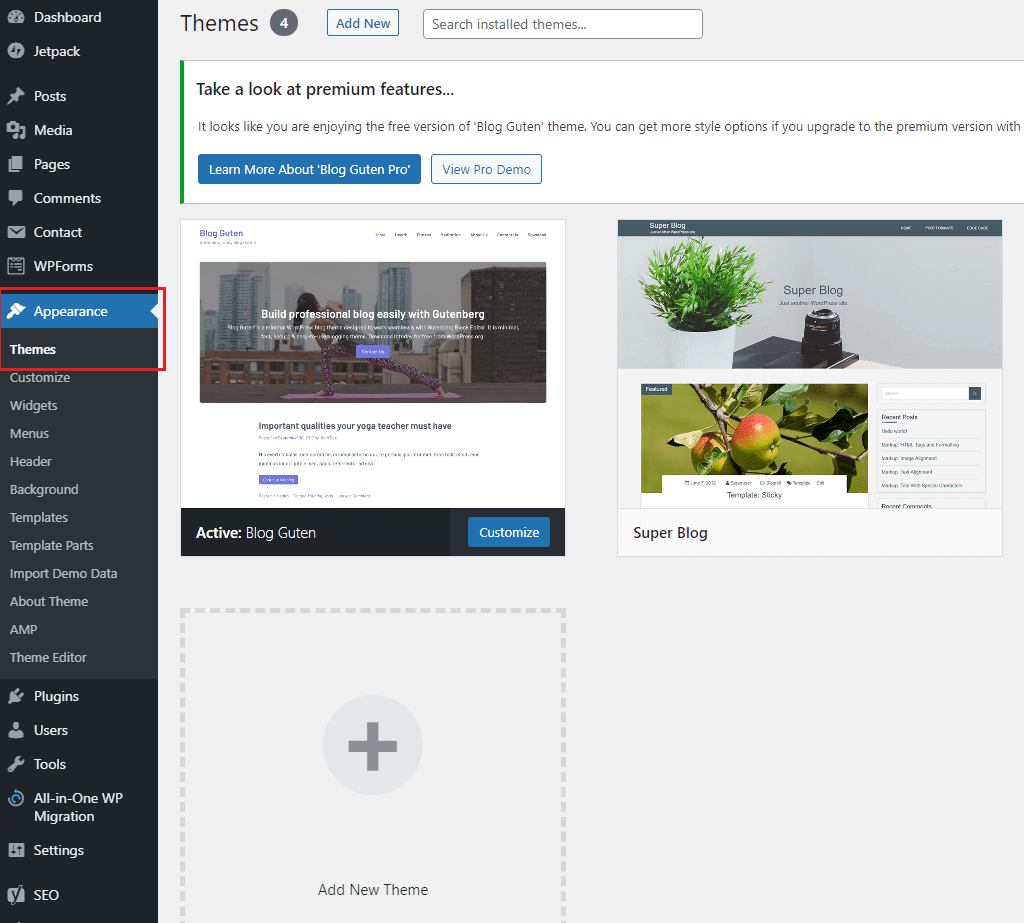
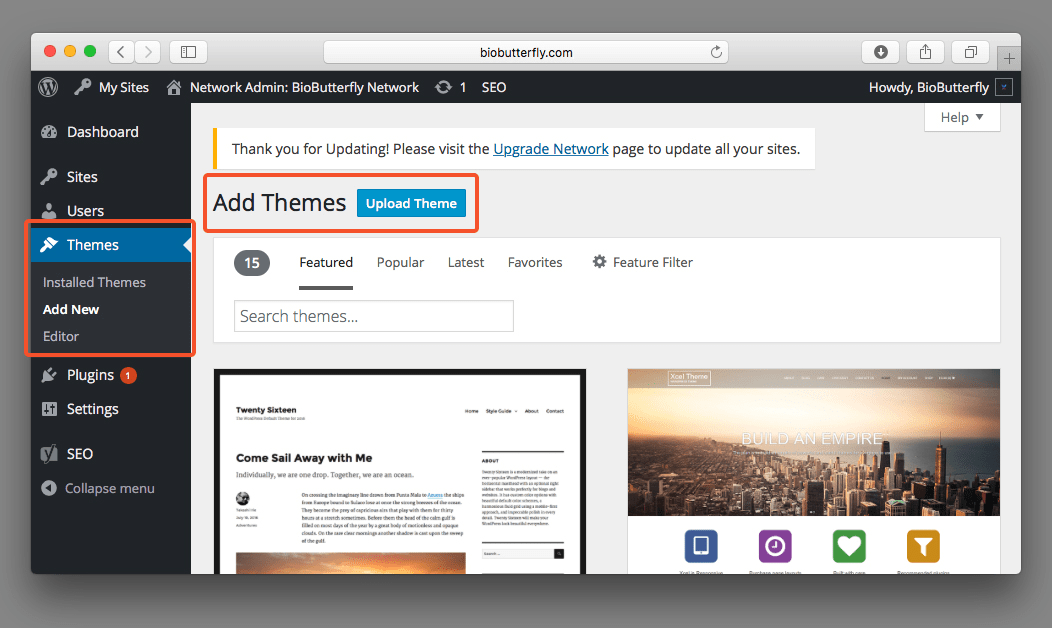
The process of uploading the WordPress theme of your choice is fairly easy. Firstly, go to WordPress dashboard > Appearance > Theme > Add New. Then, choose the zipped theme file saved on your computer and start uploading it.
However, if the WordPress theme is not uploading with the first option, you can alternatively upload the themes manually via an FTP program:
- First, go to your cPanel dashboard > File Manager.
- Next, select the domain you’d want to upload the theme, then click on public_html>wp-content>themes.
- Finally, select your desired theme and click on upload files. Please make sure you’ve already unzipped the theme file before uploading it.
Though this is a comparatively longer process, it has effectively worked for many WordPress users. Who knows, it could work for you too!
2. Fixing The System Errors
Some WordPress users may have difficulties with their theme due to system errors. Here are two errors you might be having:
a) Error 404
If you get the “error 404” every time you try uploading a theme, it means that your server couldn’t find what was requested. Oftentimes, this would happen when you upload the theme’s source file instead of the theme file itself.
Hence, to solve this issue, you just need to find the theme file—simple, right?
- First, download the theme zip file to your desktop
- Next, you have to unzip the file and look into its contents
- Find the theme file (it’s usually named after the theme itself)
- Finally, go to WordPress dashboard > Appearance > Theme > Add New and upload the theme file.
b) Syntax Error
Syntax error means there’s a mistake in the programming language of your theme. So, you’d have to review the theme’s coding sequence to identify the problem.
However, this could be a tedious job and a safer option would be to contact the theme’s developer to sort out the issue. If the developers fail to resolve this issue, you can even report their theme and receive a refund or another theme replacement.
3. Check the WordPress Theme File Format
File and folder formats are essential, and the type of format required depends on where and how you’re uploading your WordPress theme.
a) Incorrect File Format
When you’re uploading the theme file directly to WordPress, .zip is the correct format to use. Therefore, make sure the theme folder comes in .zip format. If not, contact your developer and request for the theme folder in .zip format.
Also, keep in mind that WordPress will not be able to read zip files that are placed within the main zip theme folder. So, make sure your zip theme folder only consists of open files that are accessible to WordPress.
b) Missing Files in the Theme Folder
Sometimes, the theme file itself may be missing for the theme folder you’re uploading to WordPress. To cross out this error, unzip the theme folder and cross-check its content with the WordPress Theme Package template.
If you notice any discrepancies, reach out to the theme developer and report this problem.
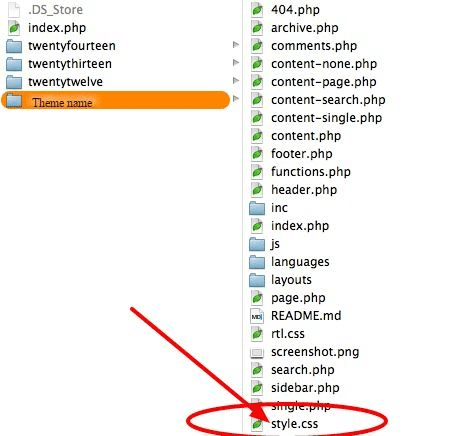
c) Missing style.css Stylesheet
Theme installation will not work if you’re trying to upload an entire zip theme file that doesn’t have the style.css stylesheet. Hence, to make sure your theme file has the style.css stylesheet, make sure you’re downloading correctly.
When downloading a theme, choose the “installing WordPress file only” option. By doing this, the download will give you an installable theme with the style.css stylesheet that you can install into WordPress.
4. Change the Default Limits
Limits are placeholder values that developers use when developing a theme. Sometimes these limit values may not be sufficient for users, and that calls for a change.
a) Theme Exceeds The Upload Limit
Upload limit describes the maximum theme file size you can upload. Therefore, if you get error notifications such as “the link you followed has expired” or “are you sure you want to do this?”, it means that the theme file you’re trying to upload is too large.
You have two options to resolve this issue. The first method is to call your hosting provider and request to increase the upload limit. Alternatively, you could try changing your PHP script’s maximum file upload size via a .htaccess file.
- First, use Secure Shell (SSH) to log in to your Cpanel account. Then, go to file manager > .htaccess file.
- Next, add php_value upload_max_filesize xxM to the .htaccess file. Remember to change xx to your desired maximum file size in Megabytes.
- Then, add php_value post_max_size xxM to the .htaccess file. Again, remember to set xx to your desired maximum HTTP POST file size.
- Finally, save the changes.
To test out the changes, try re-uploading your theme file. If it uploads successfully, it means that your upload limits have been modified.
b) Theme File Exceeds Memory Limit
It’s easy to identify if this is the cause of your installation problem. In this case, you’ll get an error notice that says something along the lines of “Fatal error: Allowed memory size of xx bytes exhausted”.
You will encounter this issue when your web hosting PHP memory limit is lower than that of the installation process. In most cases, the default memory limit is 64 Megabytes.
So, the goal is to increase the memory limit further and here’s how:
- First, log in to your control panel and open FTP.
- Next, go to wp-config.php file on the root directory and click edit
- Add define( ‘WP_MEMORY_LIMIT’, ‘256M’ )
- Repeat the installation process and you should be good to go!
c) Insufficient Disk Space
If you’re using shared web hosting, you might want to consider switching to personal hosting with sufficient disk space.
Additionally, you may avoid storing your backups in the same folder as your server to save some disk space. Alternatively, use secure cloud backup systems such as IDrive, Dropbox, or pCloud.
5. Allow WordPress to Access Your Theme
It’s a real bummer when your server says, “Installation failed, could not create directory”. It indicates that the installation has been unsuccessful, and here are some ways you could go about solving it:
a) Provide the Correct Directory Permissions
- First, go to WordPress dashboard > Tools > Site Health.
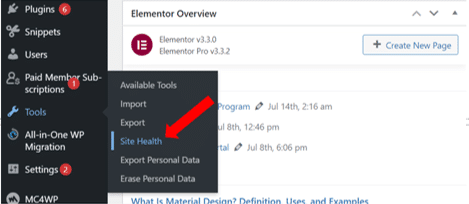
- Then, click on the Info tab to check your file permission settings.
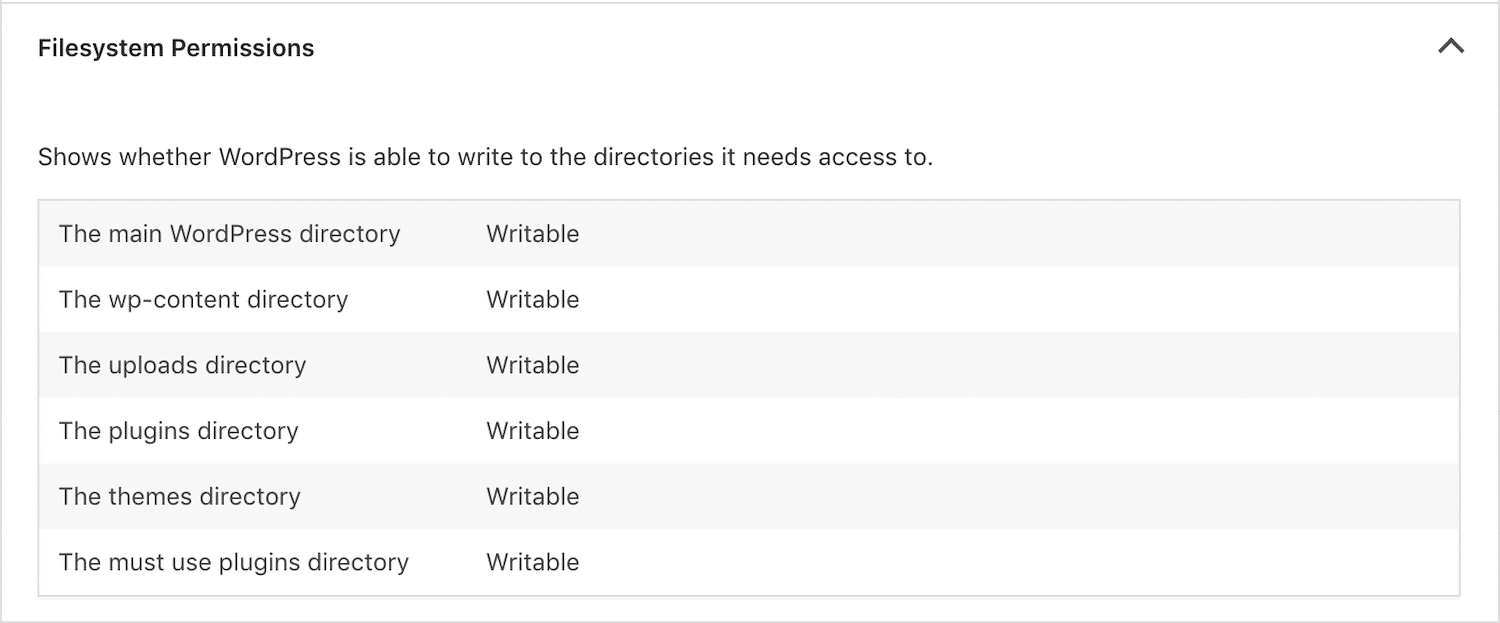
- Next, scroll down to the Filesystem Permissions section.
- Here, make sure the permission status is “writable” for all of your themes and plugin directories.
- If your theme’s permission status is “unwritable”, then this could be the problem behind installation failures.
b) Theme Not Showing After Uploading
Before jumping into troubleshooting, make sure you’re able to see the theme directory and all its files under wp_content/themes. If not, most probably, you have not uploaded the theme into the correct directory. So, resolve this by looking for the style.css file in your theme folder and uploading that to WordPress Dashboard > Themes > Add New.
In cases where your theme isn’t showing despite correctly uploading, ensure that you’ve allowed permission for WordPress to access your theme file. Then, enable your theme under the “themes”, “network admin”, and “my sites” sections in WordPress.
6. Install WordPress Themes Manually
After successfully uploading your WordPress theme, you’d have to correctly install the theme into your WordPress account. Here are some of the potential issues (and their solutions!) you may experience in this step:
- First, log in to your server using FTP
- Next, go to wp-content/themes/folder
- Upload your unzipped theme folder and wait for it to upload
- After that, you should be able to find your theme in wp-content/themes/customize
- Now, go to your WordPress dashboard > appearance > themes and upload the theme
Still Can’t Upload or Install a Theme on Your WordPress Website?
The most common cause for WordPress theme installation failure is plugin or theme conflicts. It means that there’s another plugin or theme interfering with the process of uploading the theme you have at hand.
Here’s how you can resolve it:
- First, go to Plugins>Installed Plugin and disable all the plugins.

- Now, try to upload the WordPress theme.
- If it works, enable the plugins one by one to identify the causative plugin.
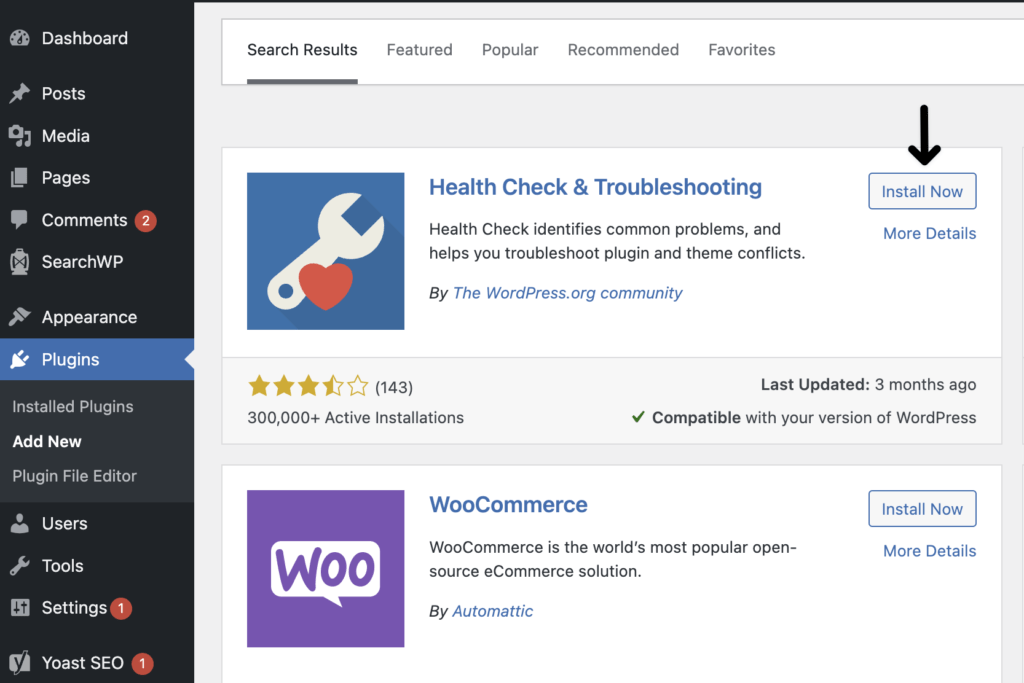
- Otherwise, you can try installing the Health Check & Troubleshooting plugin by WordPress for troubleshooting.
Conclusion
To sum up, we have covered the six most common branches of problems WordPress users face with uploading or installing their themes. We hope that the proposed solutions may be beneficial for you to get back to building your website.
Before you leave, here are some prompts you could discuss or talk about in the comments section:
- What’s your go-to WordPress theme?
- Have you tried solving your WordPress theme issues with the solutions above?
- Do you have any other WordPress themes problems that have not been discussed here?
We encourage you to share this article with anyone who might be facing problems with their WordPress themes. 🤗


